To achieve good results or master a process one must follow certain rules. Photography isn’t an exception. There are few written rules which are said to make your photo look better because you now know HOW to take good photos. Few of the rules are listed below. I would like the readers to add more to it and suggest changes, if any. This blog combines the information of me reading (and later implementing) multiple books on photography picked up from my local library. So here’s rule number 1.
Rule #1: The “Half/ Double” rule
In my previous blogs I haven’t discussed the term Exposure. You obtain exposure by combining the values of Shutter Speed, ISO and Aperture. To understand the Exposure concept better, please read the “Glass of Water” analogy. It is the easier way to understand the concept and the only analogy I found thus far. Now that we know what an Exposure means, this rule is about that.
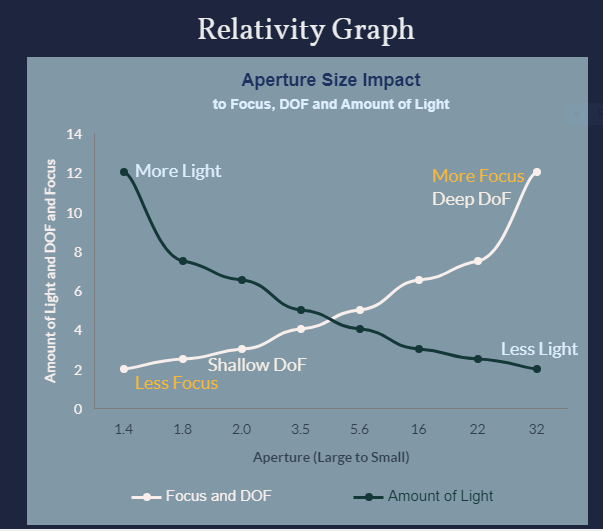
Using any three values an Exposure is achieved, let’s say it’s our INITIAL exposure. Changing one value, will change the Exposure. In order to maintain the same exposure as our INITIAL, if you HALVE one element (either Aperture, Shutter Speed or ISO) you need to DOUBLE the other and vice-versa. For example, if you have a shot setup with a correct exposure of ISO 100, Aperture f/5.6 and Shutter Speed of 1/250, then based on the subject changes decided to cut the Aperture in halve to f/8.0 (remember Aperture is measure in ‘f’ stop and is inverse, so halving it will almost double the value), you would either have to DOUBLE the Shutter Speed to 1/125 (again the same maths as Aperture) or increase the ISO to 200.
Rule #2: The “Rule of Thirds”
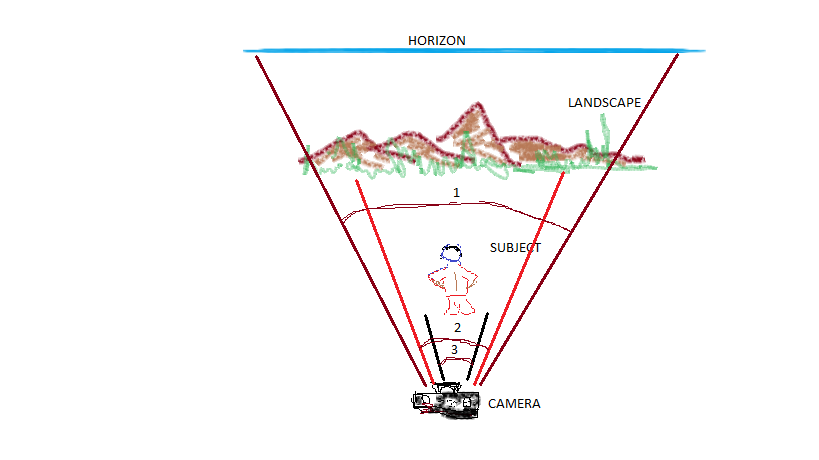
When we decide to shoot a prominent subject (a mountain peak, portrait, stationary animal etc.) we generally try to bring the subject in the center of the view finder thinking if we pan the subject in the center, it will be the only center of attraction. This is a false assumption or a myth. “Rule of Thirds” is one of the Composition techniques that allows an off-center composition which is pelasing to the eye and looks more natural. Again you can read more on it from the several available resources, books and internet.
The key elements of your photo should be arranged in thirds. Divide (imaginary or use the Grid Lines, if a feature in your camera) the scene into a matrix of 3×3. The focal point of your shot should be positioned with 2/3rds of the scene to one side, and 1/3rds to other rather than in the middle or close to the edge of the frame.
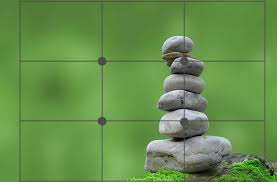
As you see, the stone tower is positioned to left than in the center which gives this photo an appealing sense and a greater value. Make use if those 4 connection dots to position your subject.
All these rules are guidelines. If you don’t follow, no harm, as long as you are happy with your way of subject exposure and composition. Sometimes it is better to not follow the rules to achieve a different perspective, professionals calls it as Breaking the Rules..!!
Please send in your comments, opinions, and any other rules you may know of.