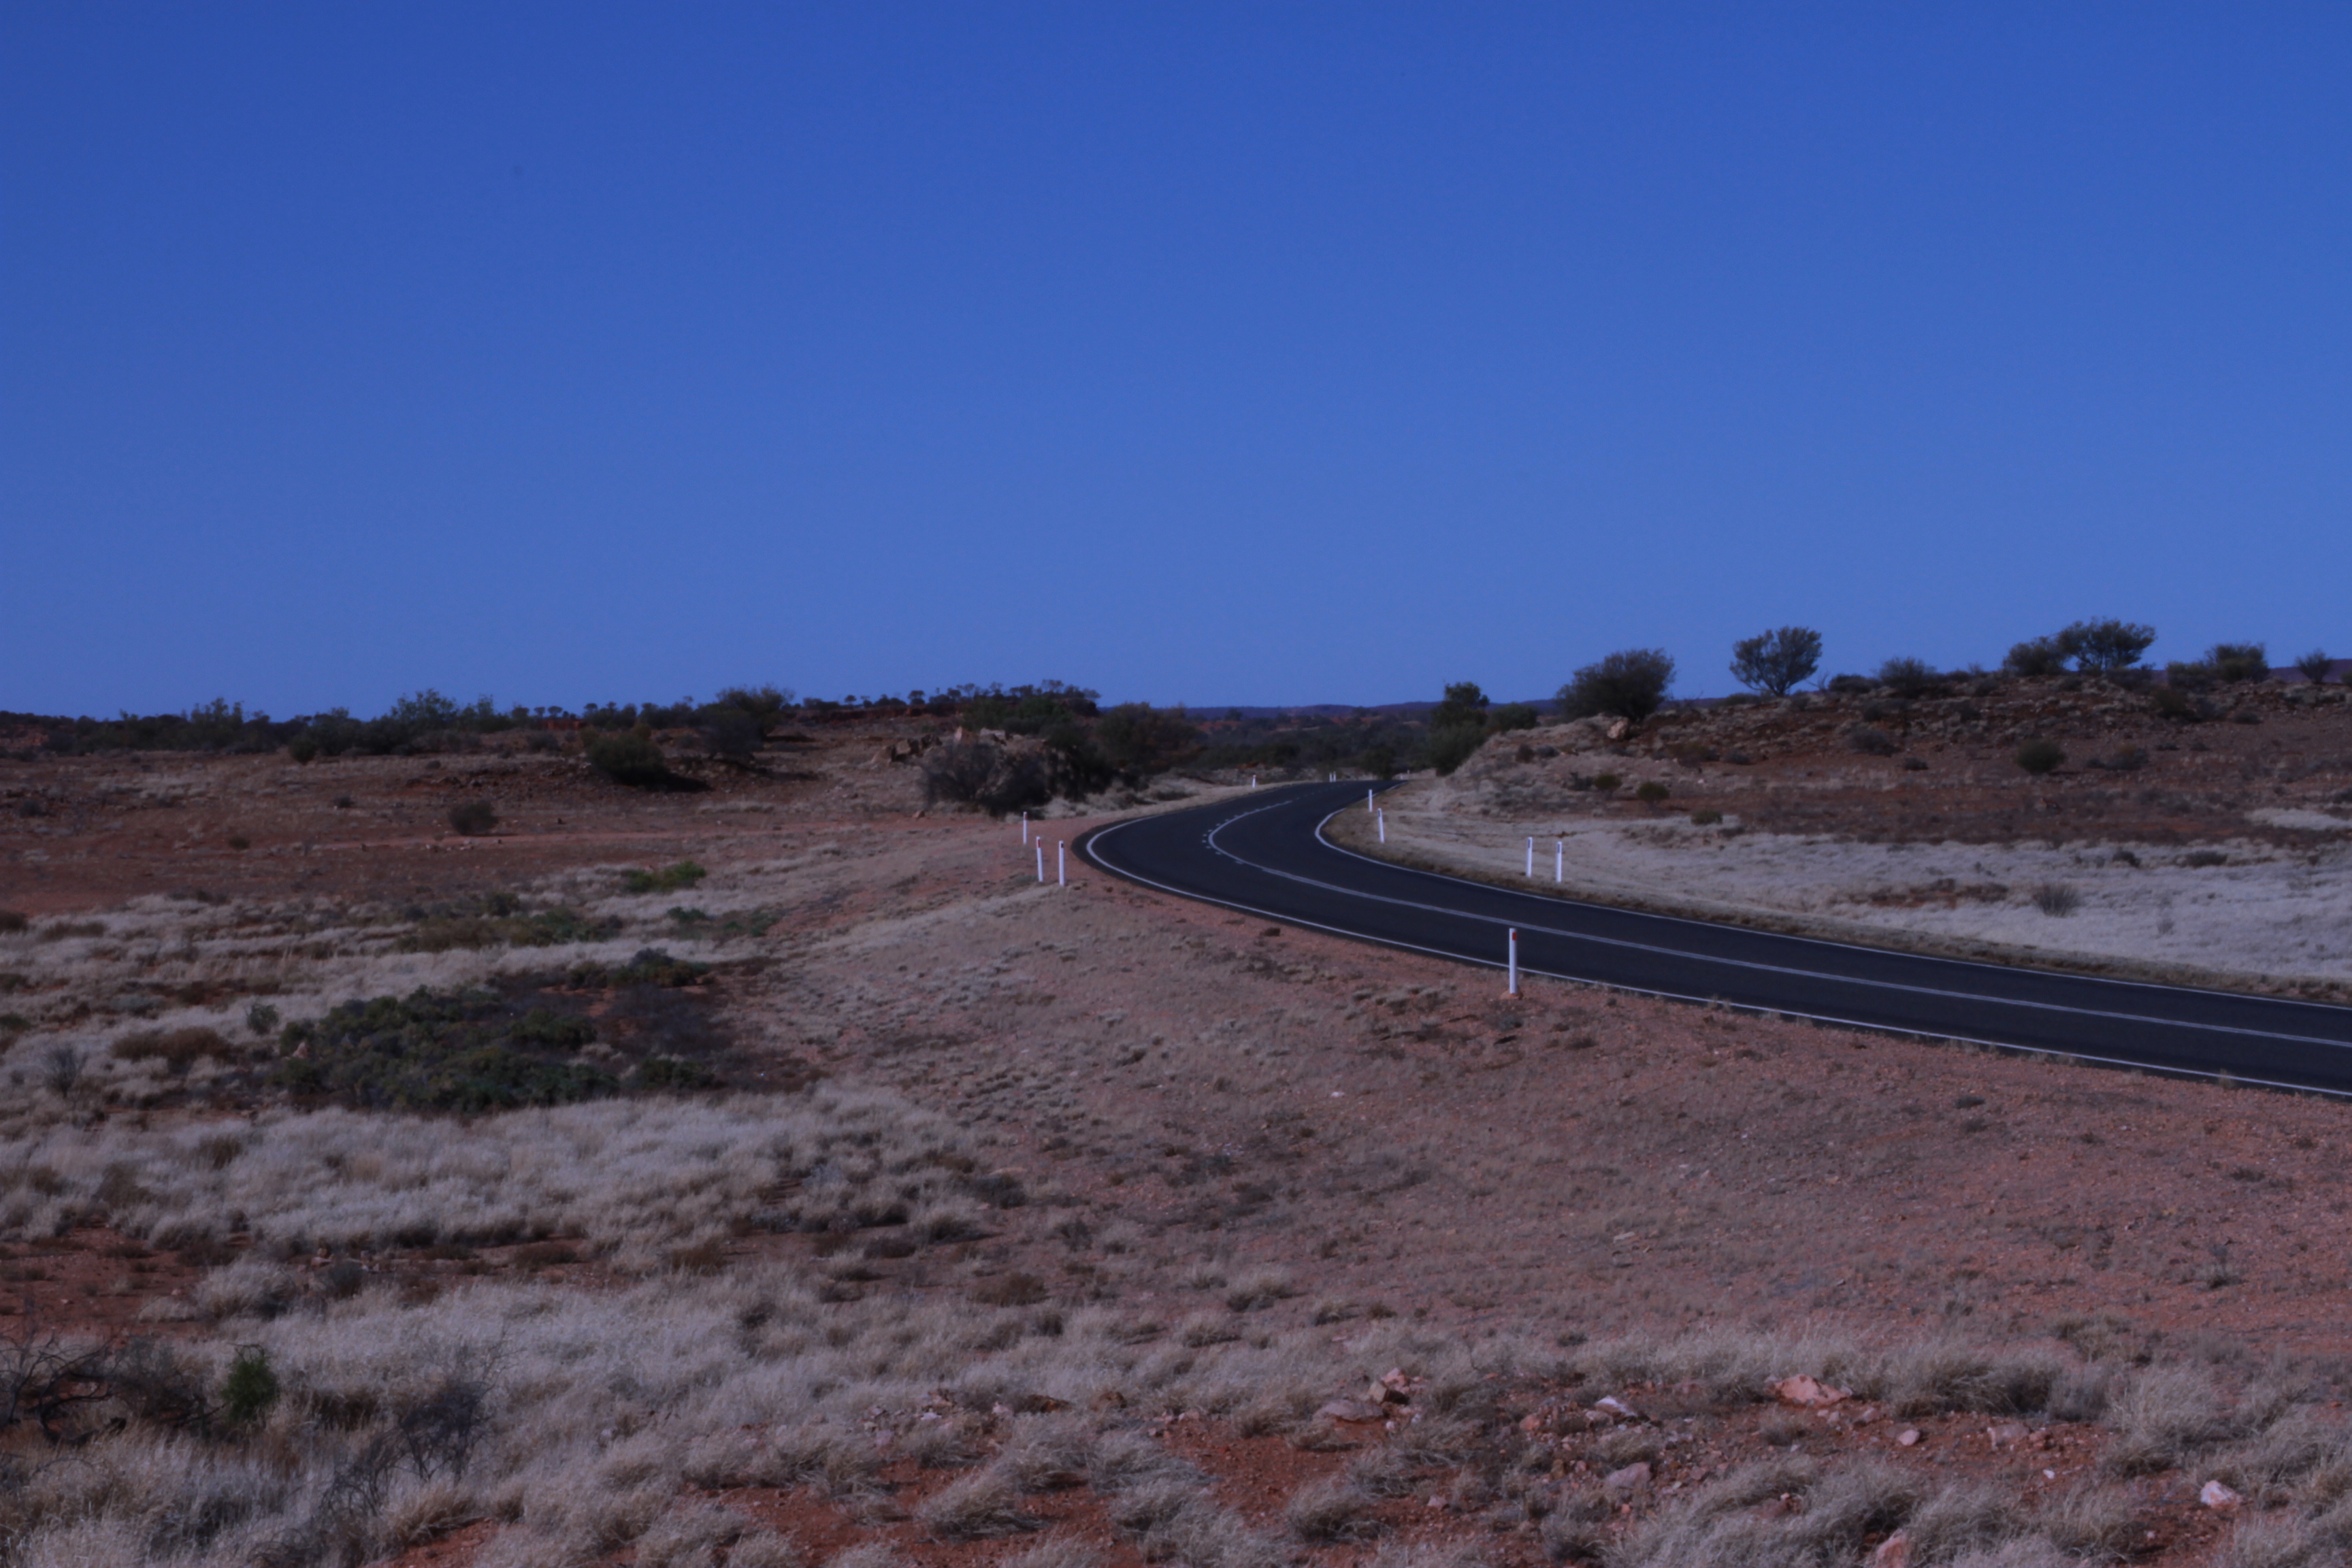
The last I visited India was in the year 2017. My recent trip was a one-week quick trip to #Pune (Maharashtra) towards the end of March 2024. Oh boy, it was HOT, oppressing heat, a constant 35 degrees (centigrade) plus during daytime with no breeze whatsoever. The little breeze that would skip through was warm. This blog certainly is not to talk about the climate of Pune or the impacts of climate change on a city. After a break of 7 years, one would imagine changes, good and bad, to a city, which surely there were. Lot many construction sites all around. Builders are building, as there are people to buy. The roads are becoming narrower whereas the traffic is expanding. Previously the city had majority of two wheelers and now this majority have moved towards four wheelers. They have become affordable to masses and people so have shifted to some comfort which is adding to the chaos.
One thing Pune people have in common is disobedience when it comes to driving, be it any kind, type, size or shape of vehicle. The painted lanes are there just because municipality had spare white paint cans in their warehouses which they decided to get rid of but with some effectiveness. So, they painted lanes. The traffic lights are a mere color circles adding colors to one’s black and white life. Even if the signal is RED, the two wheelers, auto-rikshaws, even some state-owned buses drive through as nothing has happened and will happen. Others will consider and take care. Following the traffic signal rules is looked upon as some derogatory comment, and since everyone’s ego is at the top, who cares. Every (this is a bit exaggeration but can’t quantify so let’s go with it) rider/driver thinks stopping at the red light is detrimental to their growth (time is money..isn’t it). The zebra crossings have the same plight. Painted as more paint was left. Someone thought let’s paint something that will mimic a bridge that joins two ends of the road. Not a single vehicle was beyond the zebra crossing. Imagine some pedestrian wanting to cross the road, has to circumnavigate such vehicles and quickly complete the crossing as one can’t rely on because the signal is red so vehicles will not move. It is very dangerous to cross roads for anyone be it an athletic youth or a senior citizen.
Some call it as an organized chaos. Every driver has some kind of a sixth sense. Interestingly I haven’t seen anyone getting hit or bumped on. They all take care of each other. Rear view mirrors are folded down on both two wheelers and cars too. They don’t need to see what’s behind or who is coming sideways. They just keep going. Organised chaos is good at times but not always. Not creating a chaos is in our hands in first place. I only hope and wish nothing major happens and everyone reach homes safe and sound.
Honking is another nuisance, not just Pune but all over India. The horn is a God gifted element and I must make use of it anytime I desire, or else God will punish – is probably the thought in everyone’s mind. People also think or expect, if I press the horn the front vehicle will automatically move (or rather fly?) even if there’s no space, so keep honking. The signal is still red and coming towards the end of its cycle to become green, but we have no patience. Drivers start honking as if the signal will listen and turn green quickly. The thumb is always on the horn. It is their birthright to honk, making use of every functionality the vehicle offers.
Wrong side driving is a skill. Vehicles driving right/correct side of the road give them ways admiring their skills. Life moves on as if nothing is out of place. What I found amiss this time is less police presence at traffic junctions. A free reign to the drivers, do as you please..!
With all this and much more I admire the city as it moves on. People have taken this as their life and a system to follow, so no one want to change, or make the change. Be the change.
What needs to change is the behavior and thinking. The ‘chalta hai’ (who cares) attitude must go. Everything can’t be pushed on to the government to do. This is an individual entity that an individual need to manage. Facilities and rules are provided for betterment and safety which one must respect. India is a superpower and close to becoming a major superpower competing with the handful of developed nations, USA one of them. Hence let us support and show the world that we are good/better in every aspect.
In the depths of the Great Barrier Reef, Marlin, an overly protective clownfish, embarks on a daring rescue mission when his beloved, his only surviving son Nemo, gets scooped up by a diver. With his forgetful friend Dory by his side, Marlin encounters an ocean full of memorable comedic characters, who are differently abled, on the momentous journey to find Nemo. The animation has the depth of the ocean itself.
Review:
An epic adventure brought by Disney Pixar in May 2003, still loved by many, kids and adults alike, took more than 3 years to bring it to life. But the efforts and the wait were worth it per the director Andrew Stanton. In order to get the right effects, Andrew wanted most of his production crew to go underwater and visualize the needs of the story. Hence everyone on the production line had to get certified in scuba diving that helped bring the reality on the screen. This movie portrays an underwater world – a diverse reef community – that doesn’t exclude anybody by including unique characterization (diversity) of sea creatures and accommodating different behaviors and disabilities (inclusion).
Apart from addressing Nemo’s disability – a stunted right fin that effects his mobility – the movie also addresses questions that are at the heart of every parent-child relationship. The fact about how parents always protect their children from being hurt (physically and emotionally), and help them to take care of themselves by exposing them to the real world. Both the characters, Marlin and Nemo, portray this association throughout the film. Marlin, an overly protective dad, because he has been through the trauma of his wife and the loss of all her eggs except one being eaten by a giant Barracuda, ultimately recognizes Nemo’s abilities and gives him a lot more freedom to make independent choices.
Dory, a blue tang, is another lively and cheerful character in the film. She has problems with memory loss but doesn’t give up. Knowing Marlin’s loss, Dory brings out his inner spirit by constantly being at his side to help him get over his anxiety disorder (PTSD) and compel him see the fun side of his life. At the end, she just wants others to take her seriously and respect her abilities – specialized skills of reading and talking to whales.
The reef community is diverse with various other characters who play a vital role in the film, for example we have a shark, named Bruce, who has a fish eating addiction and is very friendly. As a form of self-control, however, he reminds himself that “fish are friends, not food”. A sting ray, named Mr. Ray, who is the smartest creature on the reef, encourages his students to remove their shackles and be explorers and promotes togetherness.
Closing comment: Being different is normal. Building an inclusive community comes by acknowledging and accepting differences that we have in our society.
We are constantly been reminded of getting on a certain dietary plan when you cross a certain age. It is hammered on us mostly when there’s a trigger. You have just received your blood report, or your spouse has heard of someone who has gone on diet and has reduced some pounds etc. No doubt there are genuine diet followers who do it right from the very first time. Those who don’t, they wait for a trigger. Then due to conscience, some follow YouTube, some will follow what others say, some follow professionals (dieticians and nutritionists), some will act (to-be or not-to-be) and few will diet only in front of others..!!. Though the aspect of food diet is important, this post is not about that.
A similar situation is of our digital appetite. Our hunger for digital intake has grown largely in the past decade or so and is equivalent if not more, to our actual food intake. When we eat we generally trouble our stomach to store it and our digestive system to digest it. Whereas with digital intake we now trouble our eyes and overwork our brain. Luckily no one is speaking in ‘1s’ and ‘0s’ (Binary language), yet.
Technology is not going to slow down. So it’s up to us HOW we make use of it. WHY, WHEN, HOW is all on us. With IoT (Internet of Things) on the rise, it’s adding to the dependency list. These questions when answered appropriately will also reduce your carbon footprints on the planet.
Follow the following diet if you feel you are at the cusp of being digitized or you feel you are sucked into it and are in a deep chasm, swimming in the information rapids, trying to figure a way out.
Lighter Diet:
Restrict the usage by 30 mins per day every day
Read a few pages of a printed book every day, especially before going to sleep.
Medium Diet:
Cut the usage by one-fourth per day every day
Use blackboards and/or whiteboards
Hear unfiltered directly by your ears – (means no ear or headphones)
Read in Black and Whites
Heavy Diet:
Use the medium only as needed and when required
Talk, Discuss, Argue with people instead of Google, Siri and the likes
Shut down the internet from 9pm
Do not power your digital pads/ devices, so when you have the urge, it won’t be available and automatically you won’t be able to use
Requesting readers to share suggestions and opinions on curbing the increase of digital appetite.
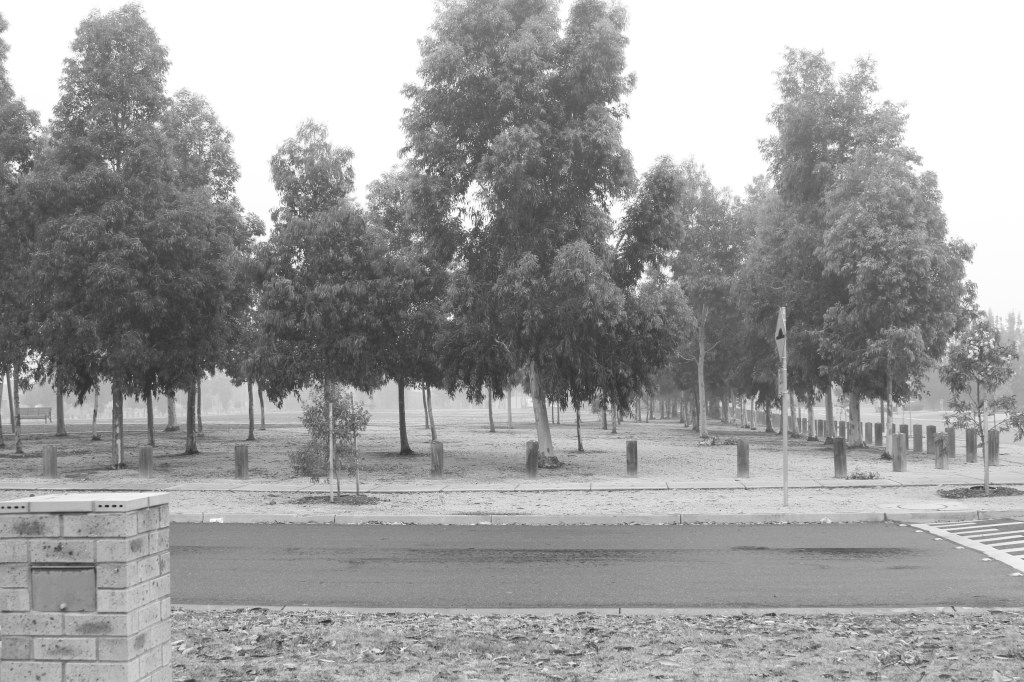
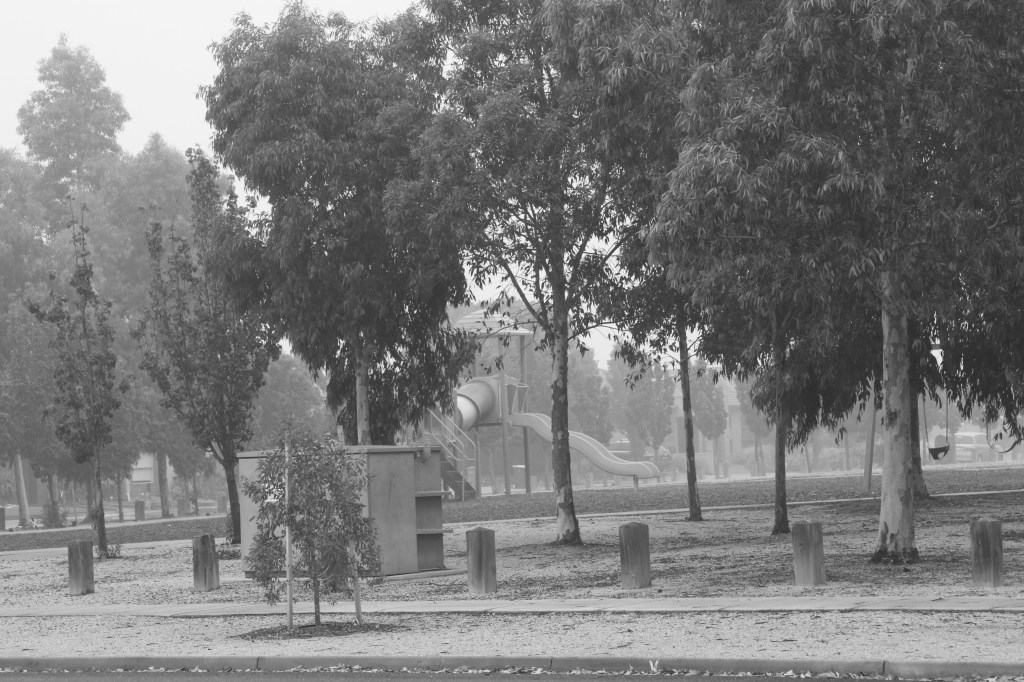
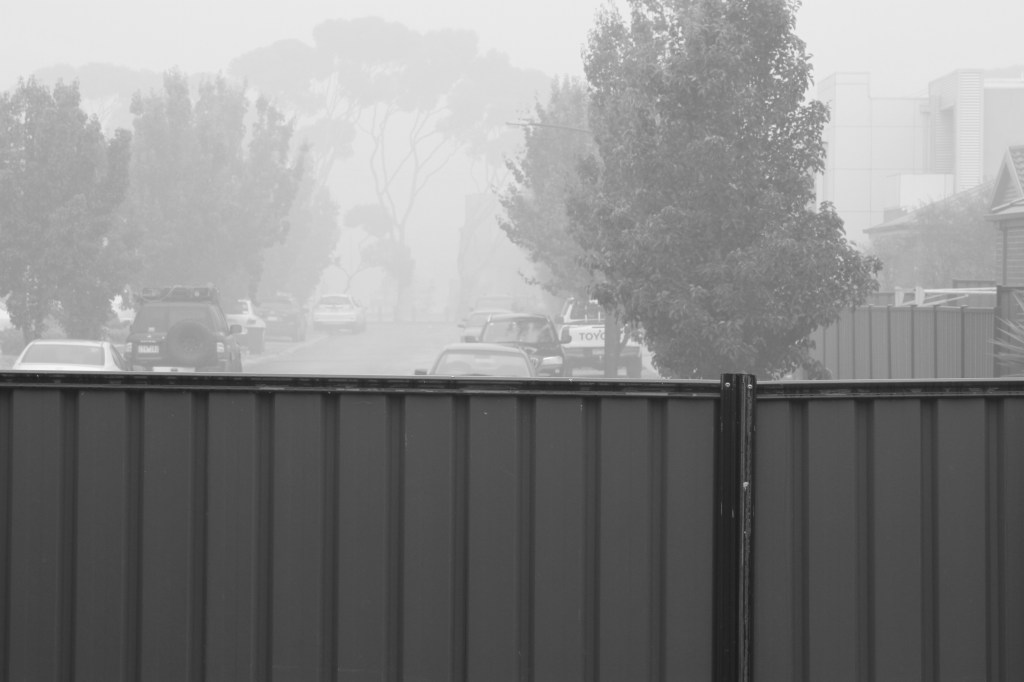
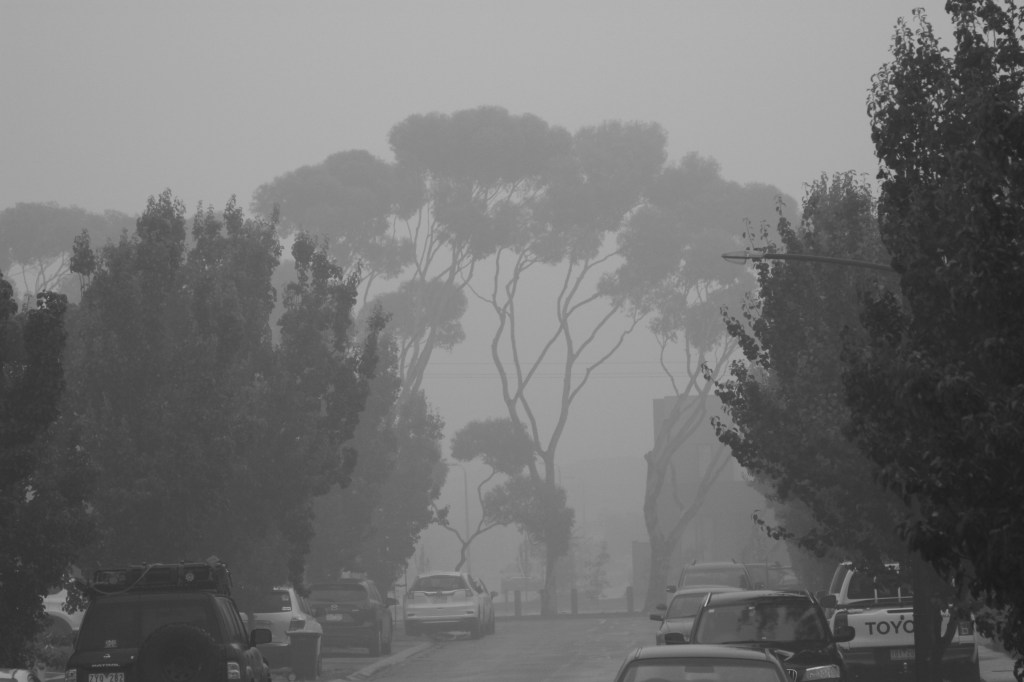
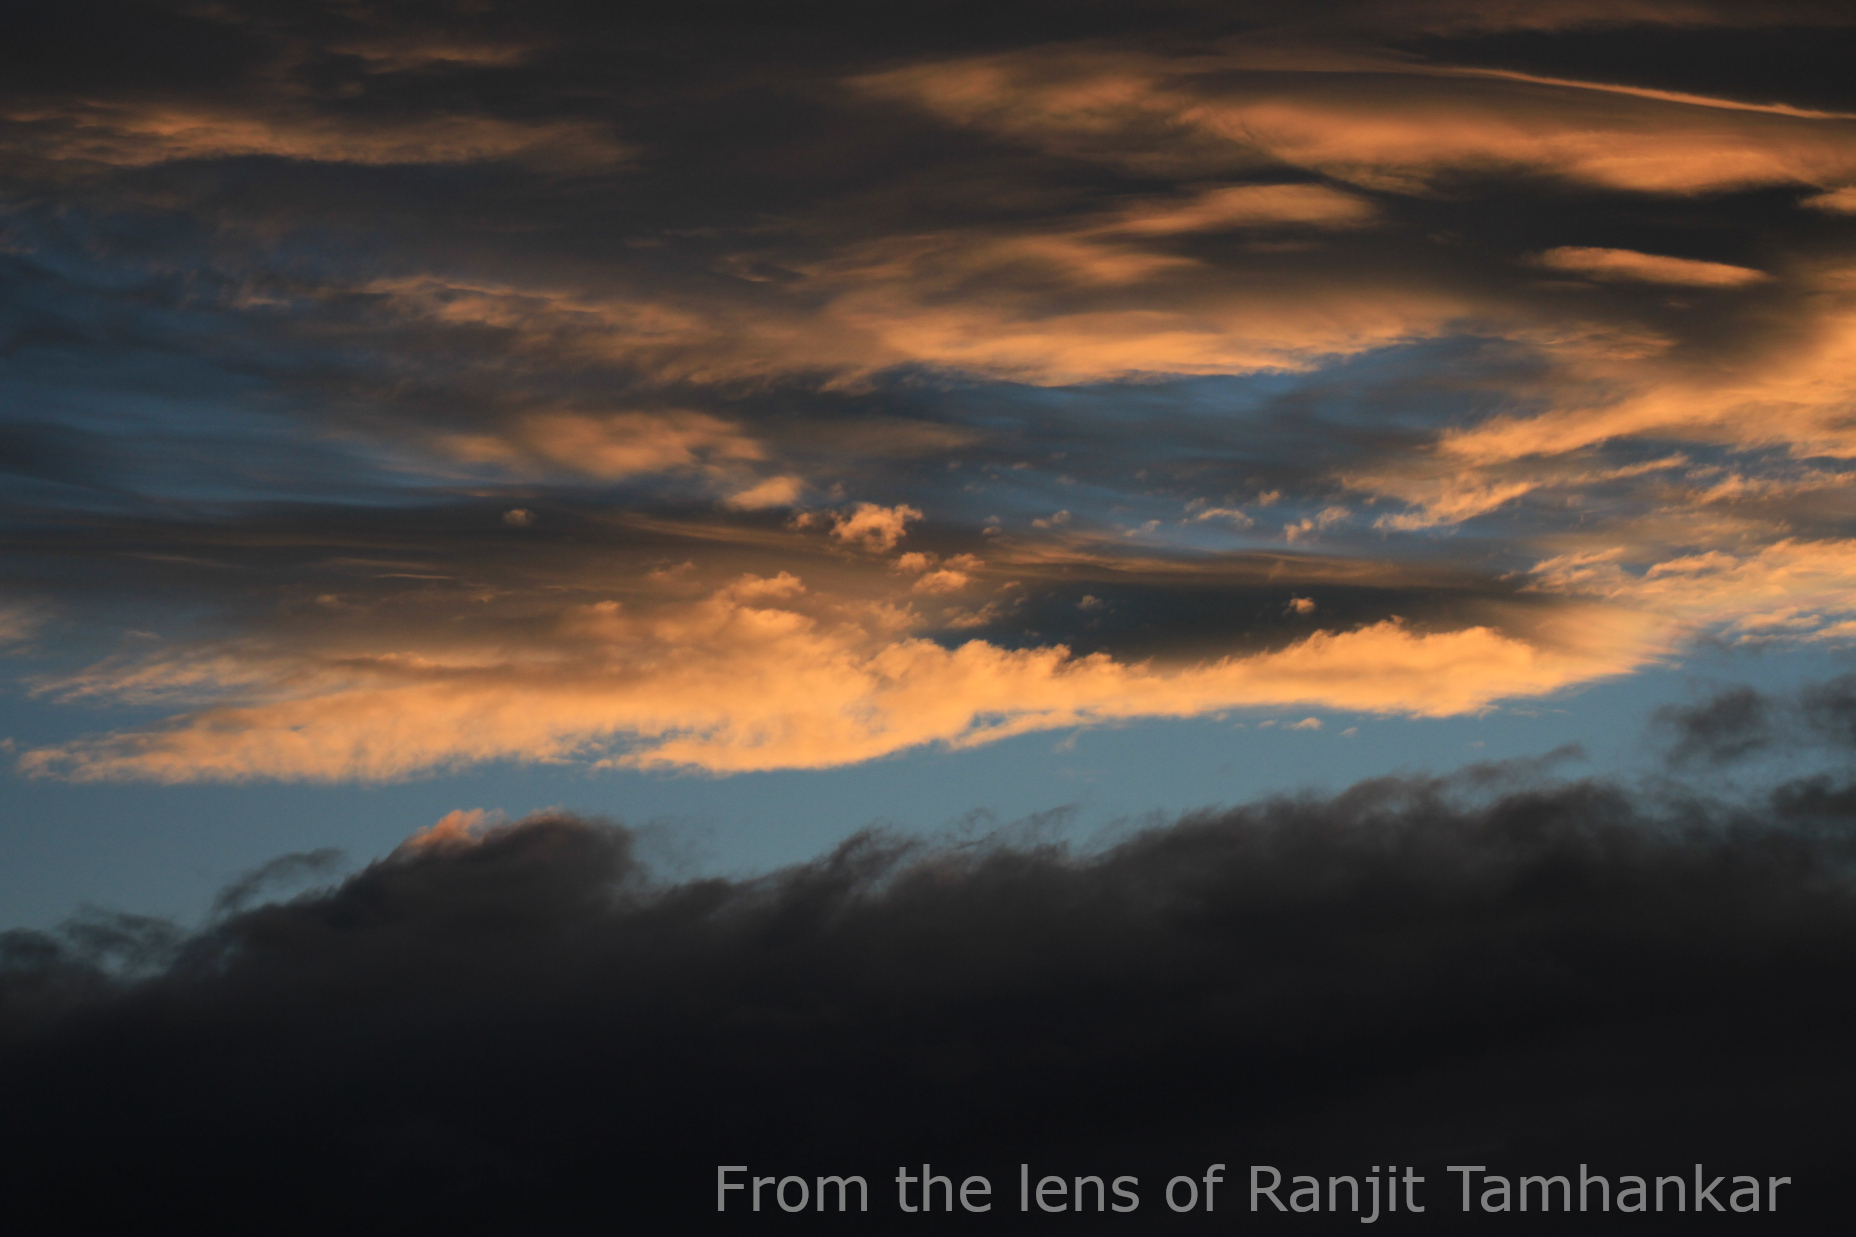
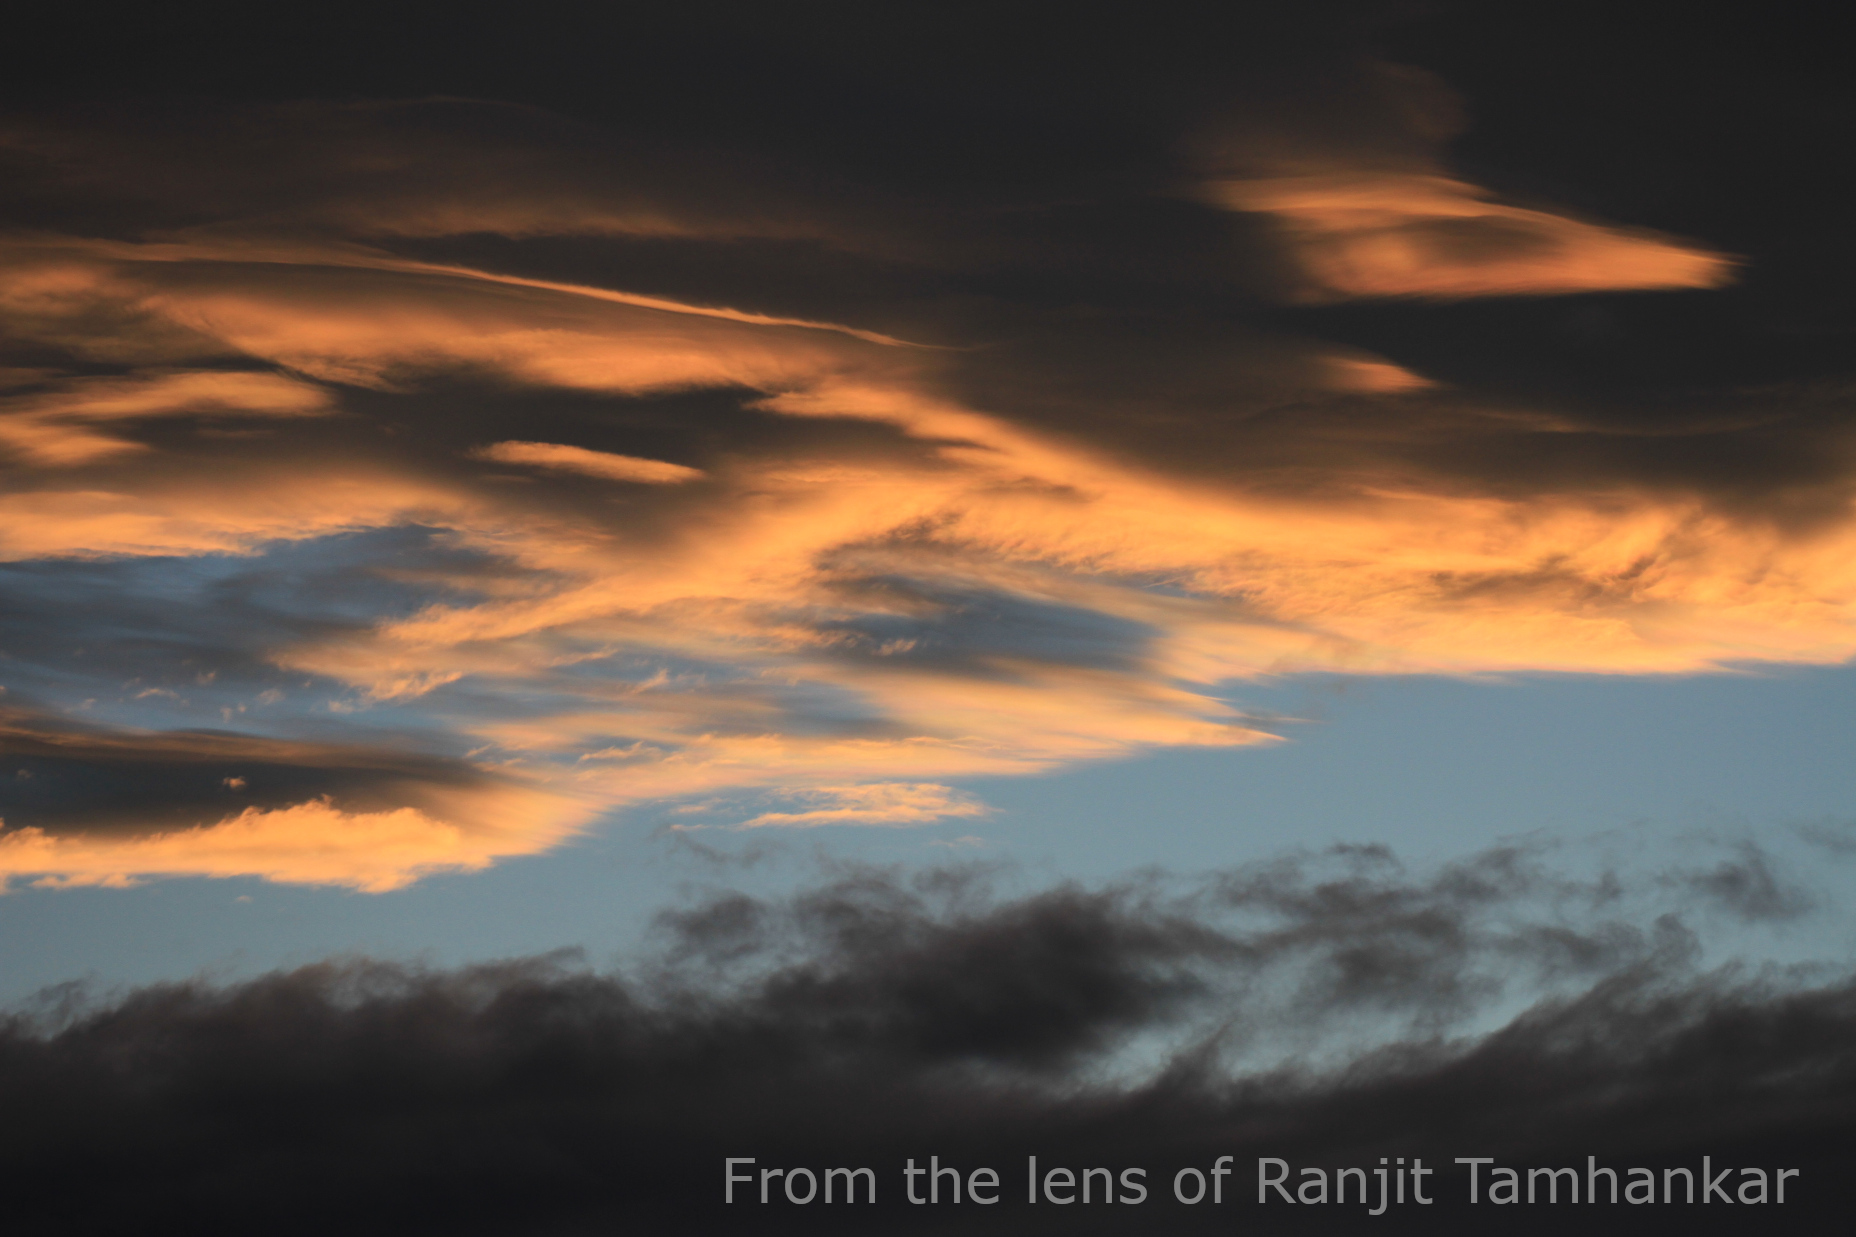
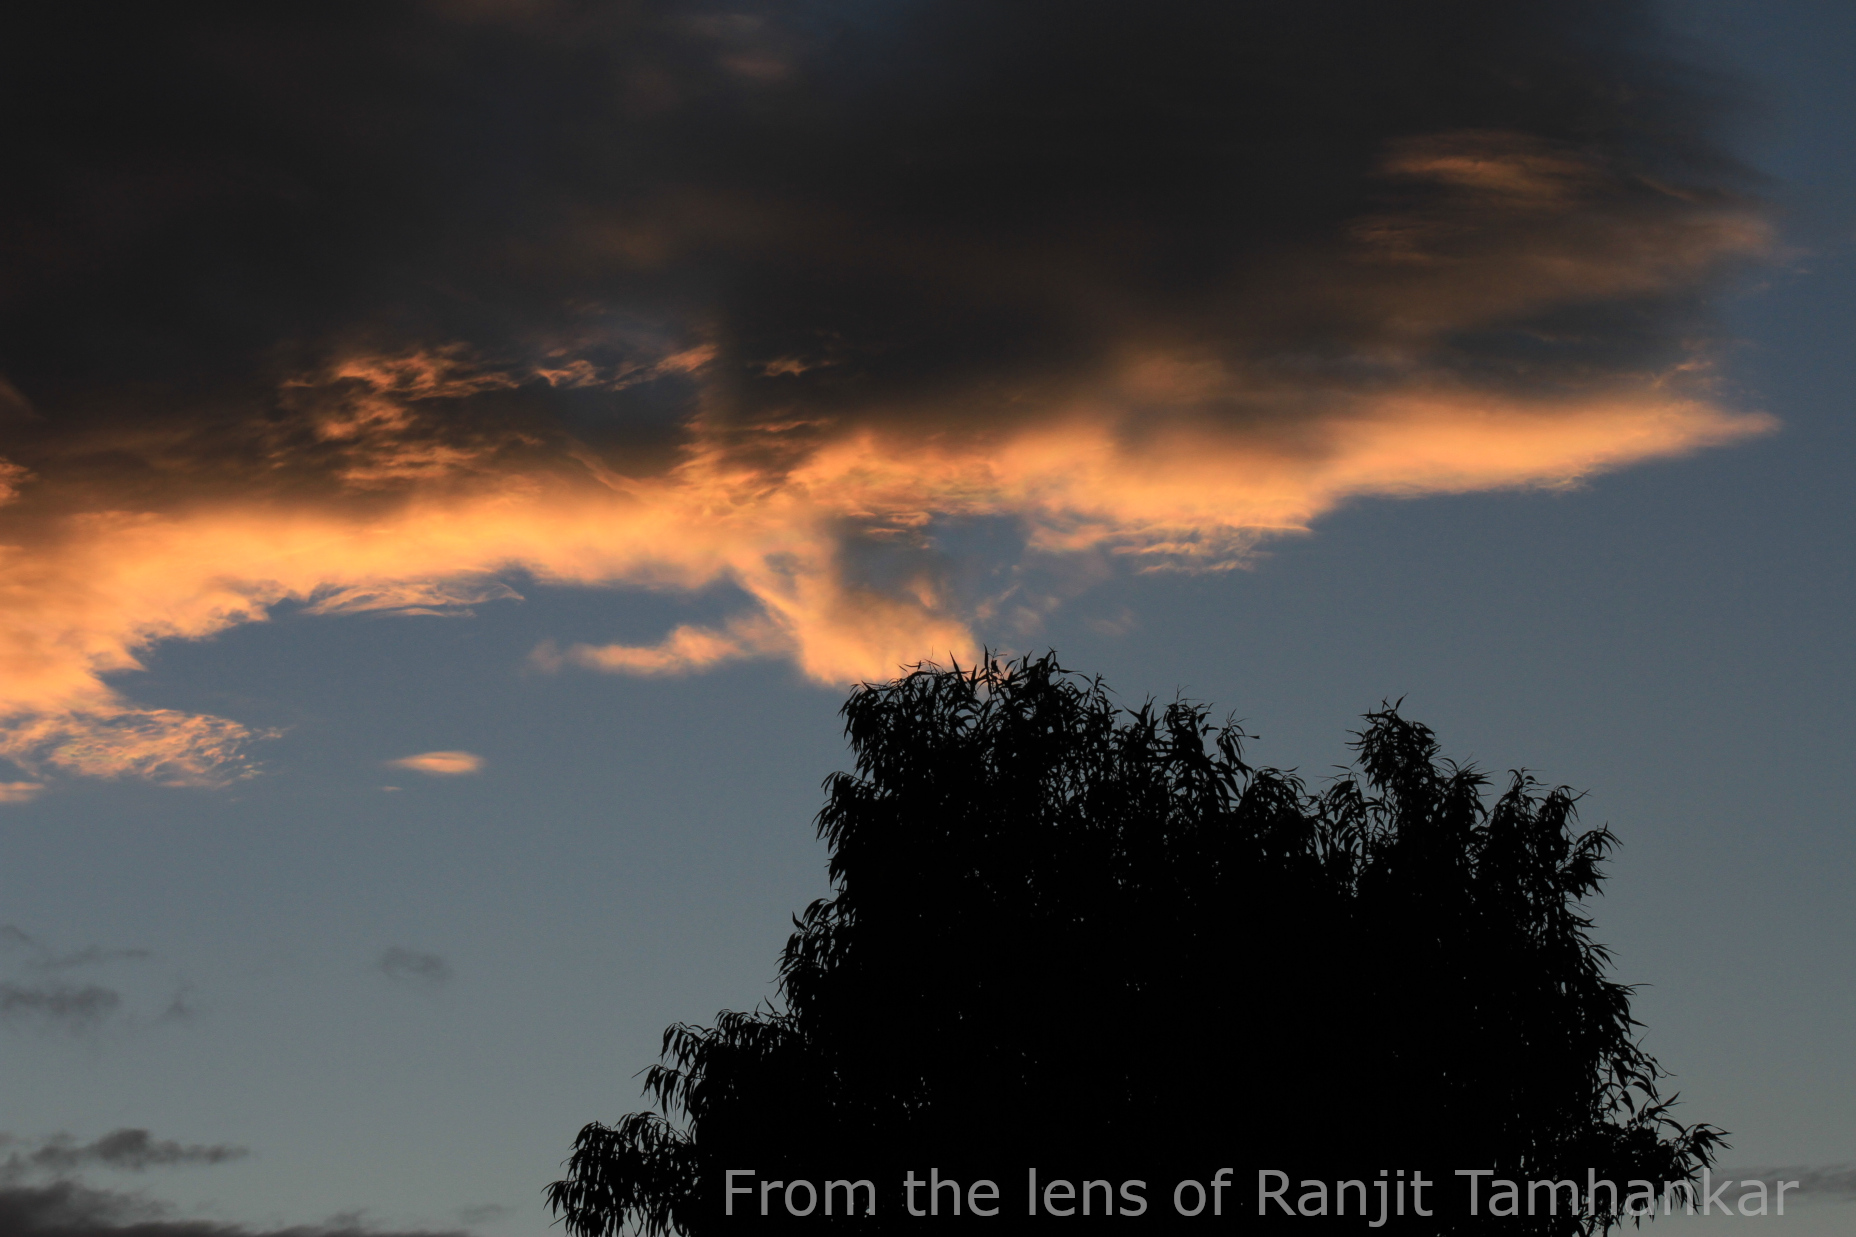
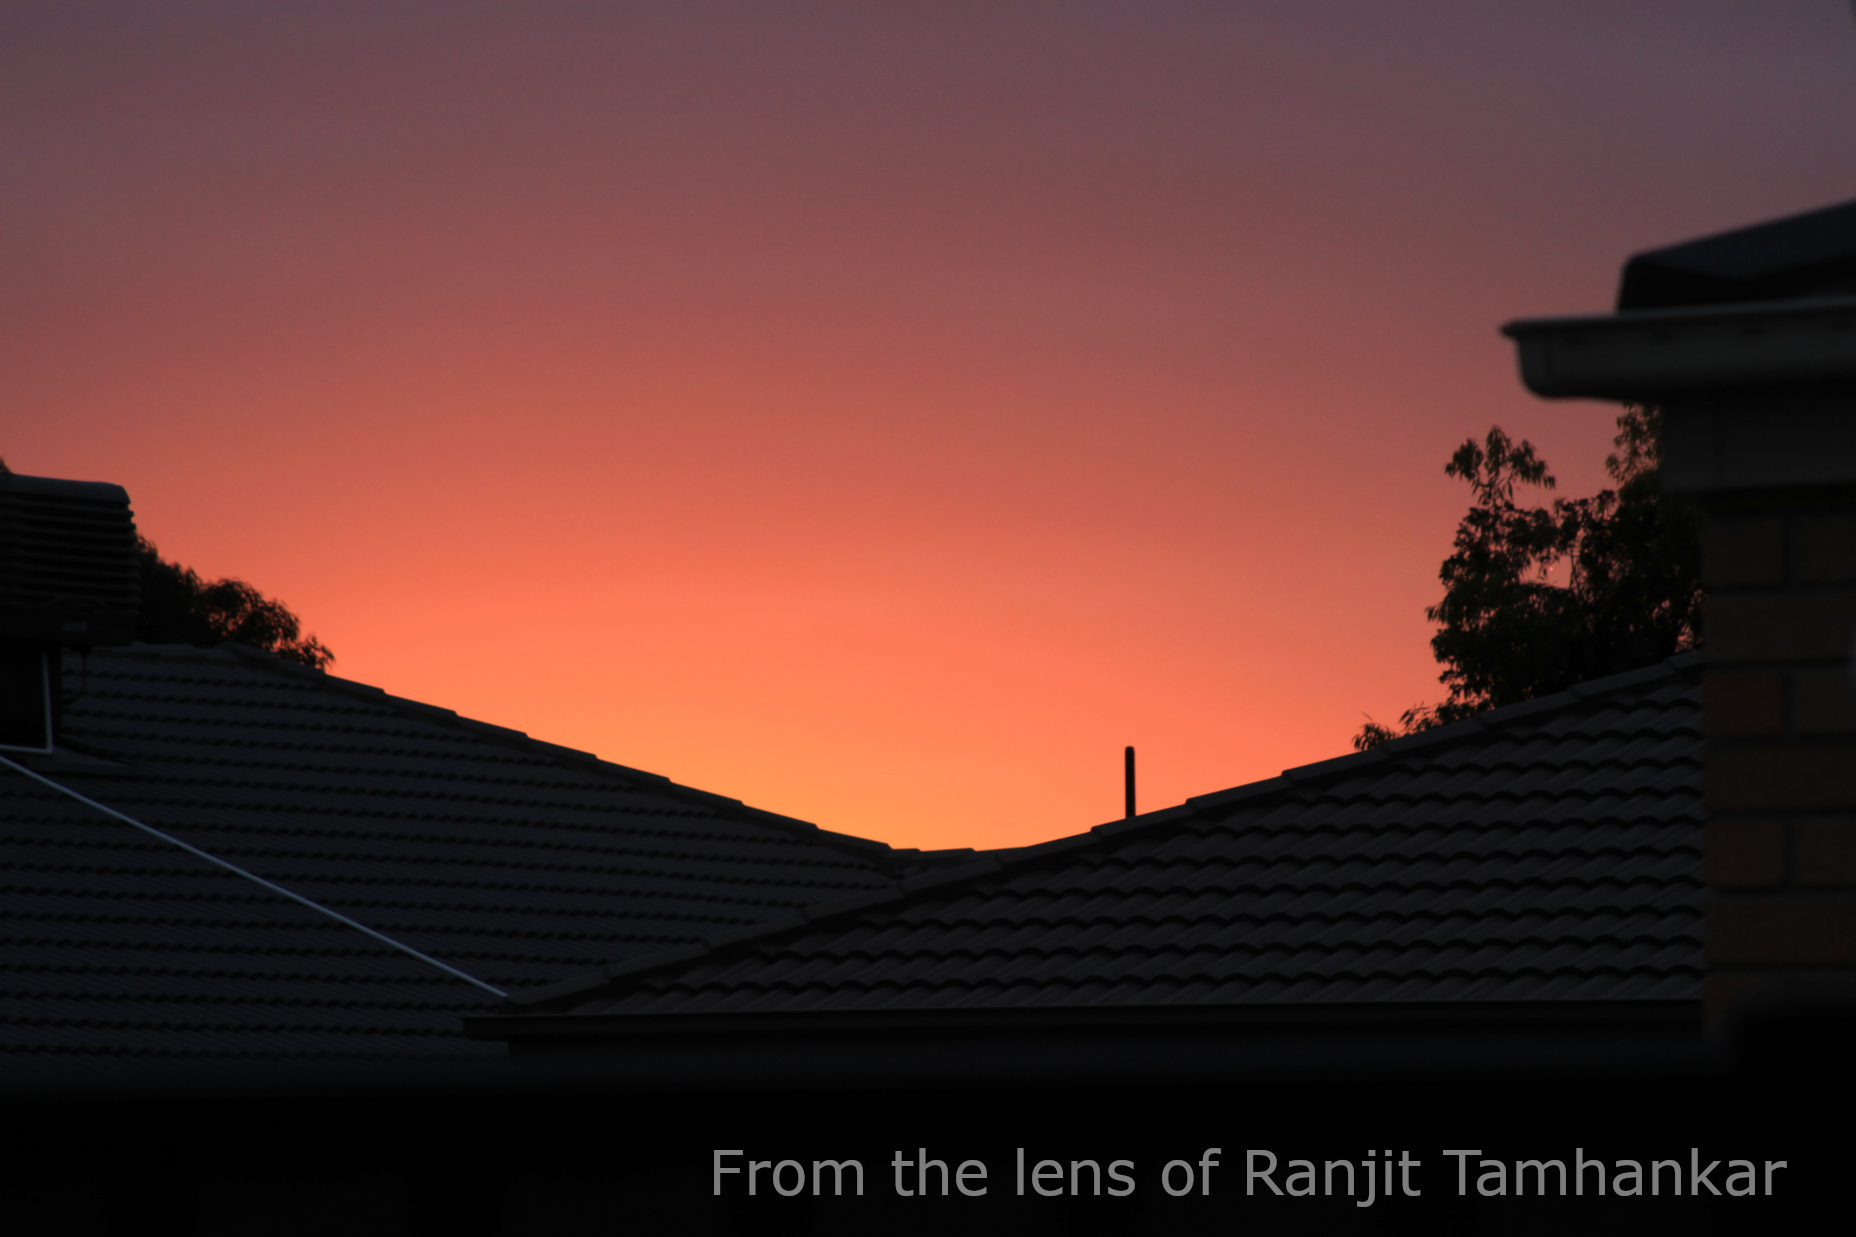
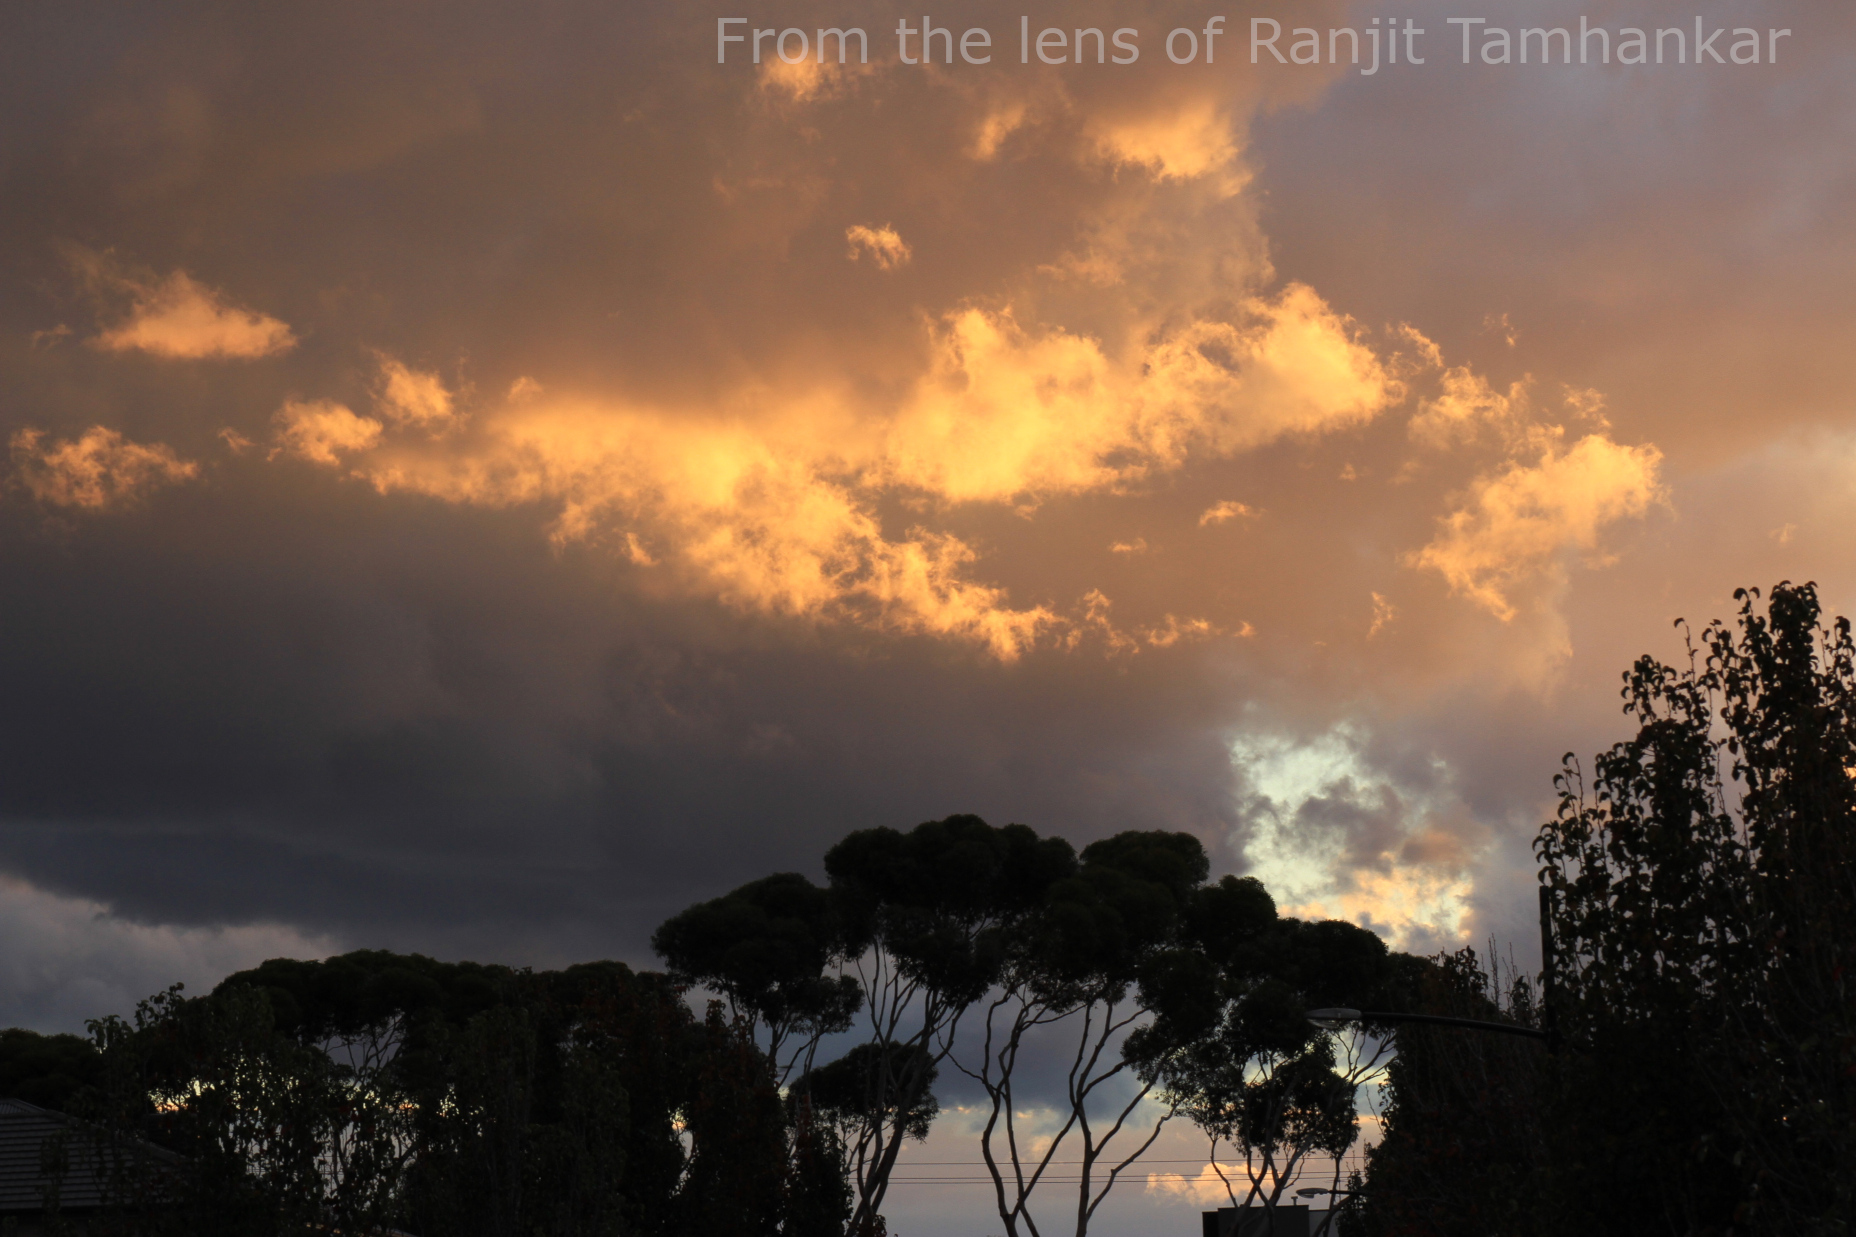
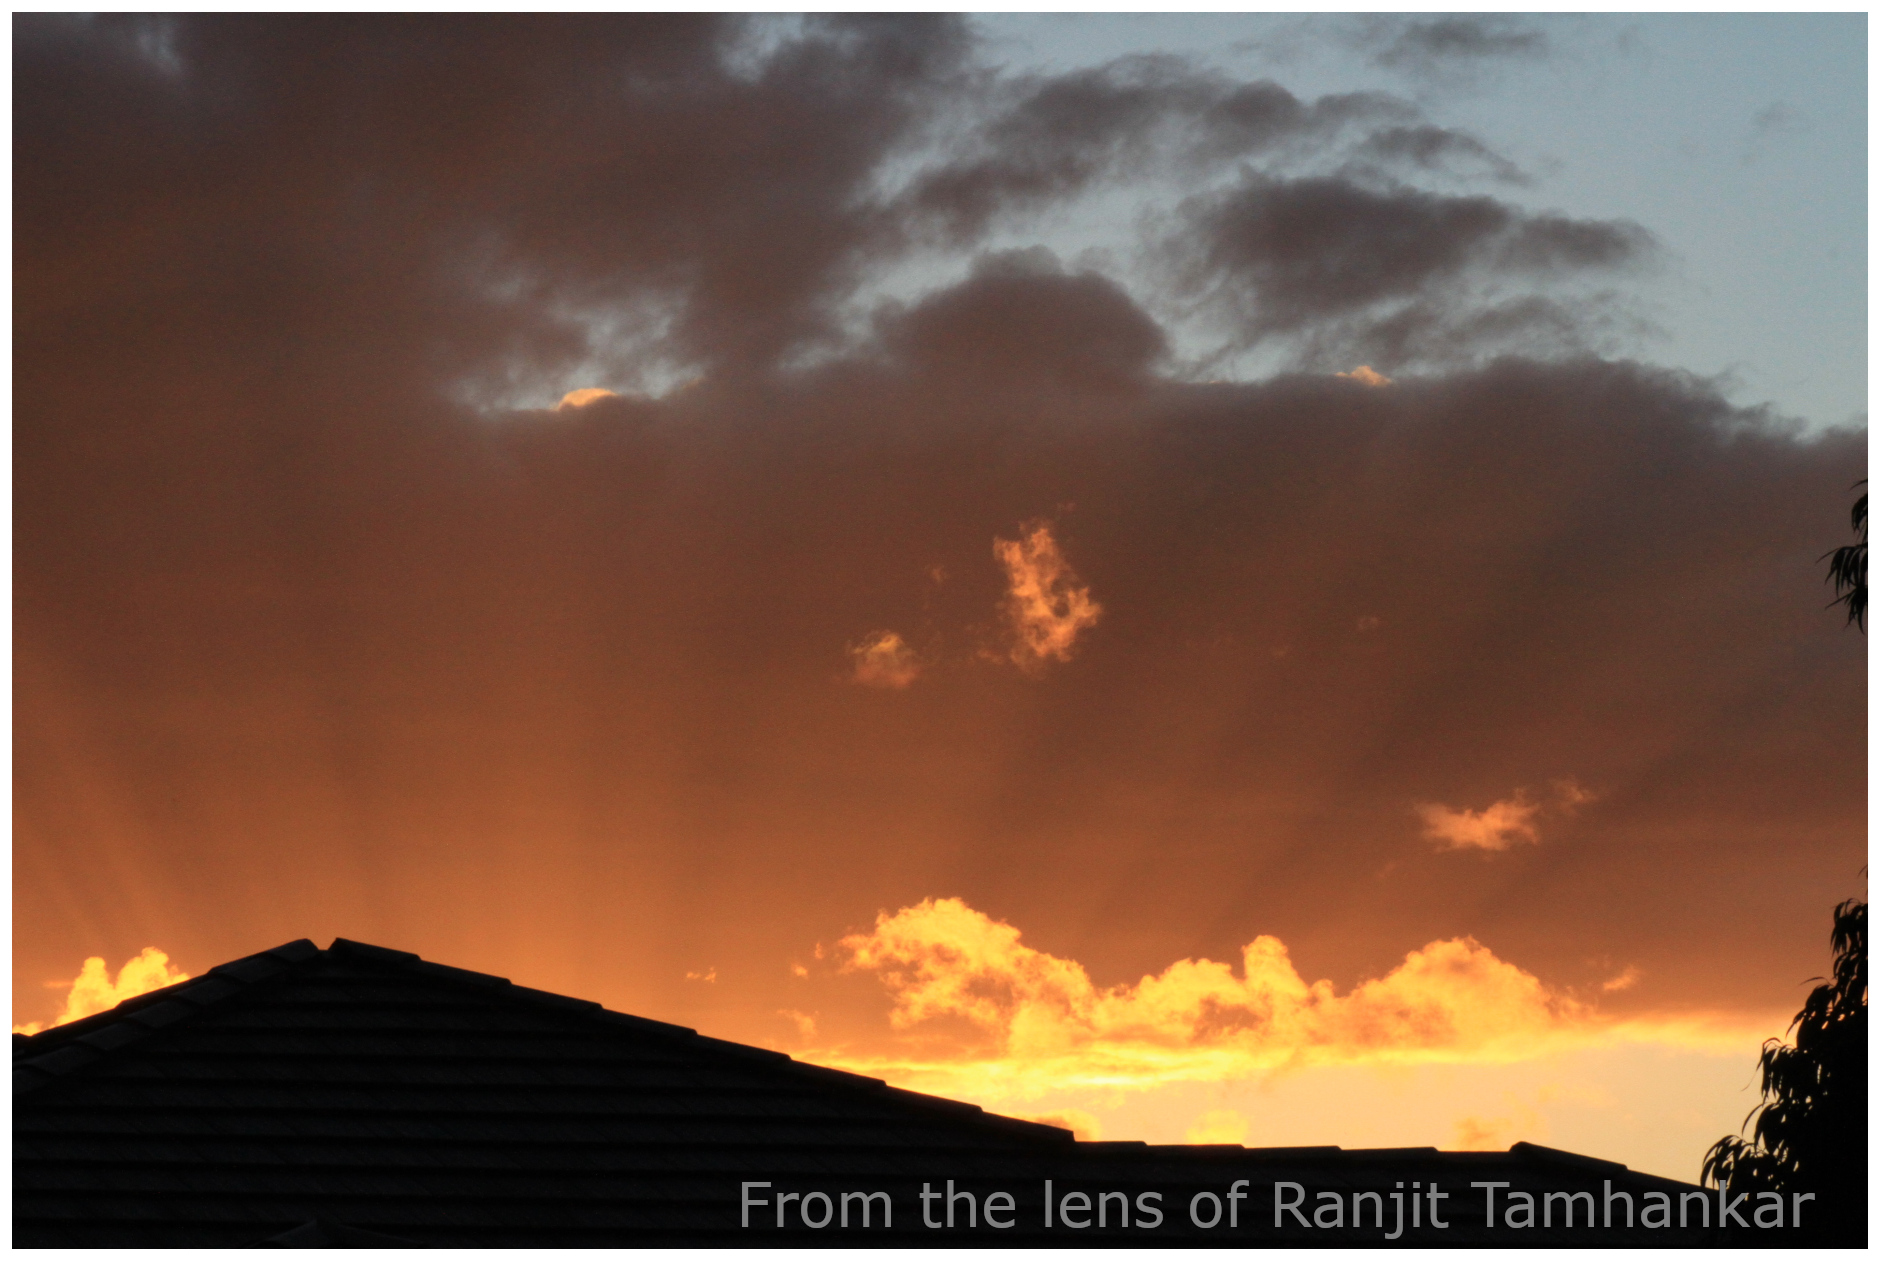
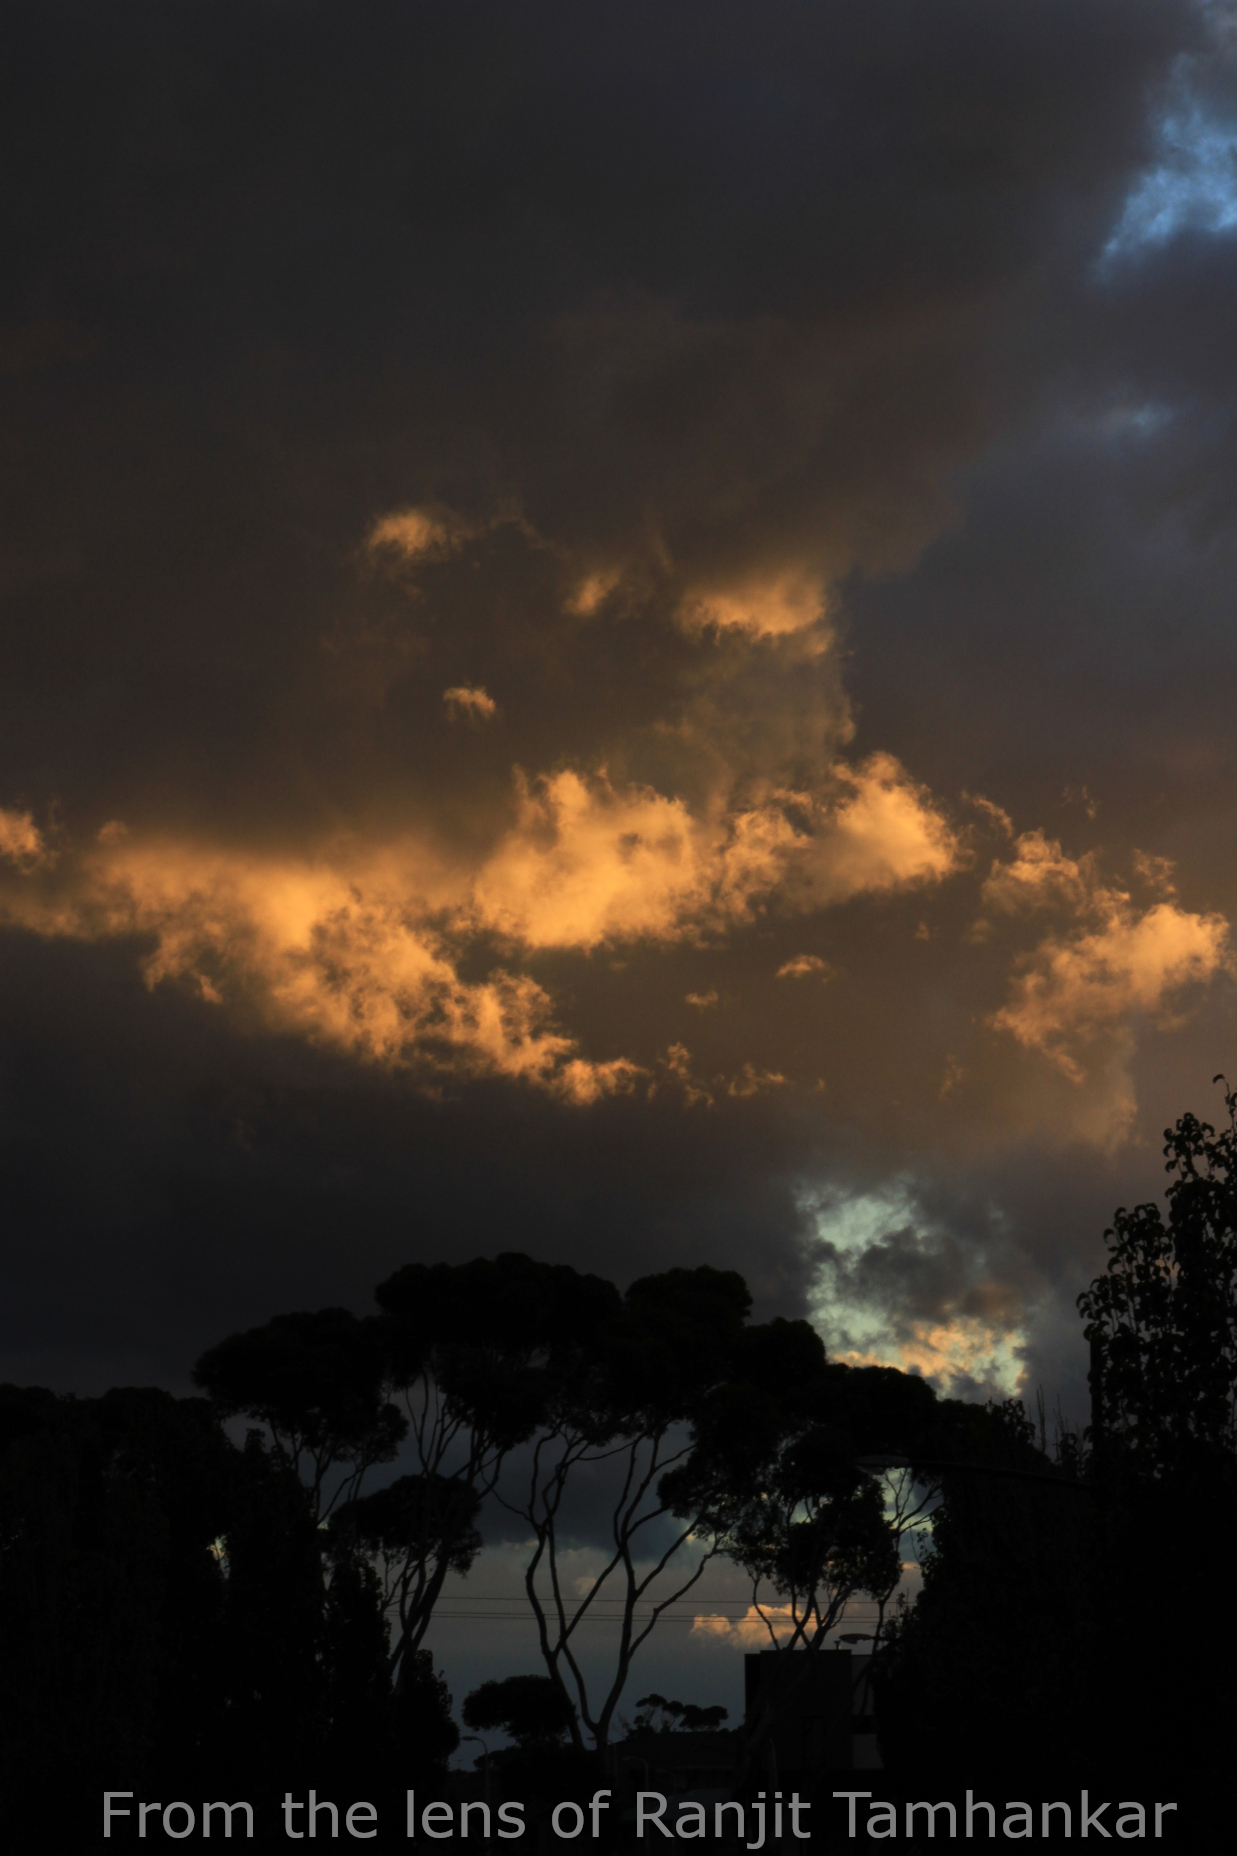
It is not so good in the state of Victoria, Australia. Fires are still raging. Though they are few hundred kilometres from my house, the smoke is all across Melbourne, covering almost all suburbs. I hope we get some reprieve soon. The air quality index (208) – per https://aqicn.org/city/australia/melbourne/melbourne-cbd/– for Melbourne has dropped to hazardous level and is now worst in the world.
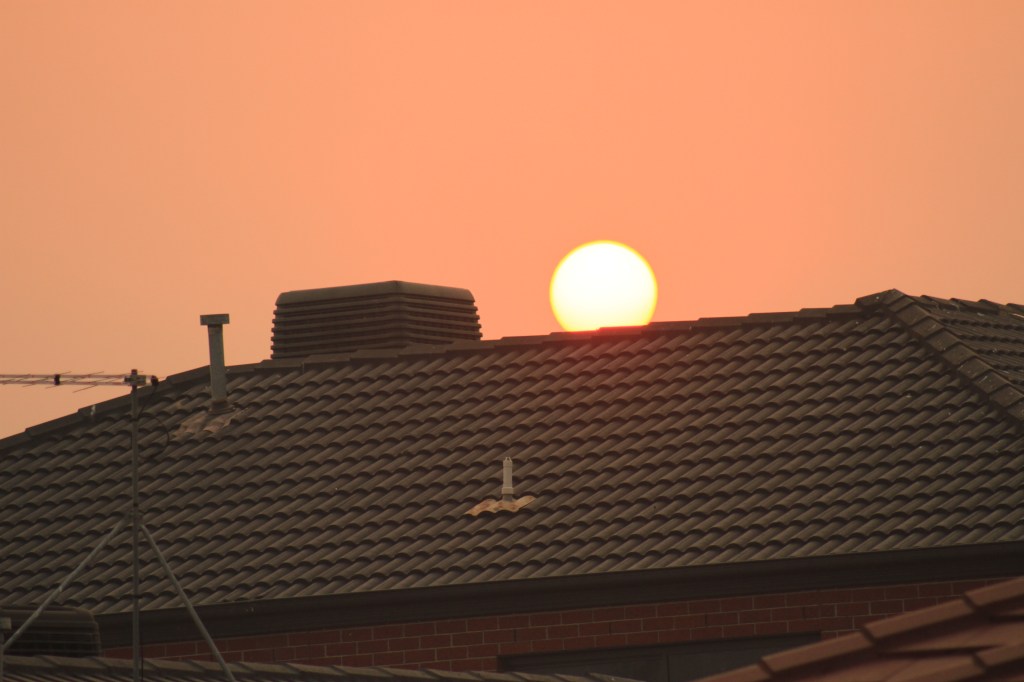
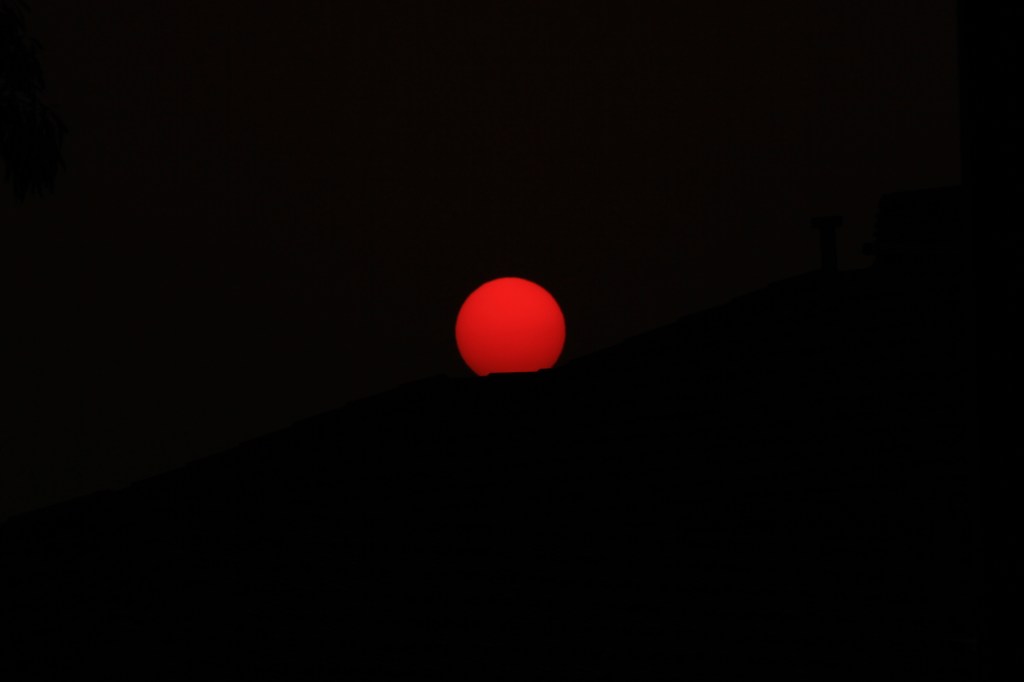
These are few snaps taken during one of the many smoky days, last week I suppose. Landscape is in Black and White to get some perspective. The RED sun is from yesterday (13th Jan 2020) taken around 1900hrs.
All these images are untouched, original as downloaded from the camera (Canon EOS 7D).
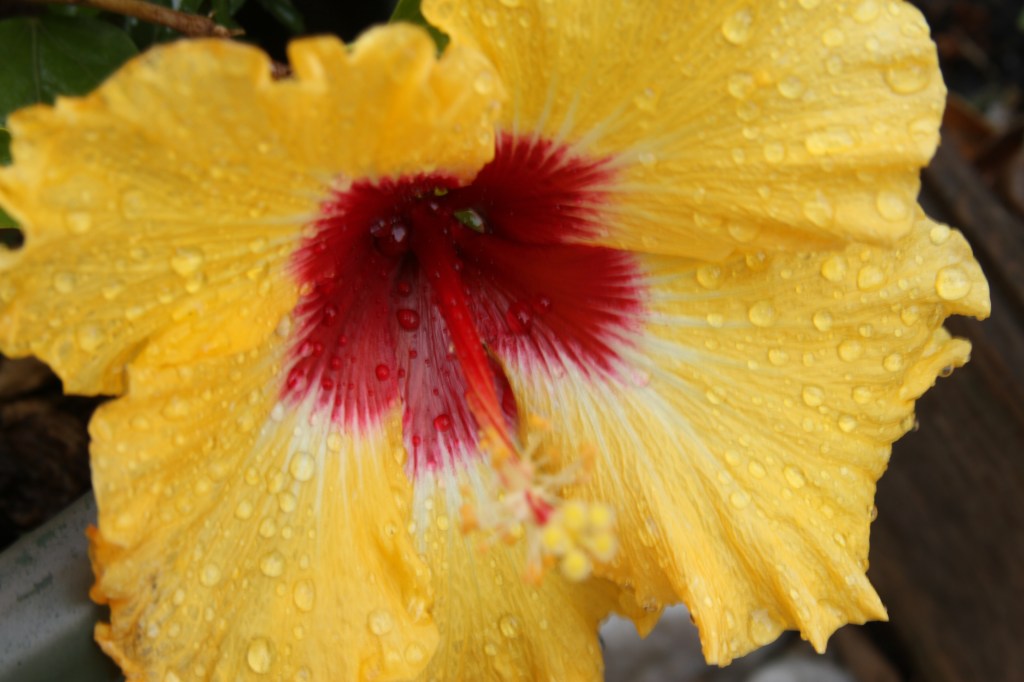
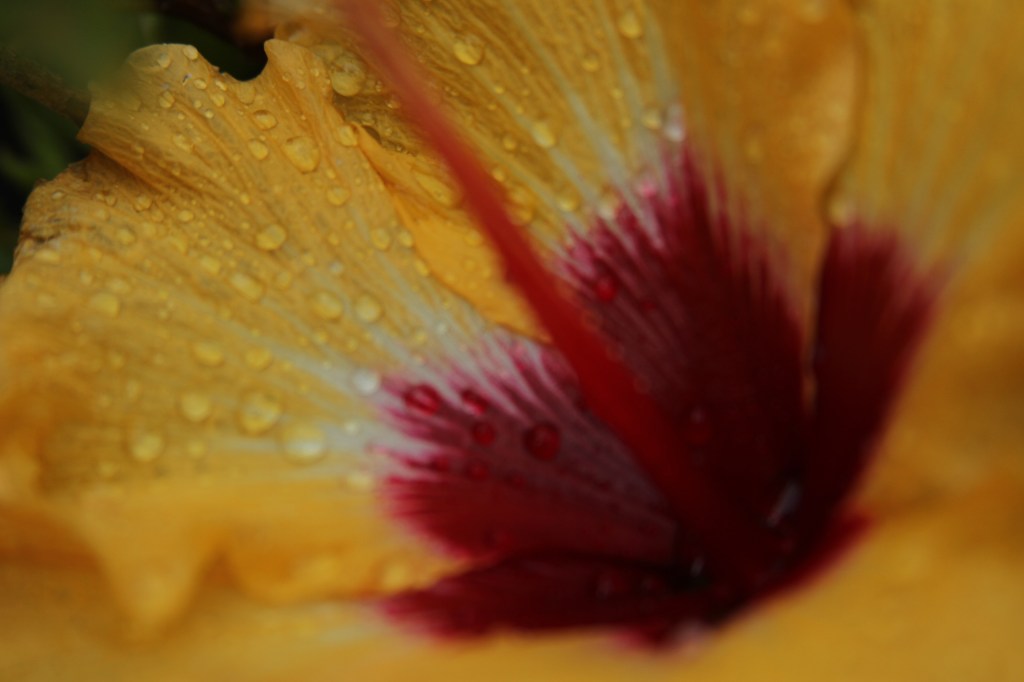
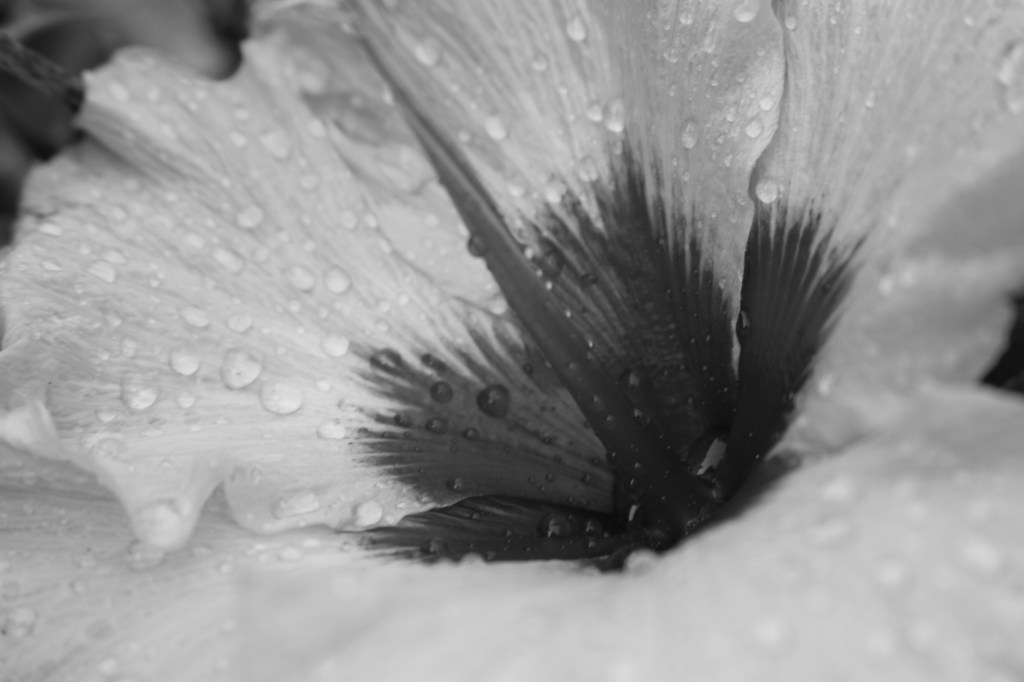
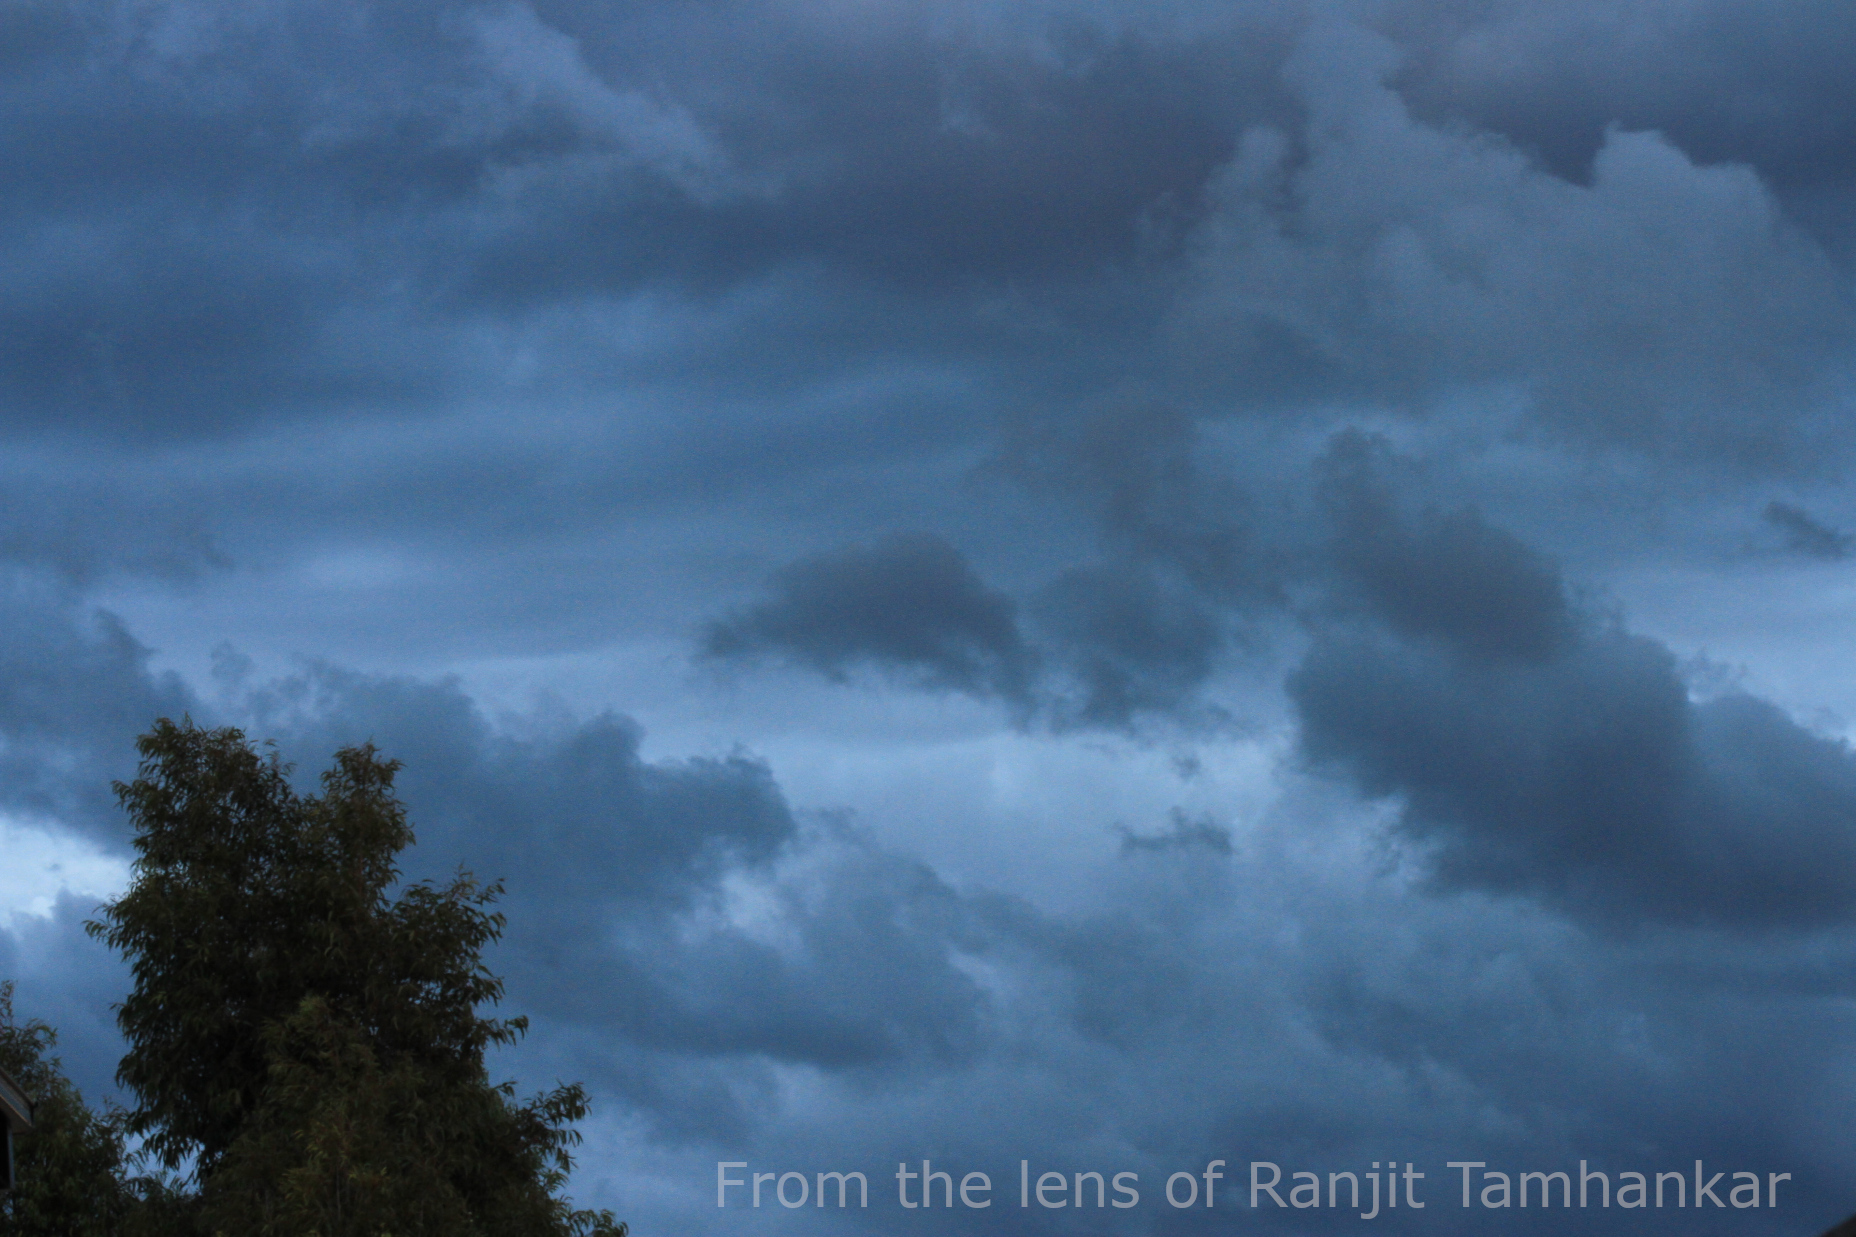
It rained yesterday after many weeks. It has been hard on the state of Victoria (as with few other) with all the heat, fires, and smoke. It was certainly a reprieve as the temperature suddenly dropped – almost 20 degrees – yesterday and started raining. It’s raining today too, but the smoke lingers :-(. I took the opportunity to snap few photos of the lone hibiscus and of those many water droplets. I wish I had a MACRO lens.
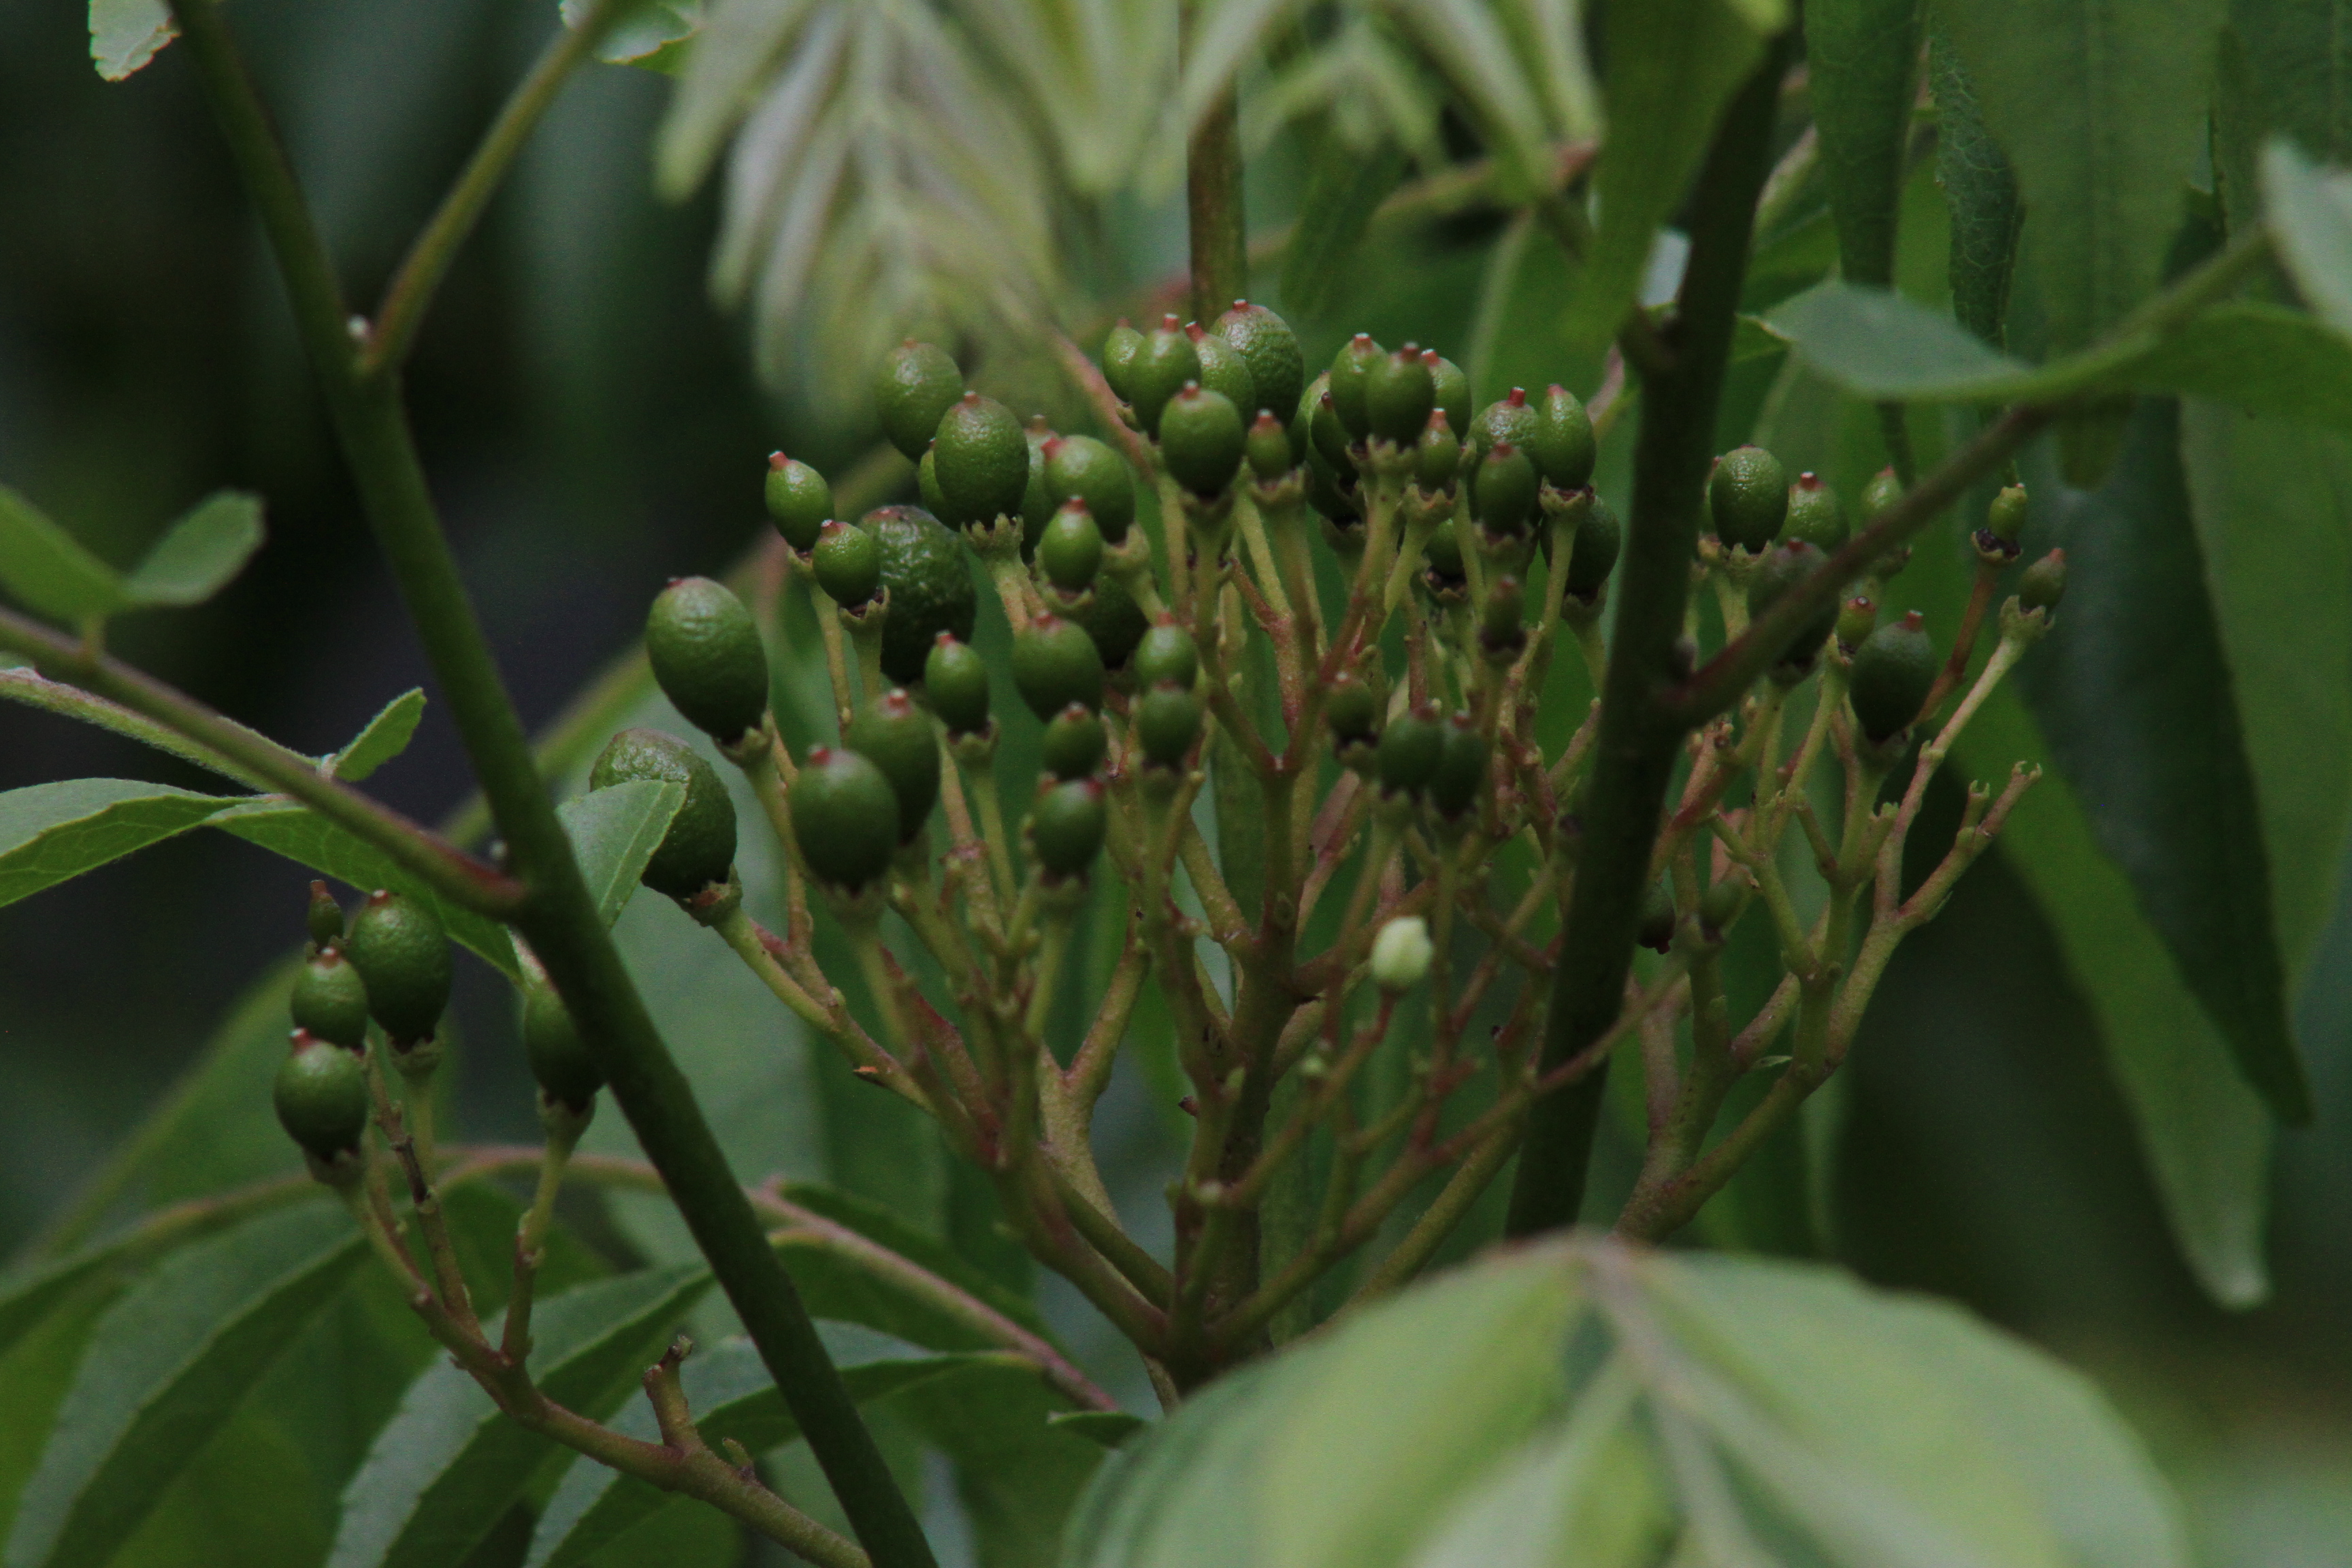
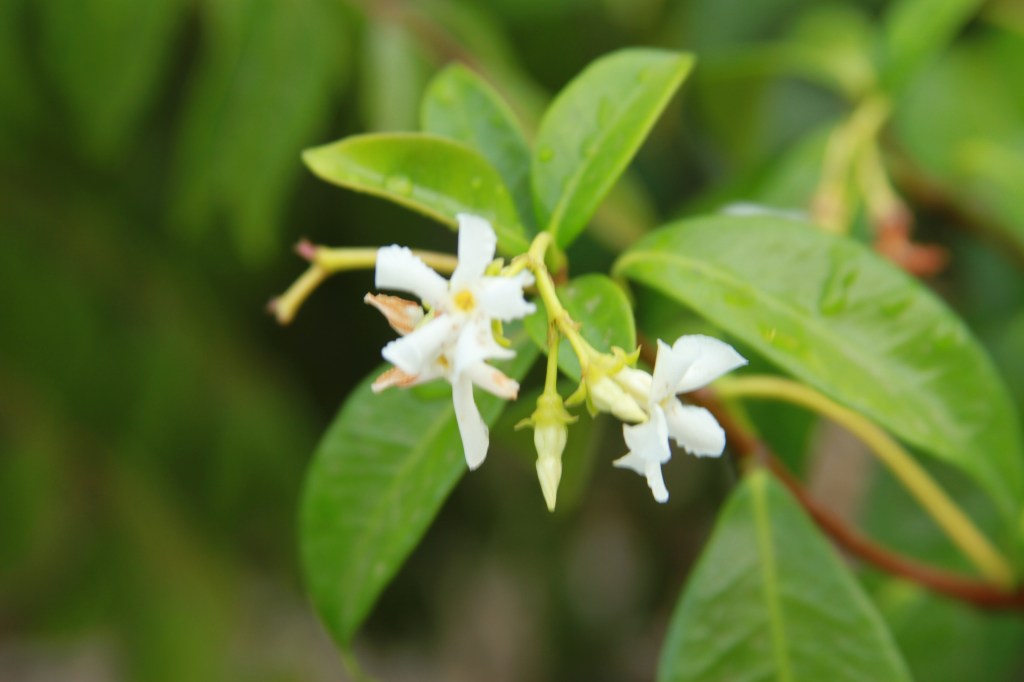
The Jasmine
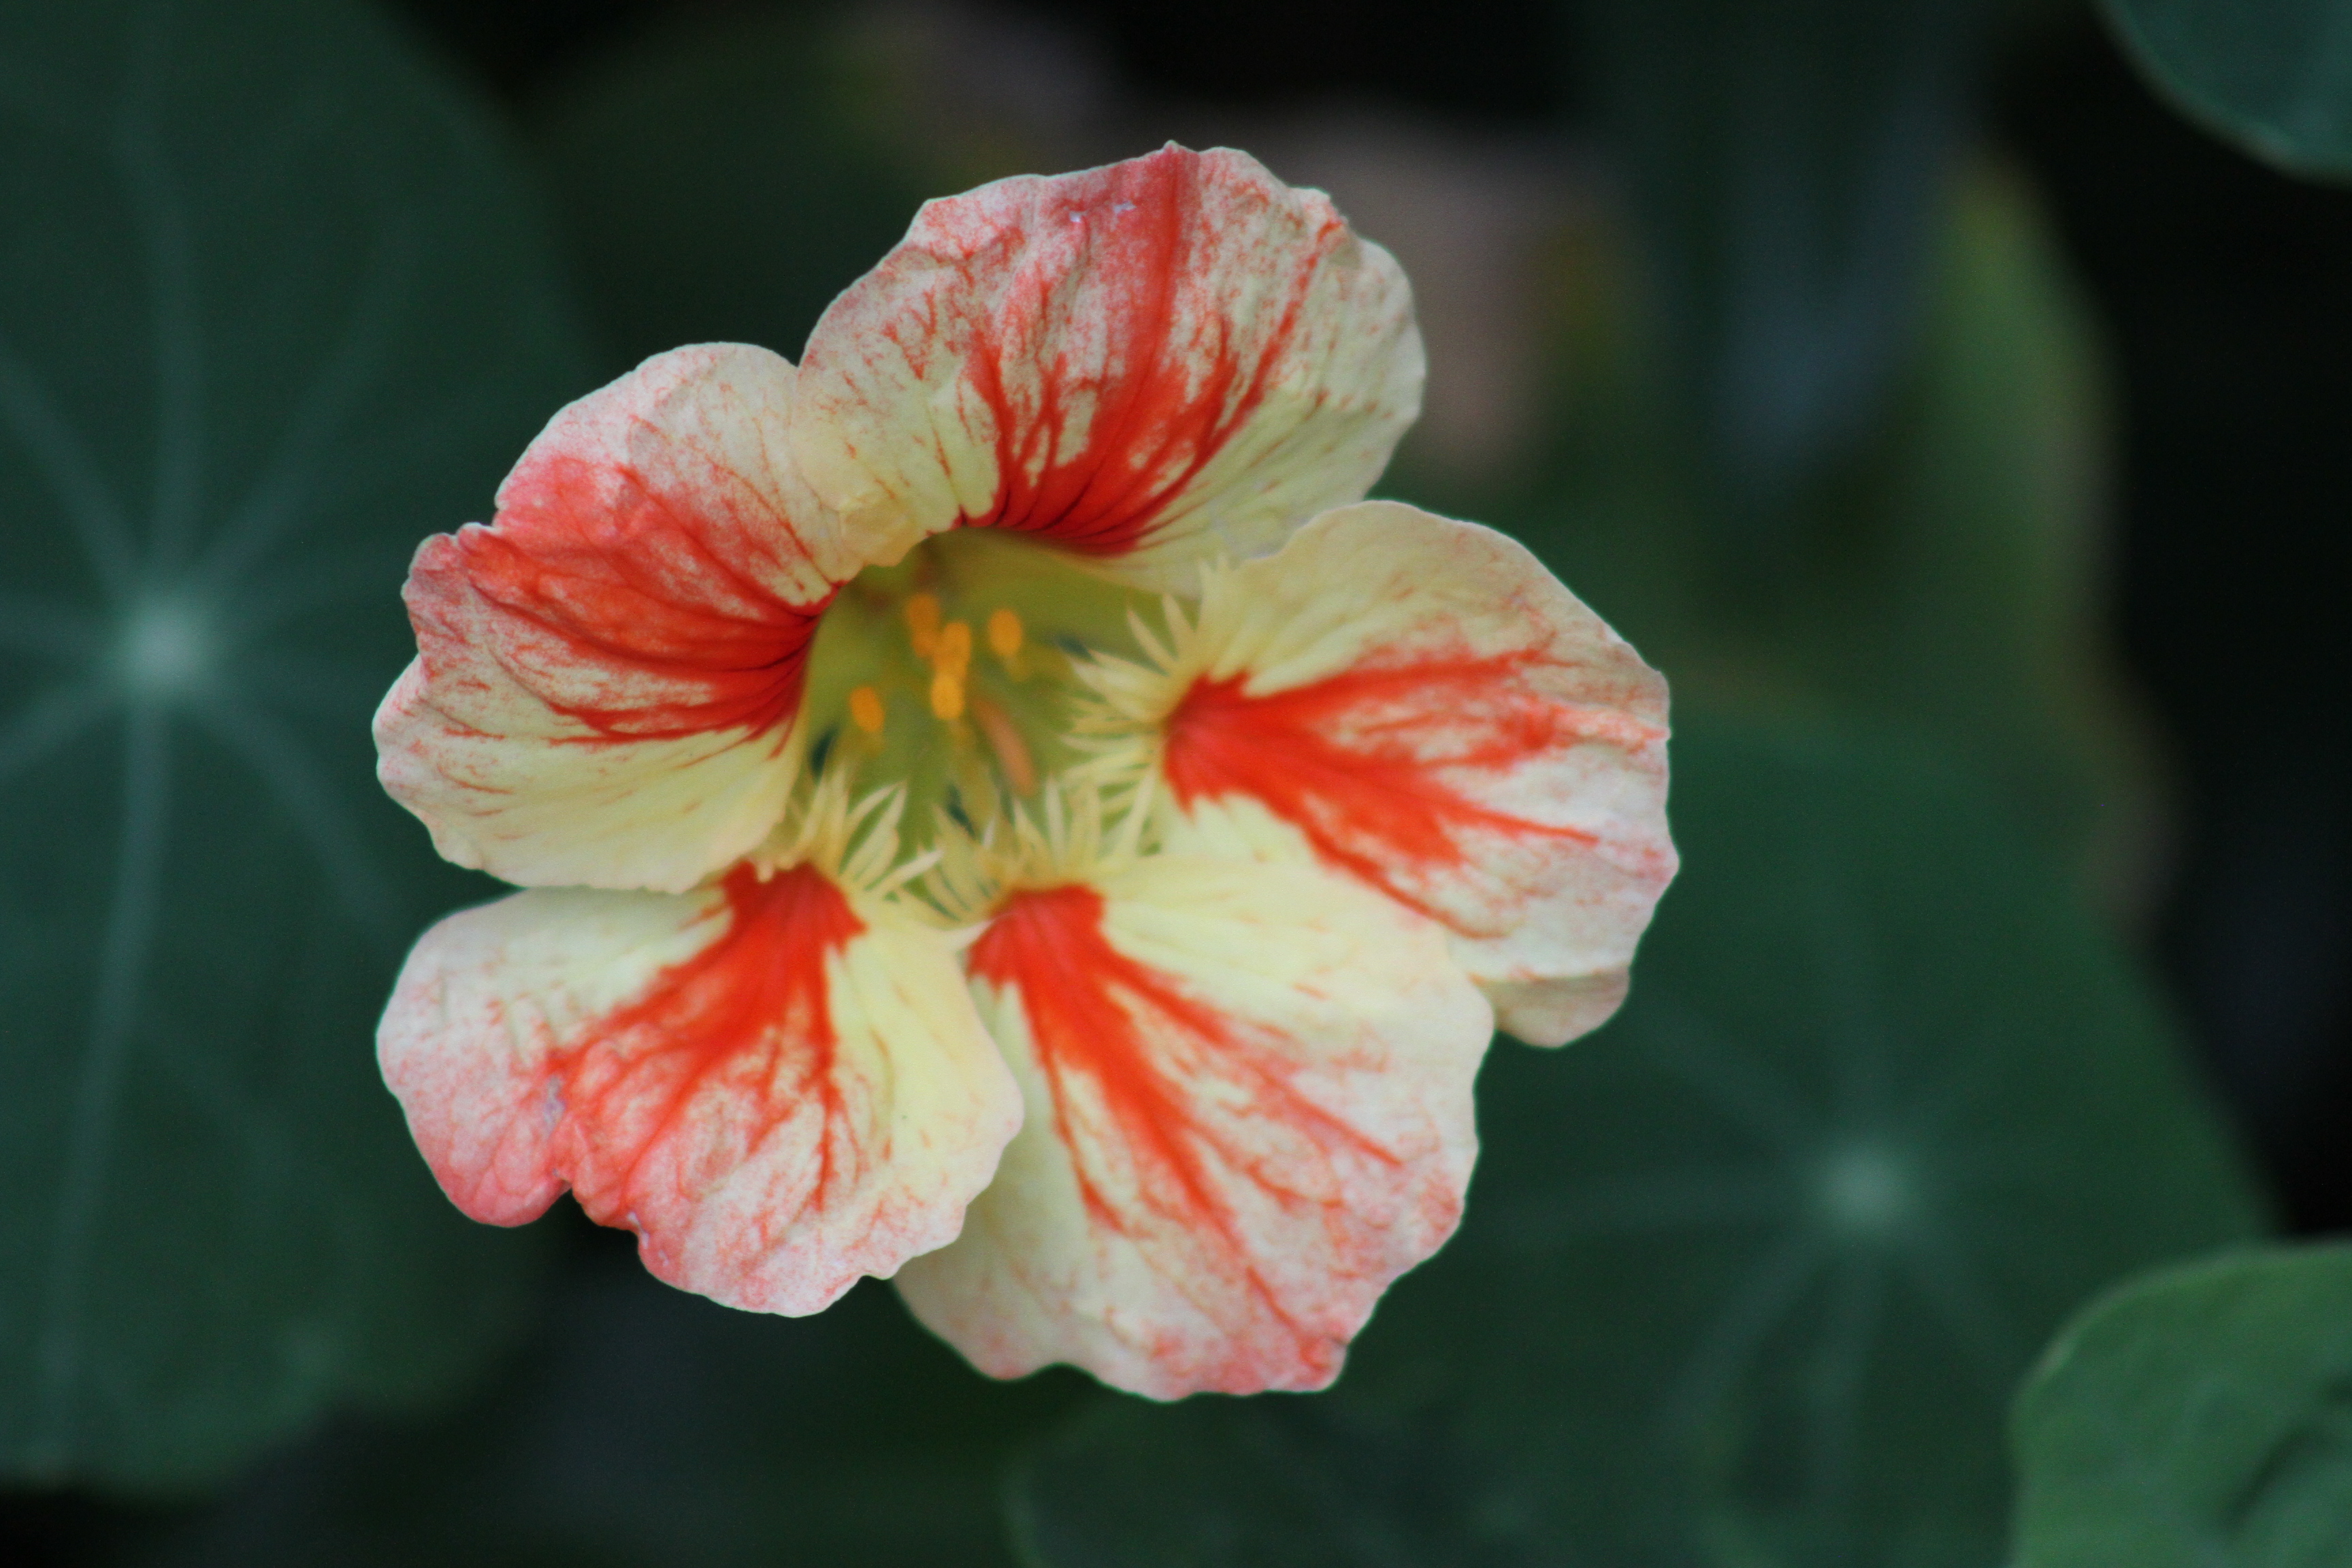
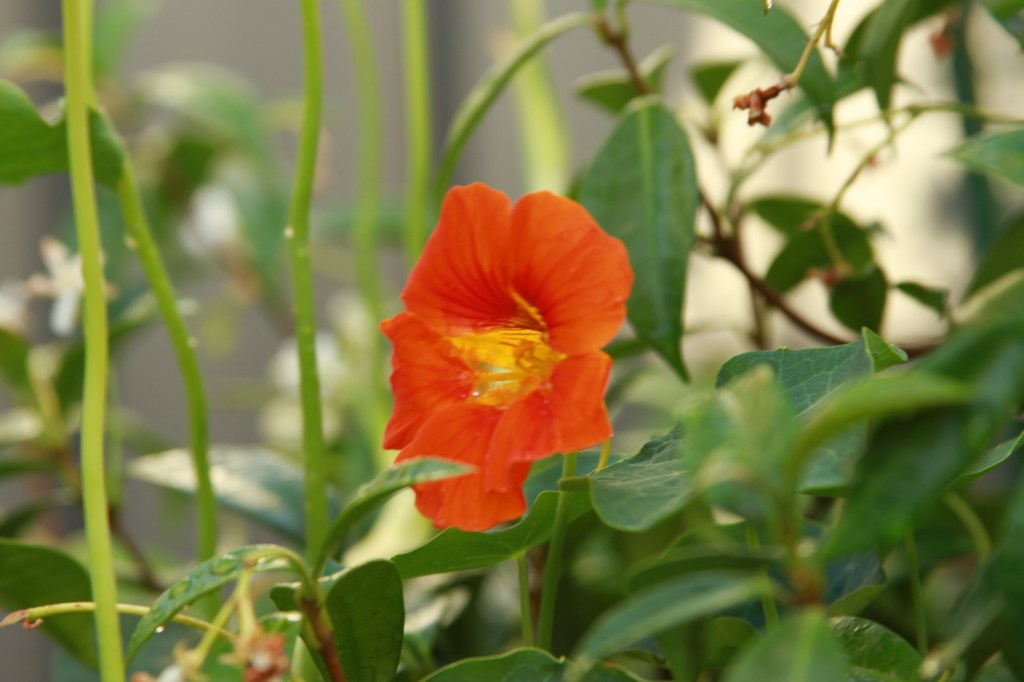
The Nasturtium
In B&W
Wishing all my readers a Very Happy and Prosperous New Year.
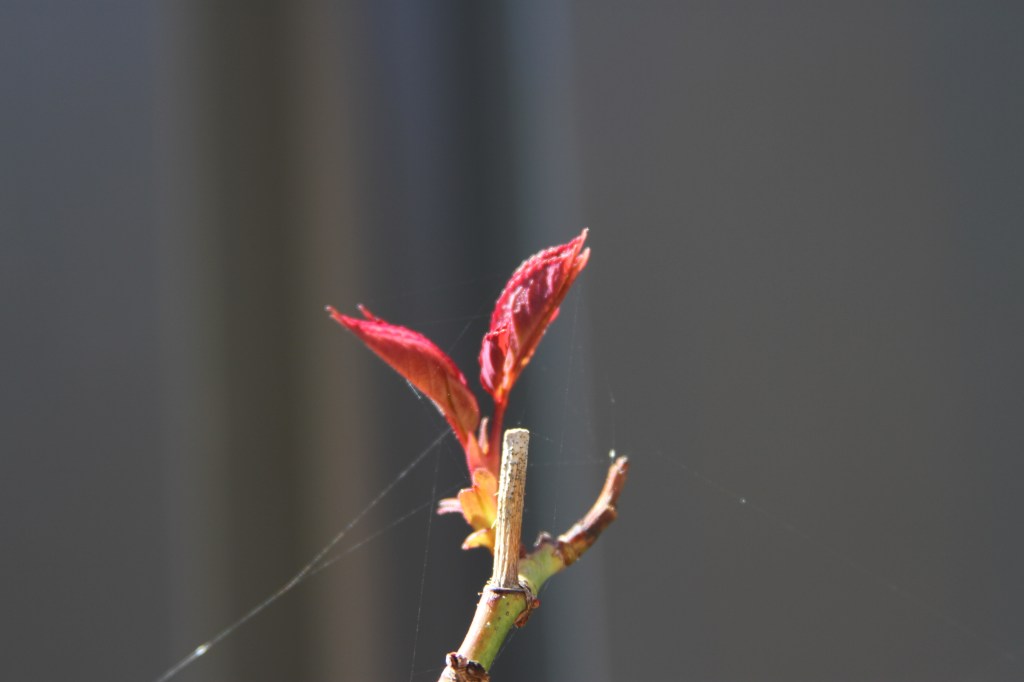
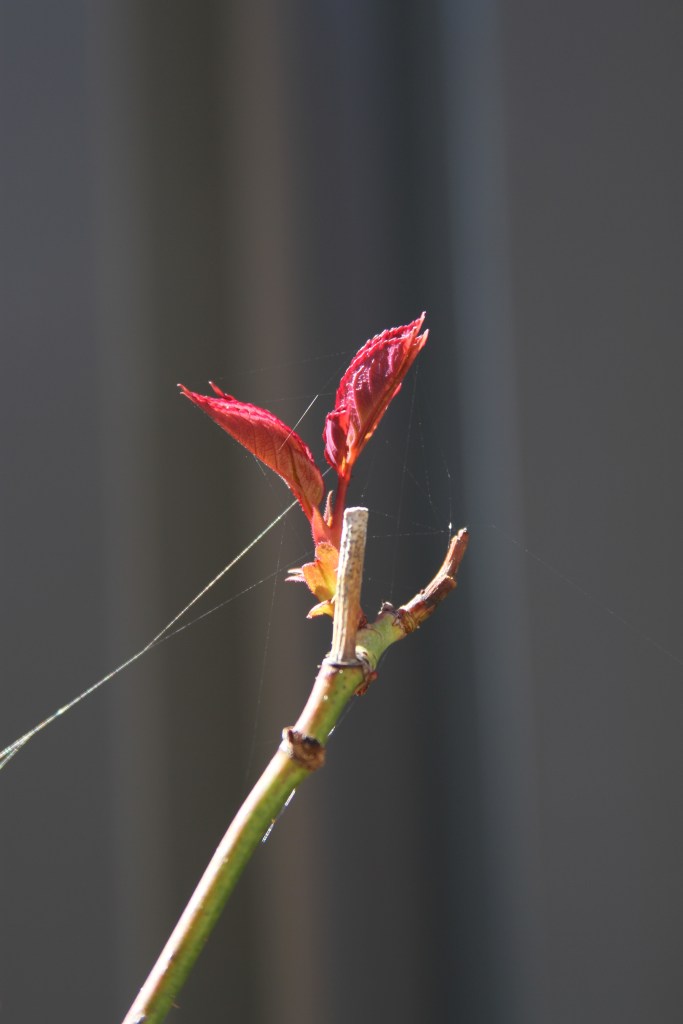
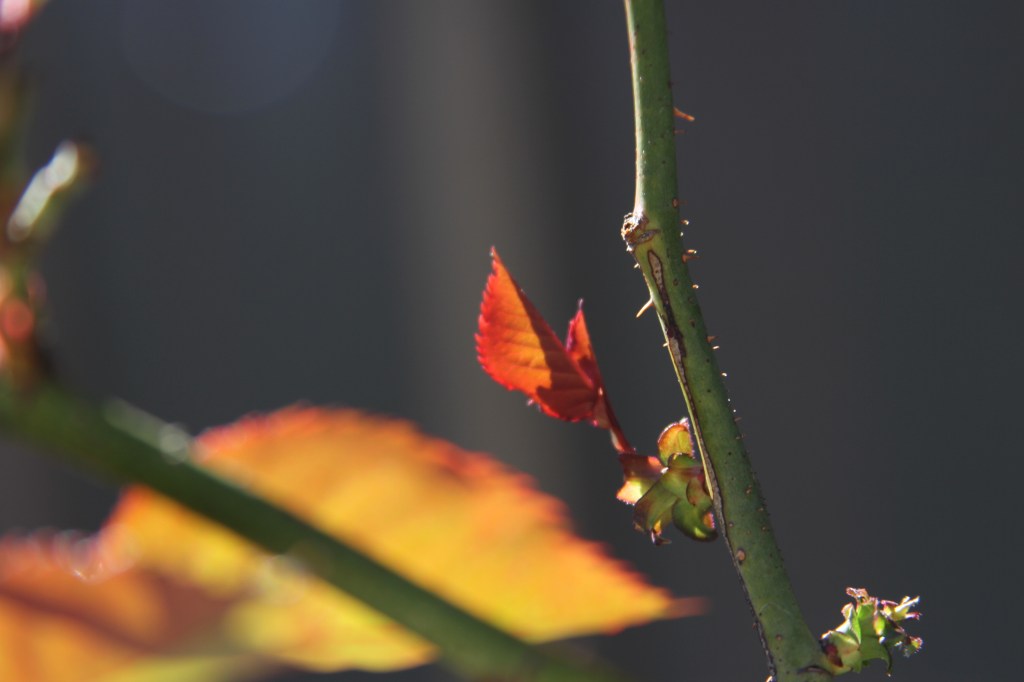
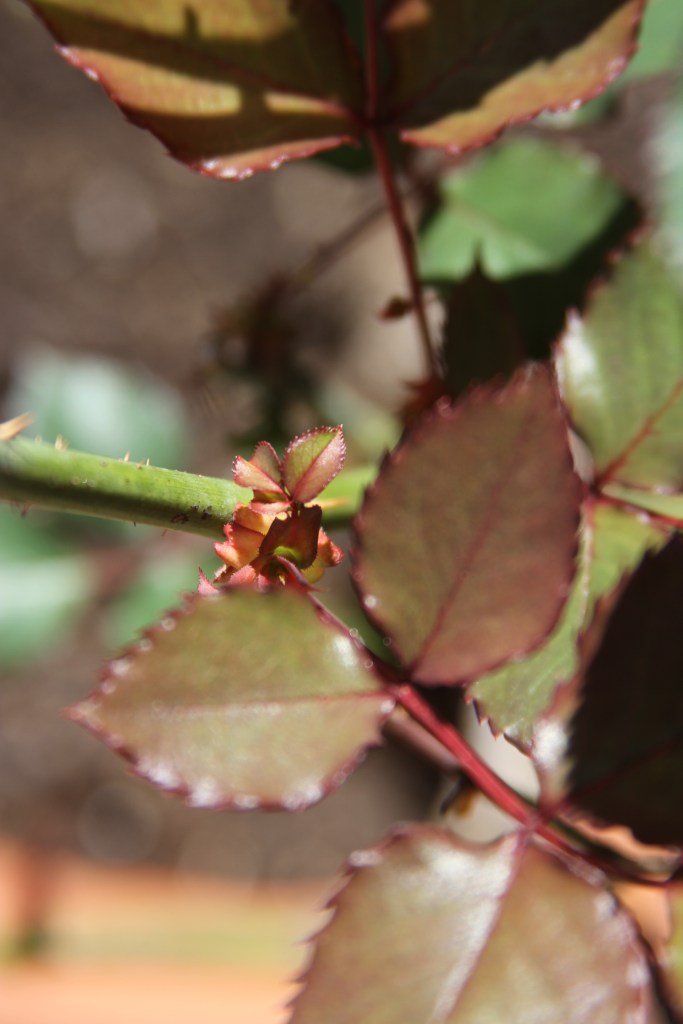
It has been some time I have posted anything. So here it is. Another round of nature photographs. Spring (here in downunder) is on the doorstep and my little rose garden is blooming up. Here are few shots taken on a bright sunny day.
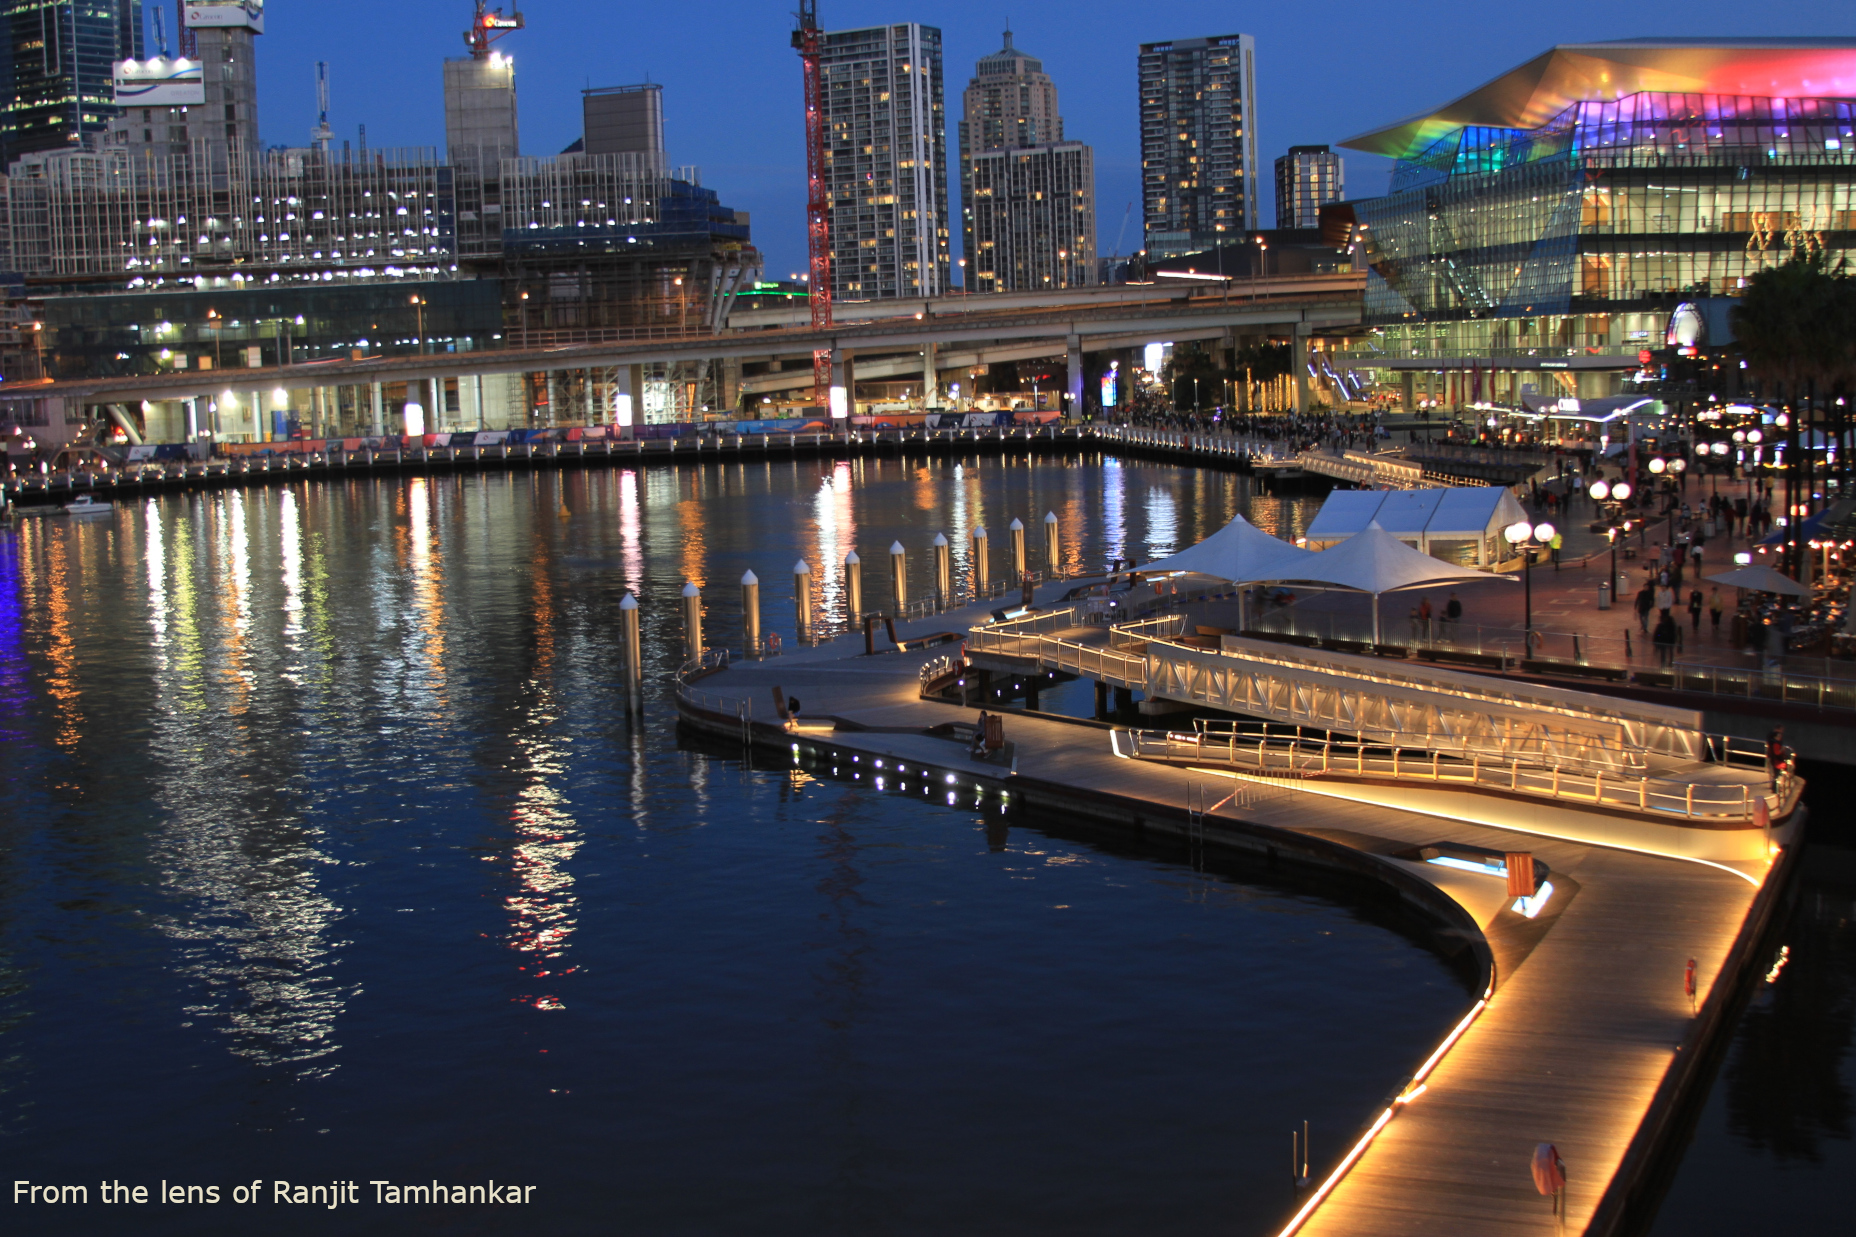
Last week I was in Sydney on a vacation trip. I almost did 20K steps each day, walked all over from my hotel to those enchanting places. One evening when all others were tired and decided to take a break, I stepped out with my camera and the tripod thinking of getting some night time photos. It was still a bit of daylight around, so I first went into the St. Mary’s Cathedral to take few snaps from inside. I am not sharing them here on this post though. Once it was dark, I came out of the church and planted my tripod nearby.
Here are few pictures taken during night time. There are also few pictures taken at the darling harbour where unfortunately my tripod wasn’t with me, as I was not destined to be there in the evening. However I was able to get few without much shake.
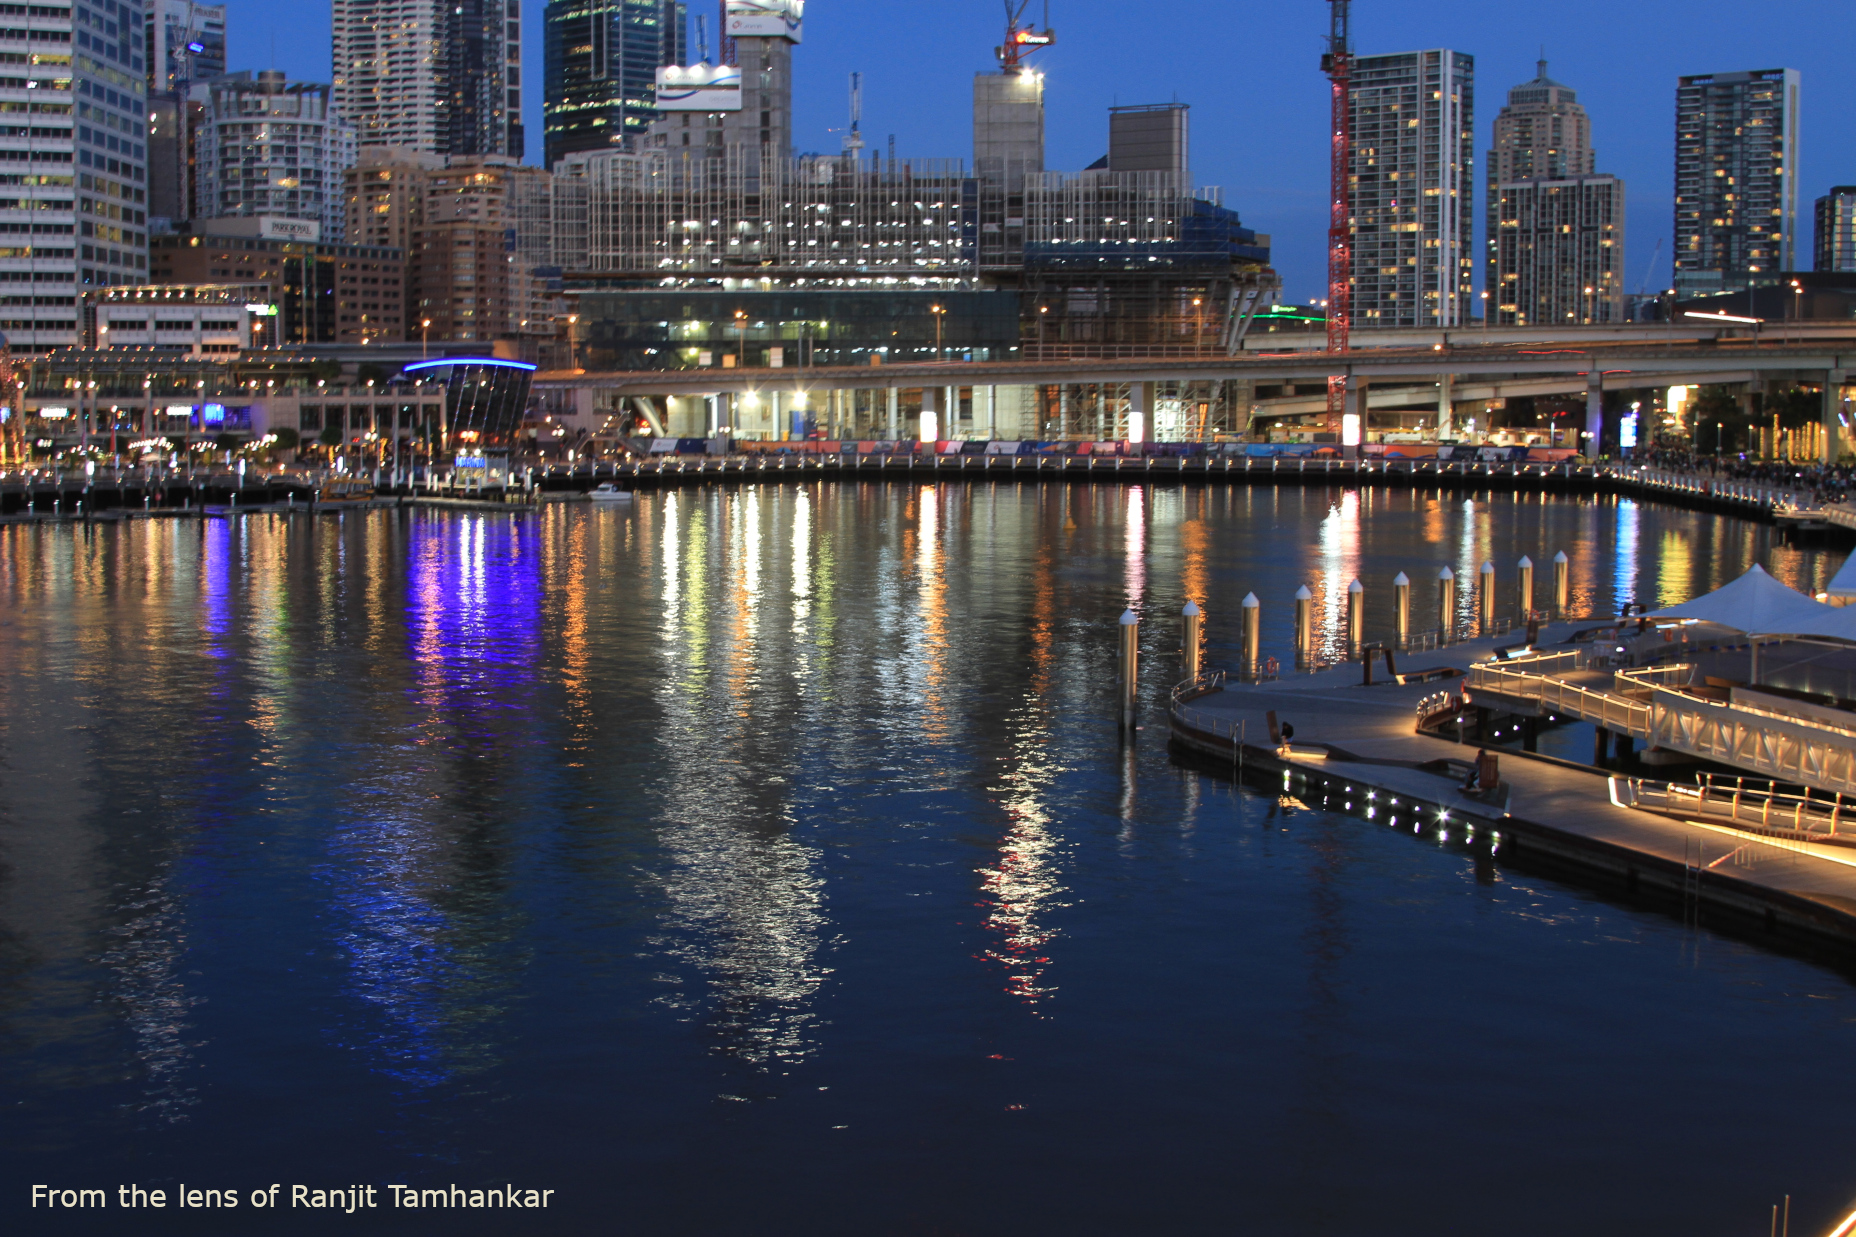
Darling Harbour – Sydney Darling Harbour – Sydney
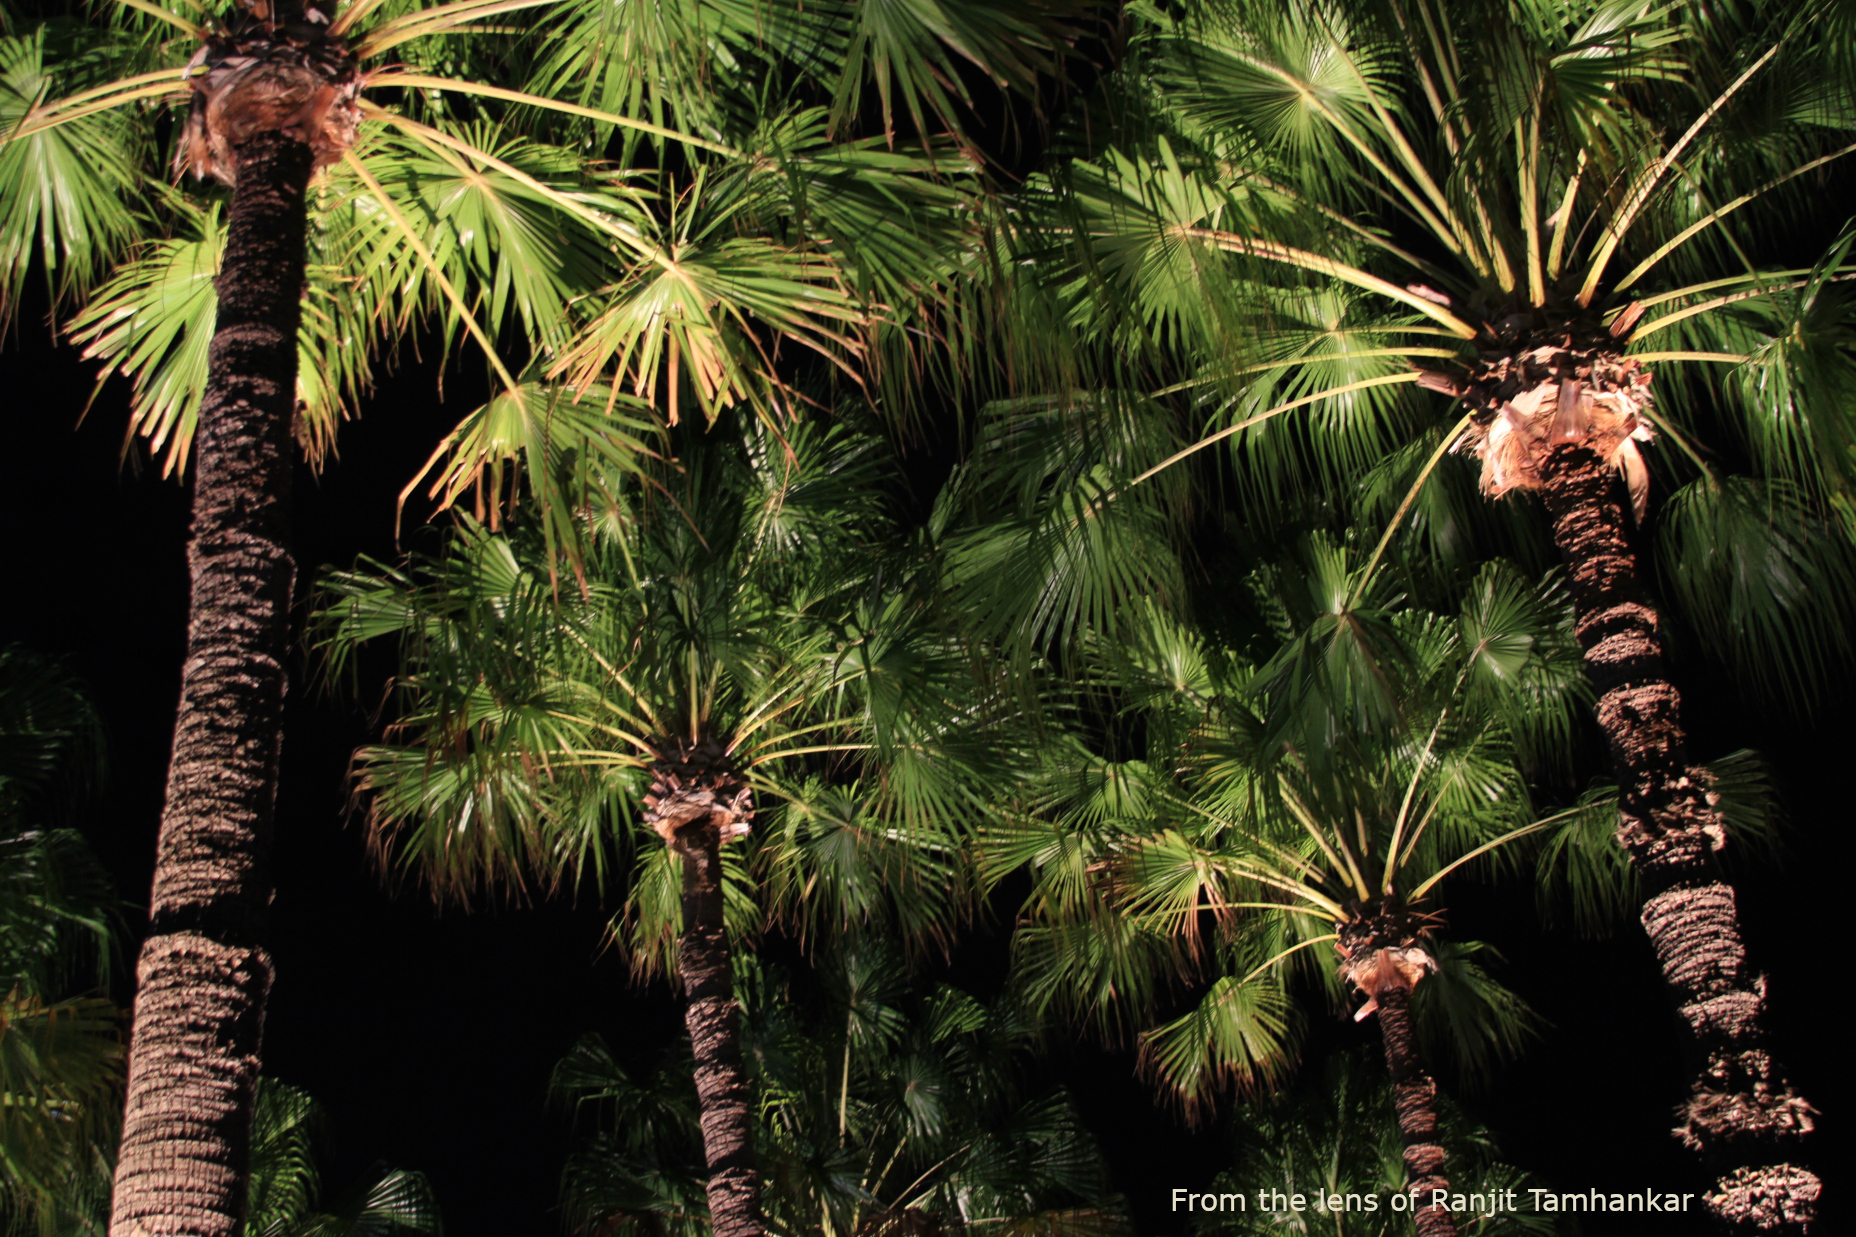
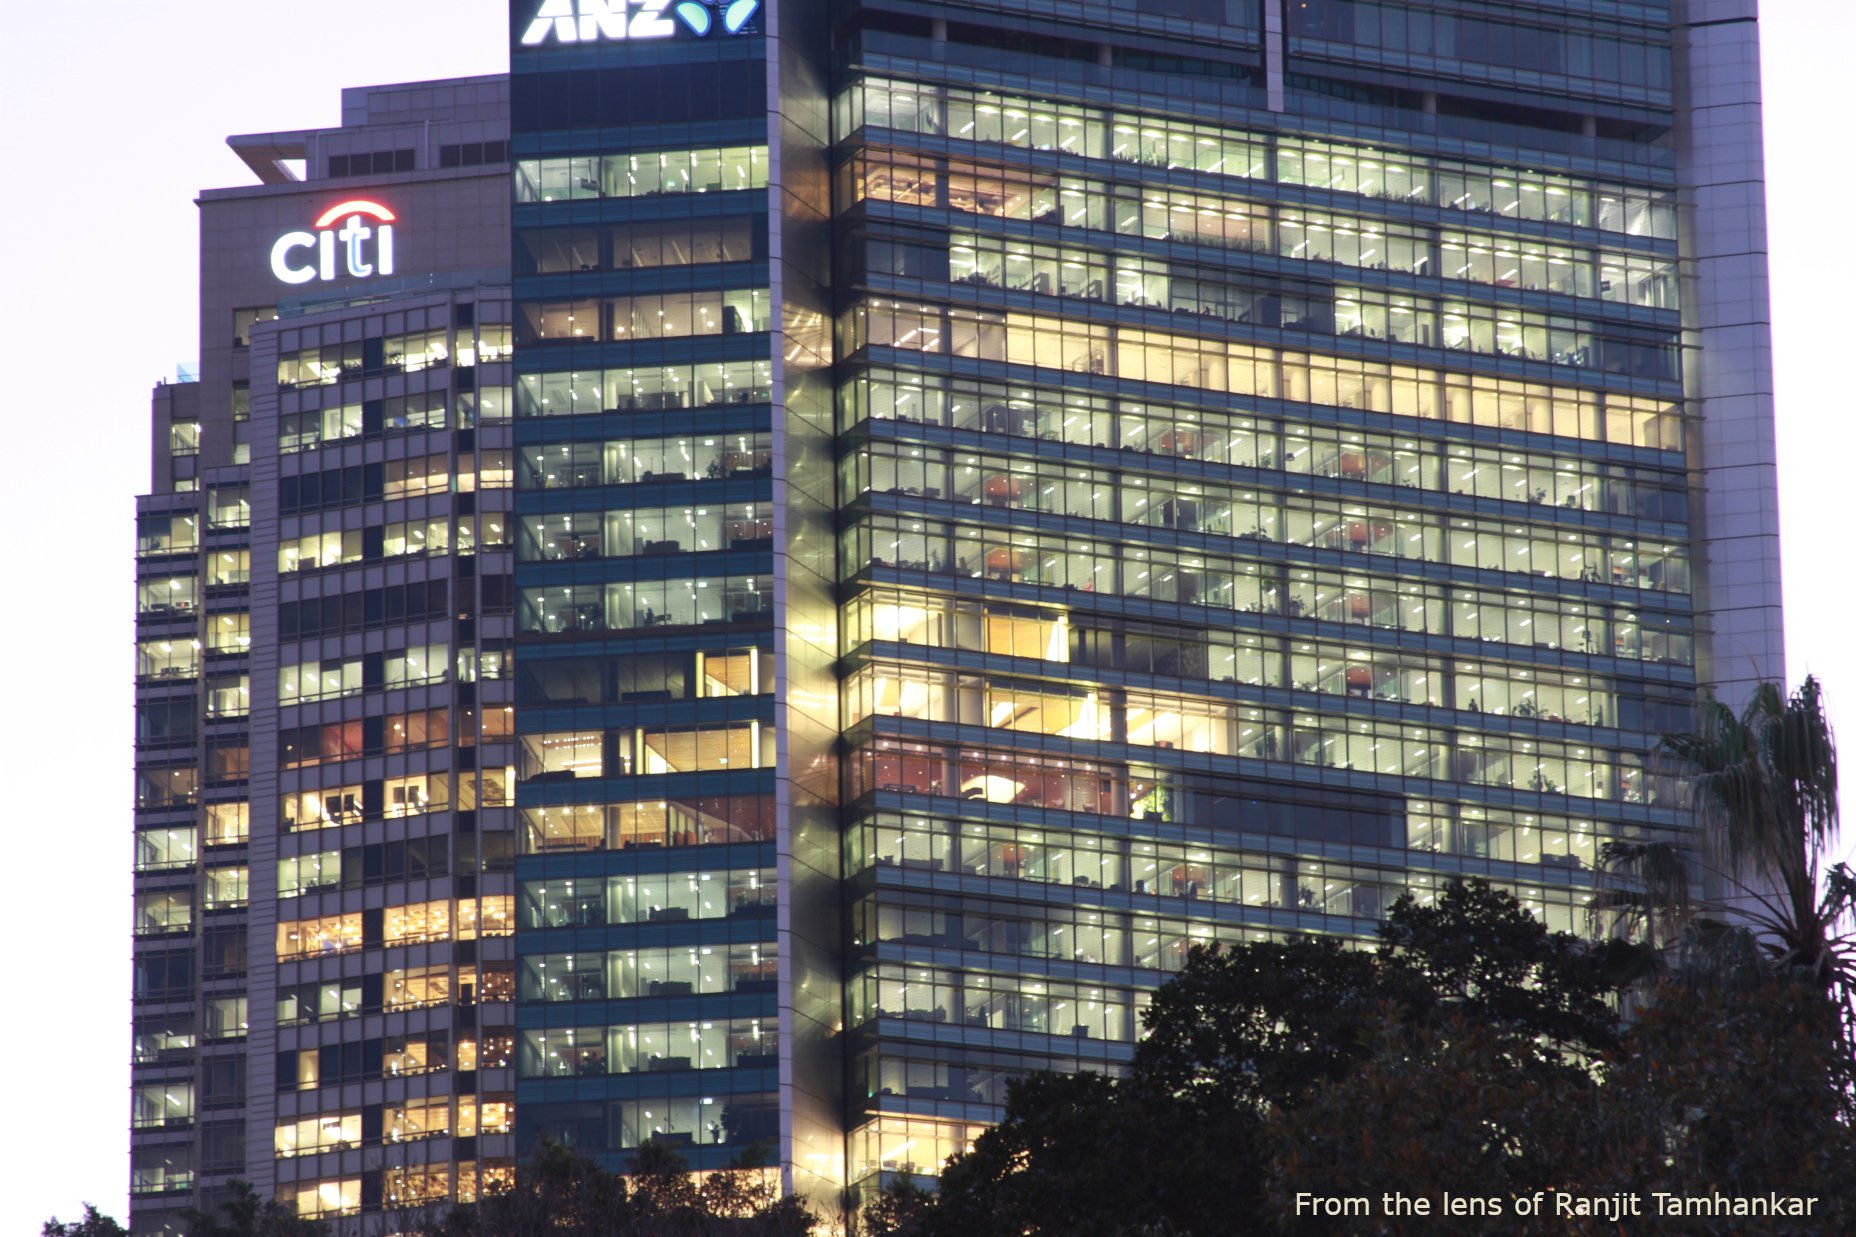
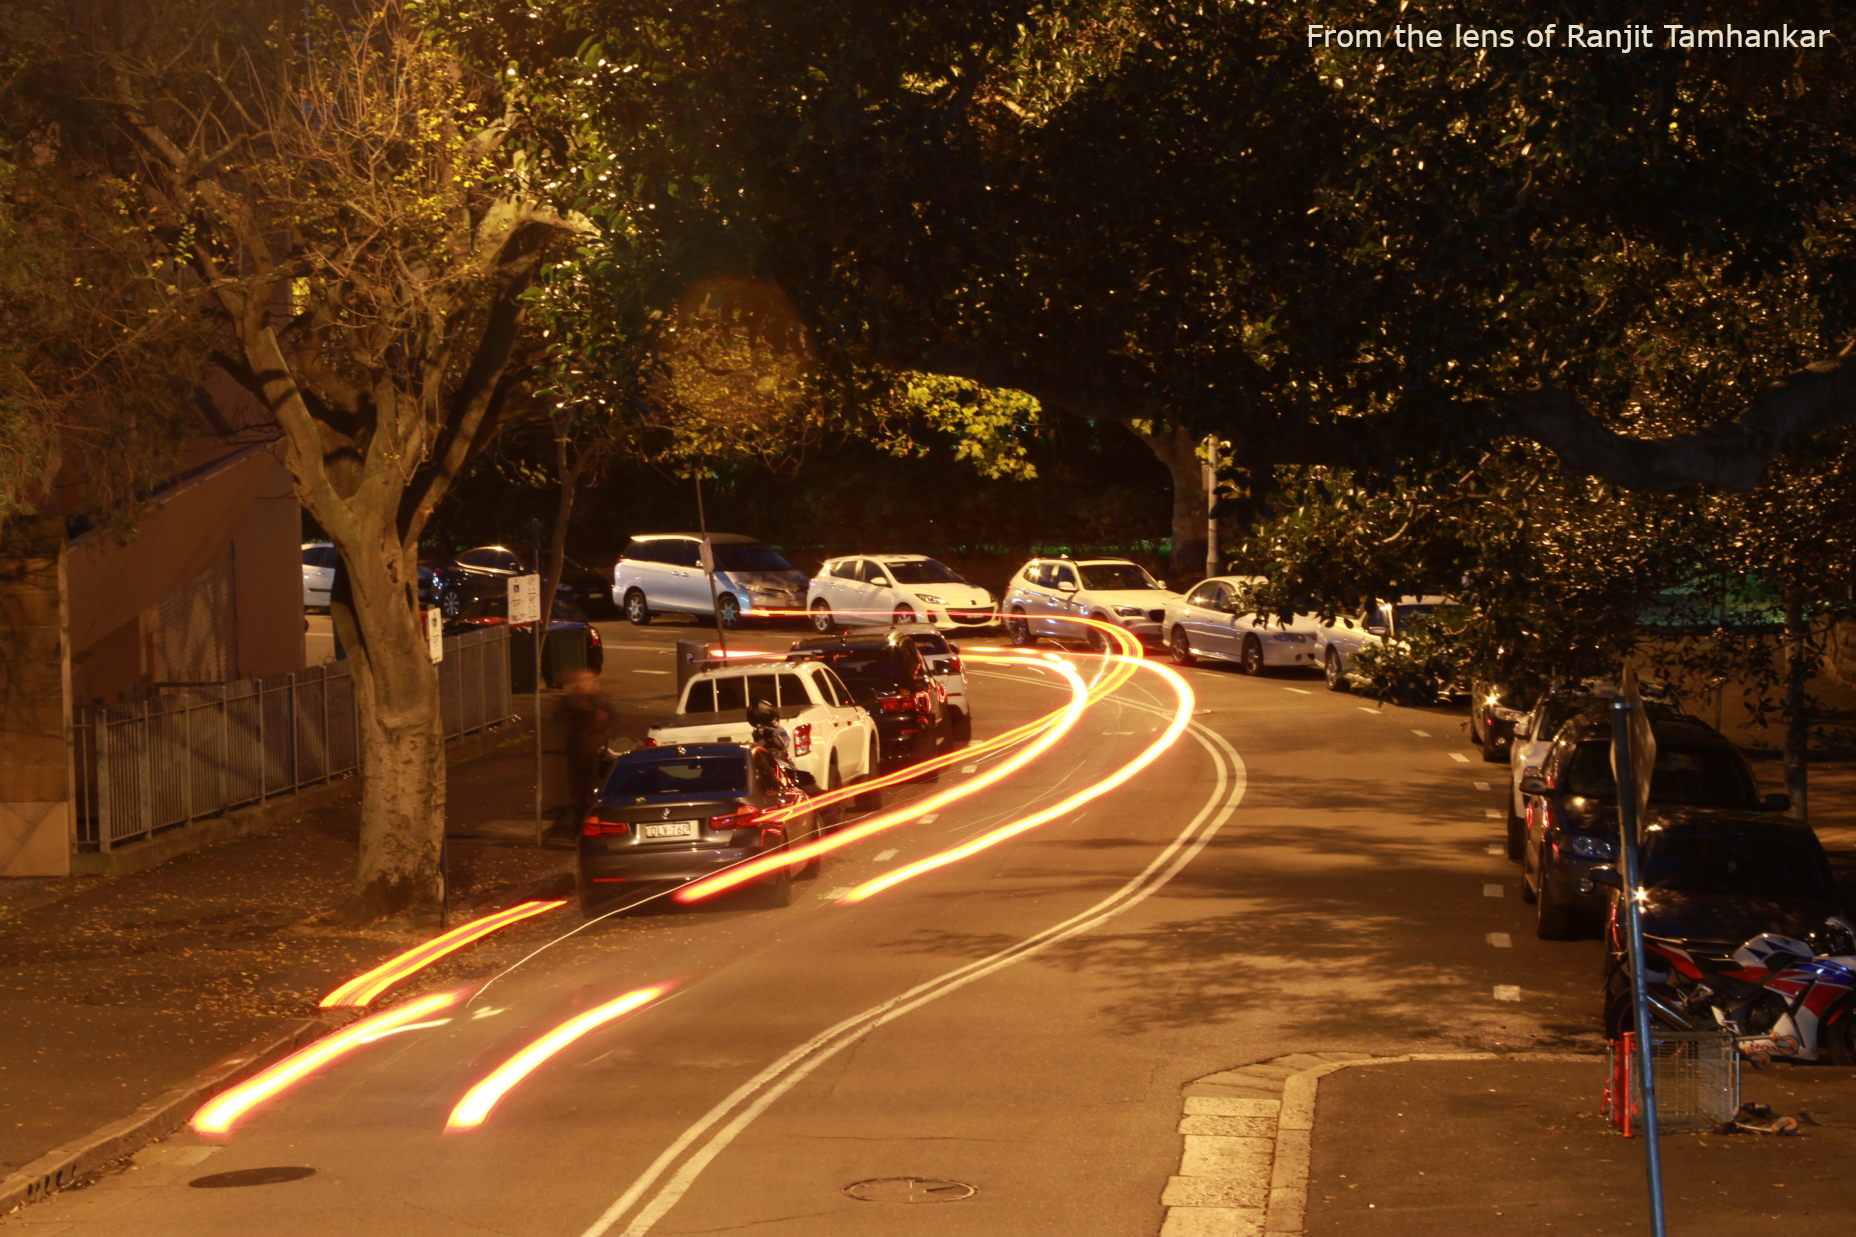
Harbour BridgePalm Trees on the pathway – Portobello Cafe?Car light trailsIf you zoom this, you can see people standing at the windowsOne of many lamps at the St. Marys CathedralNot sure which building was this, was on the other street from the church, but gave me a great photo op
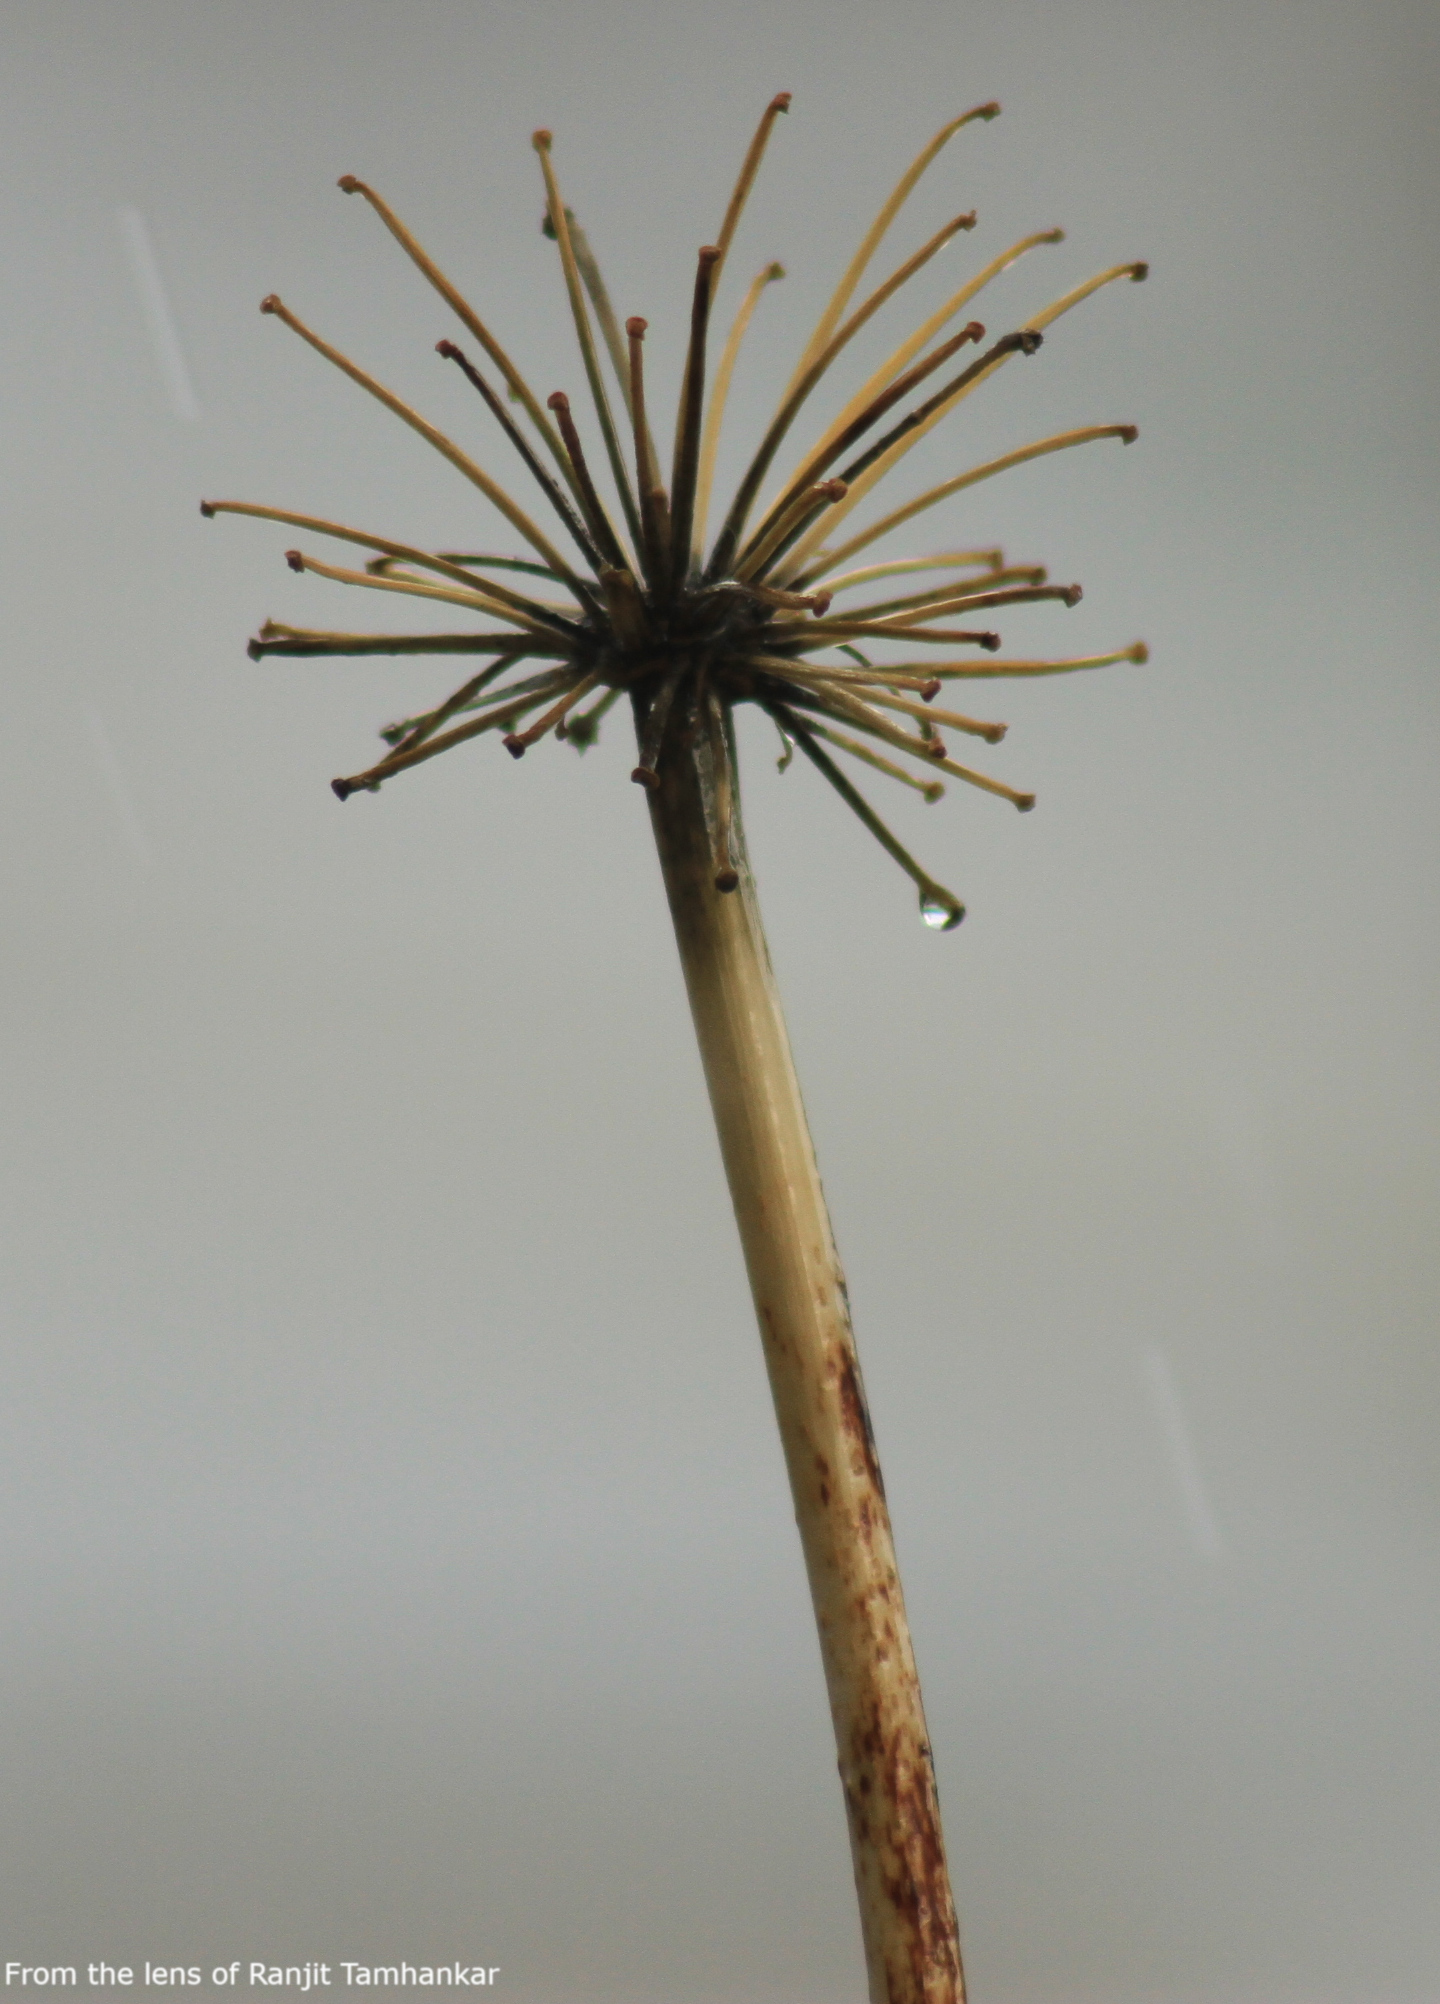
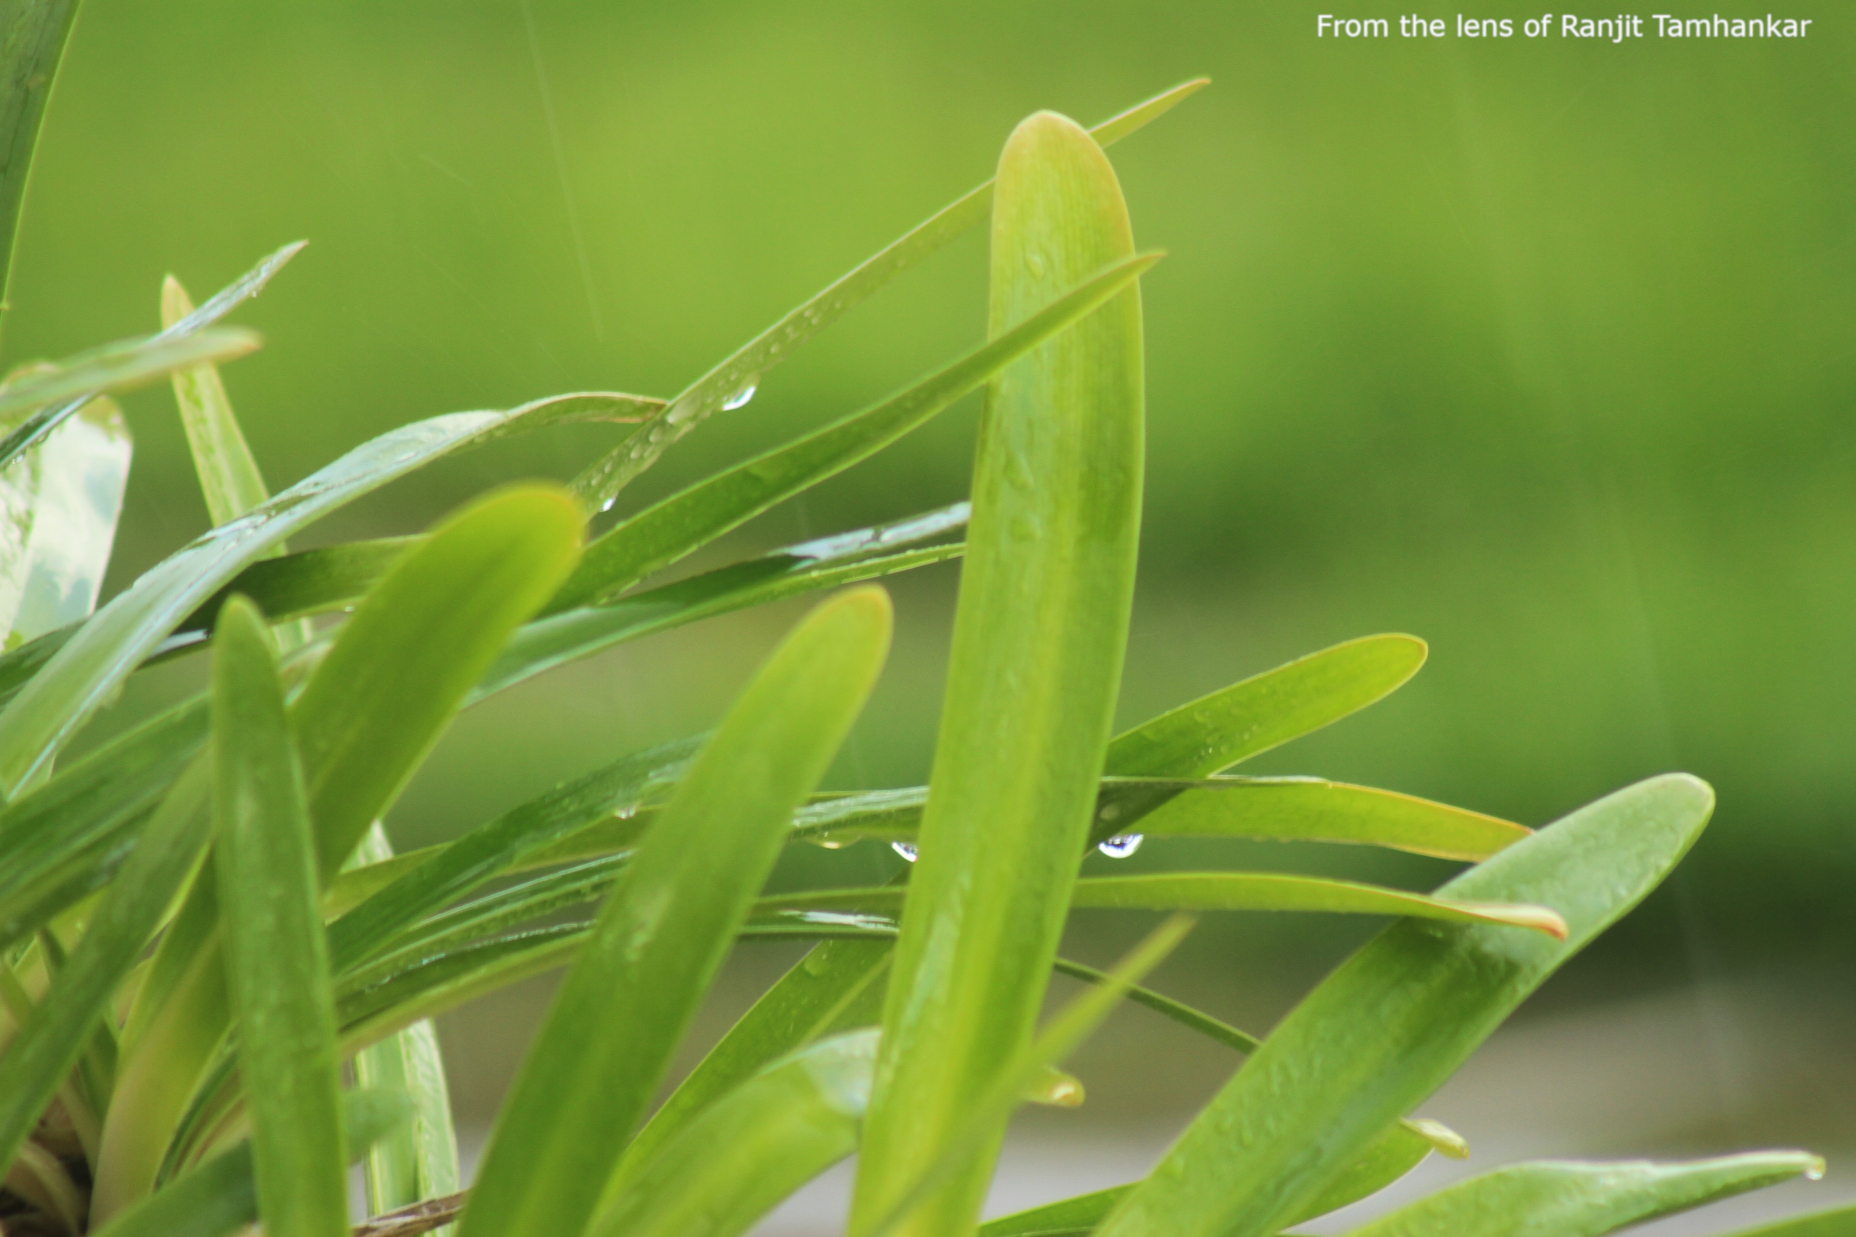
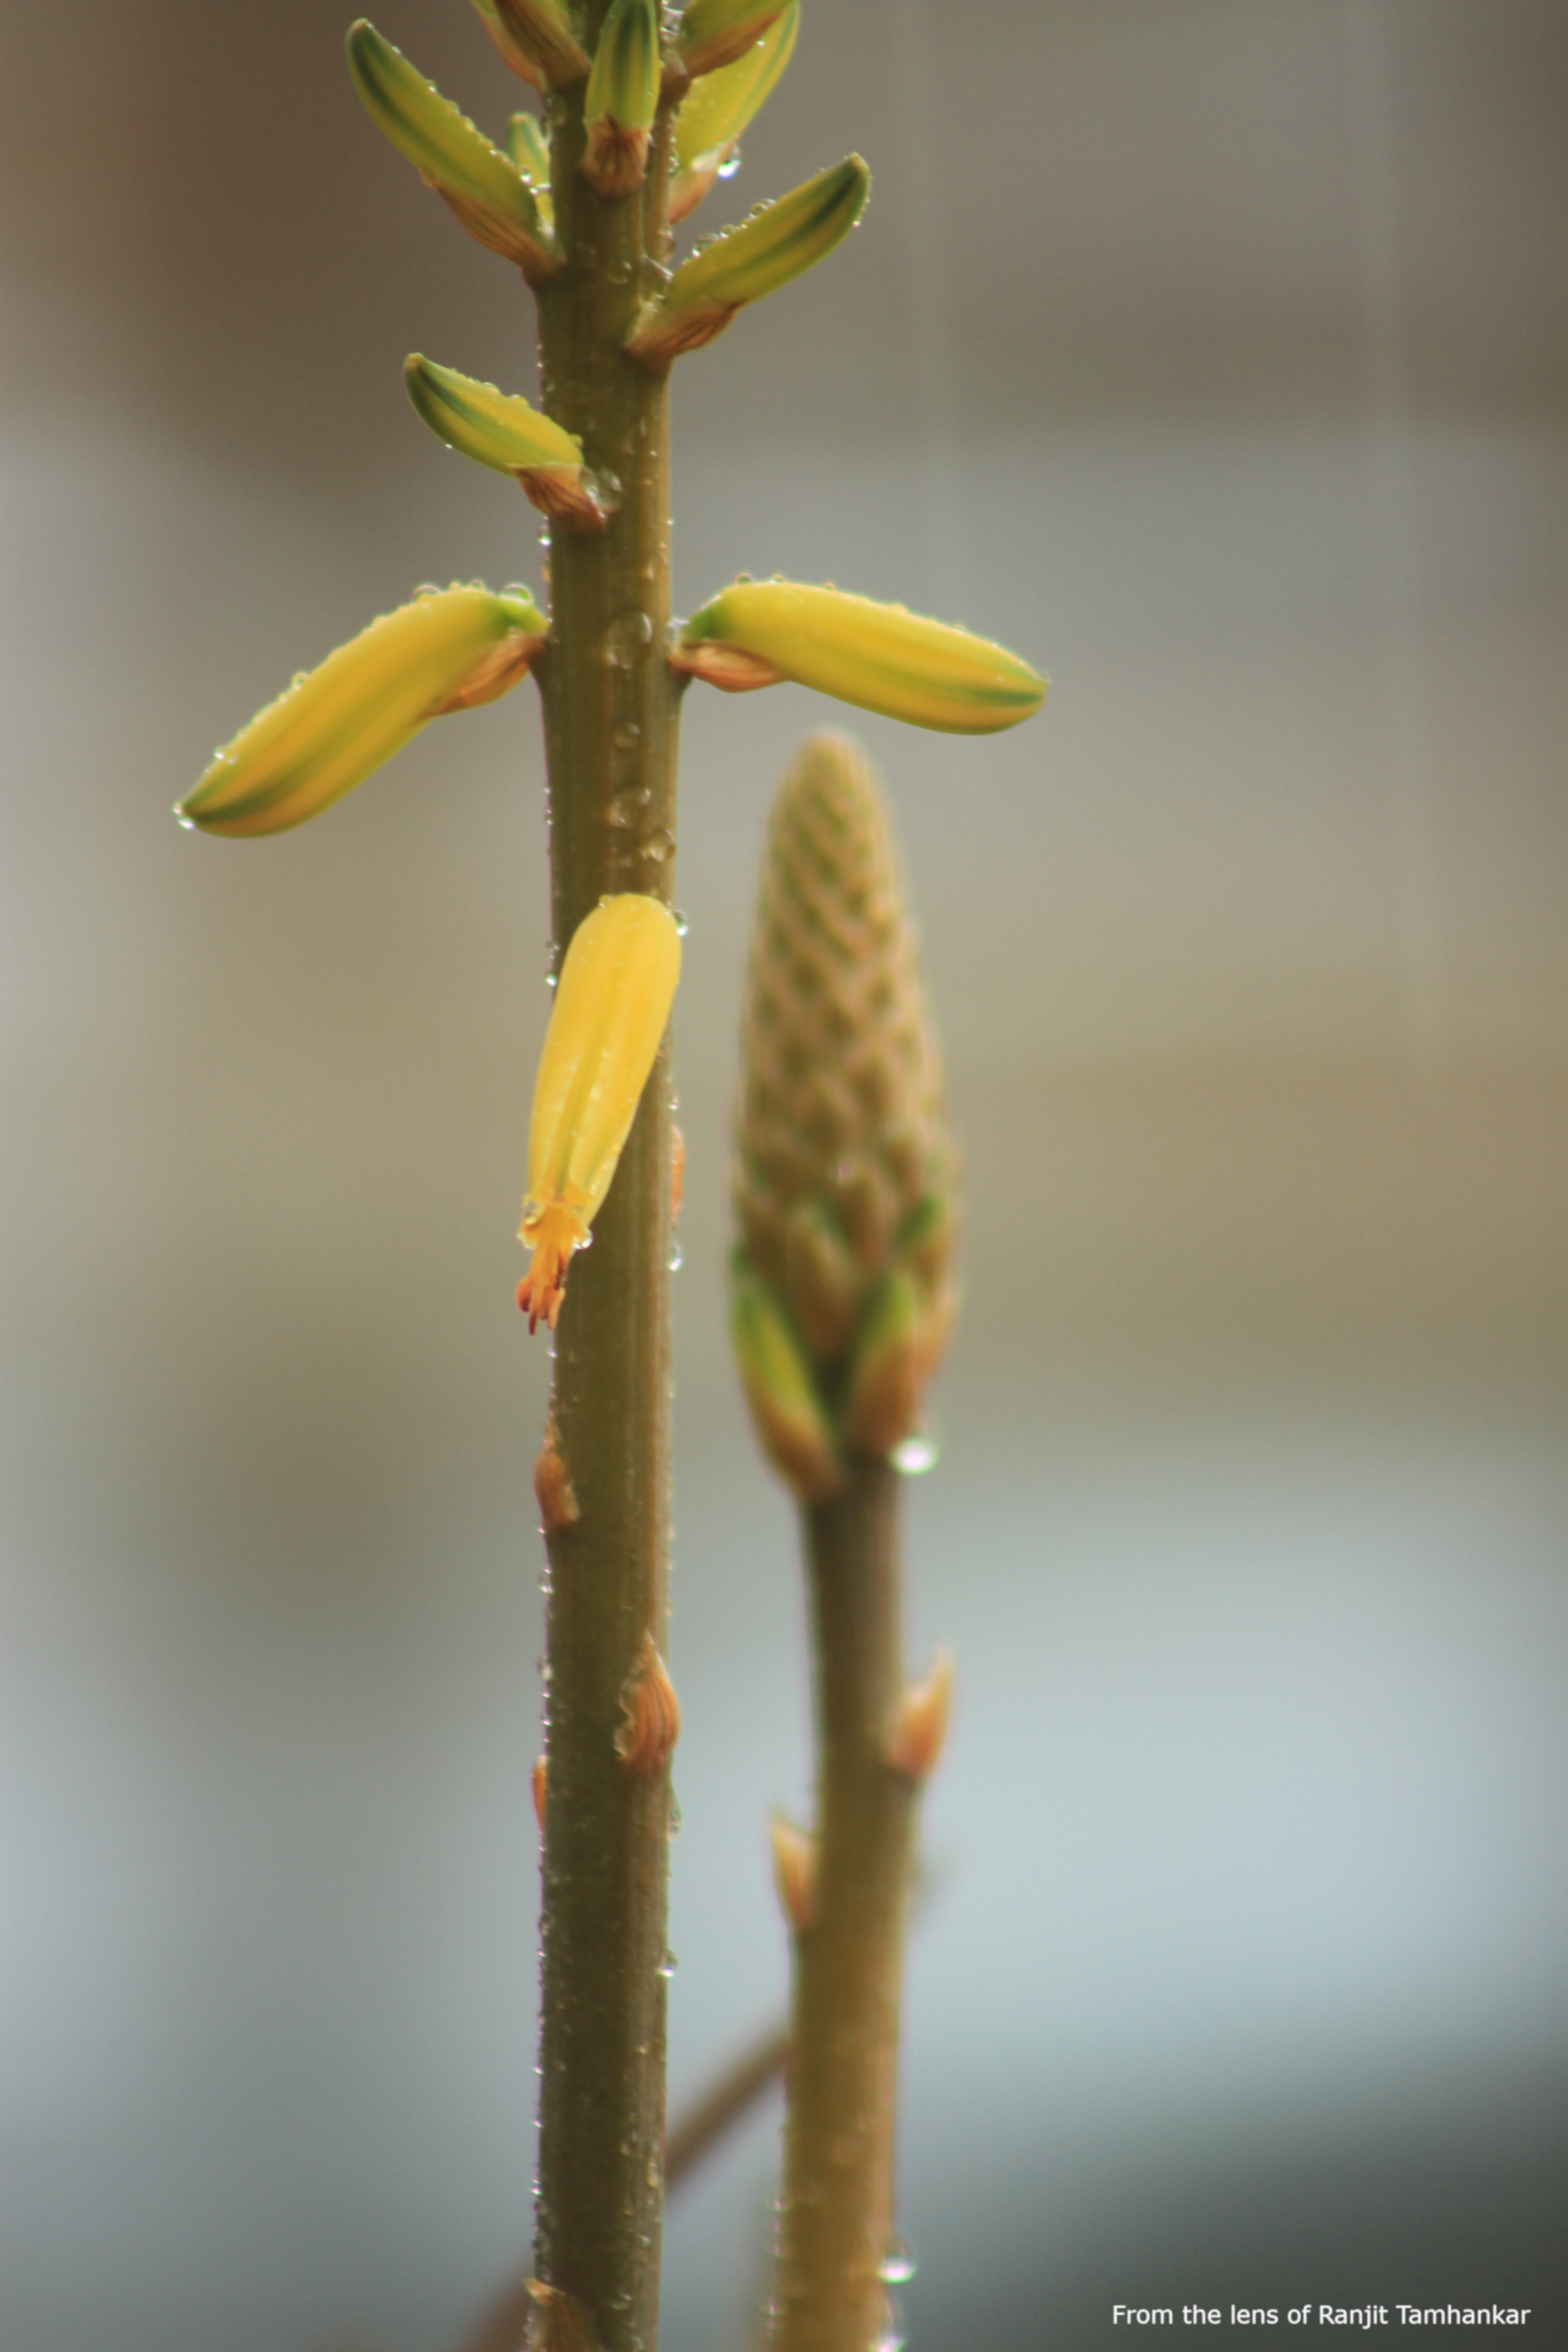
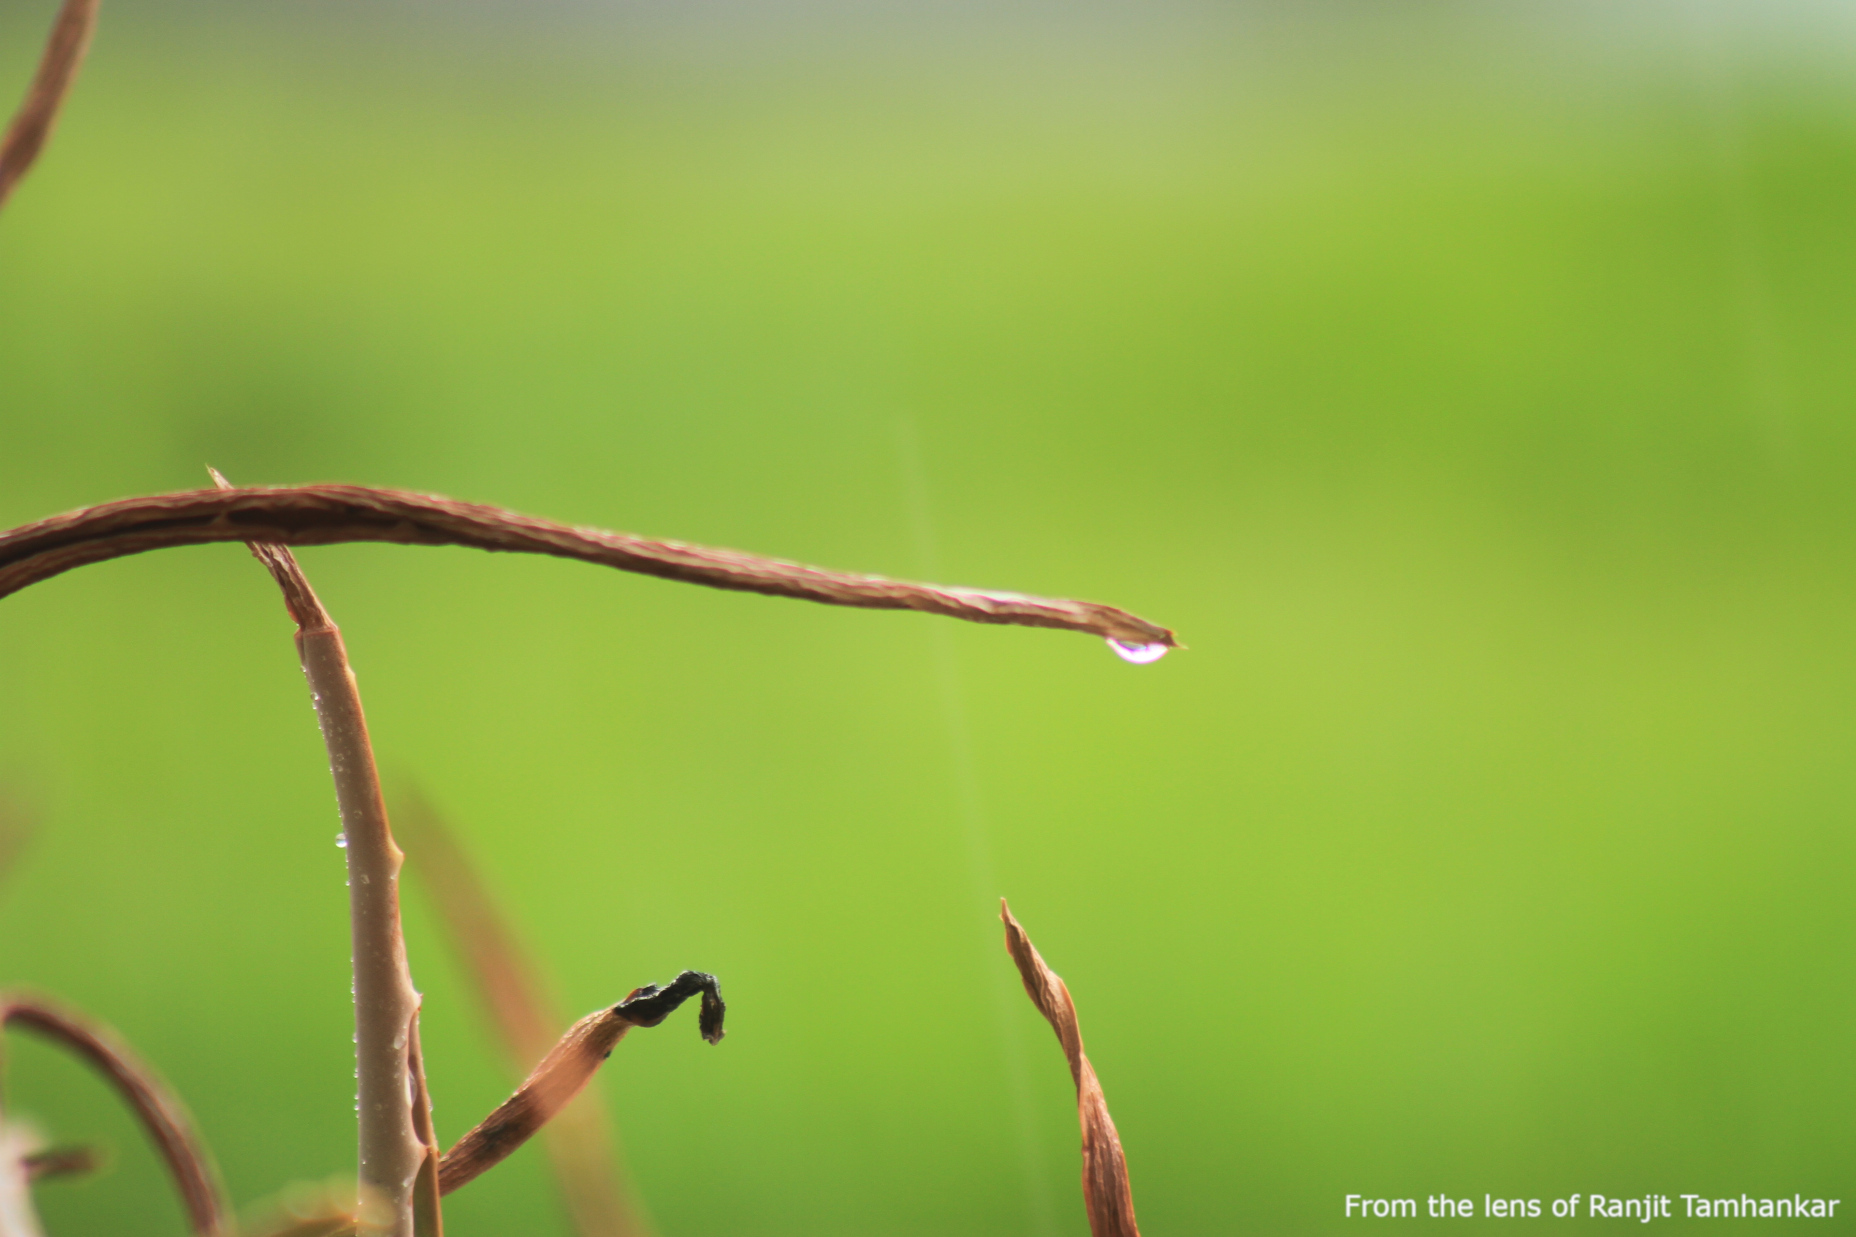
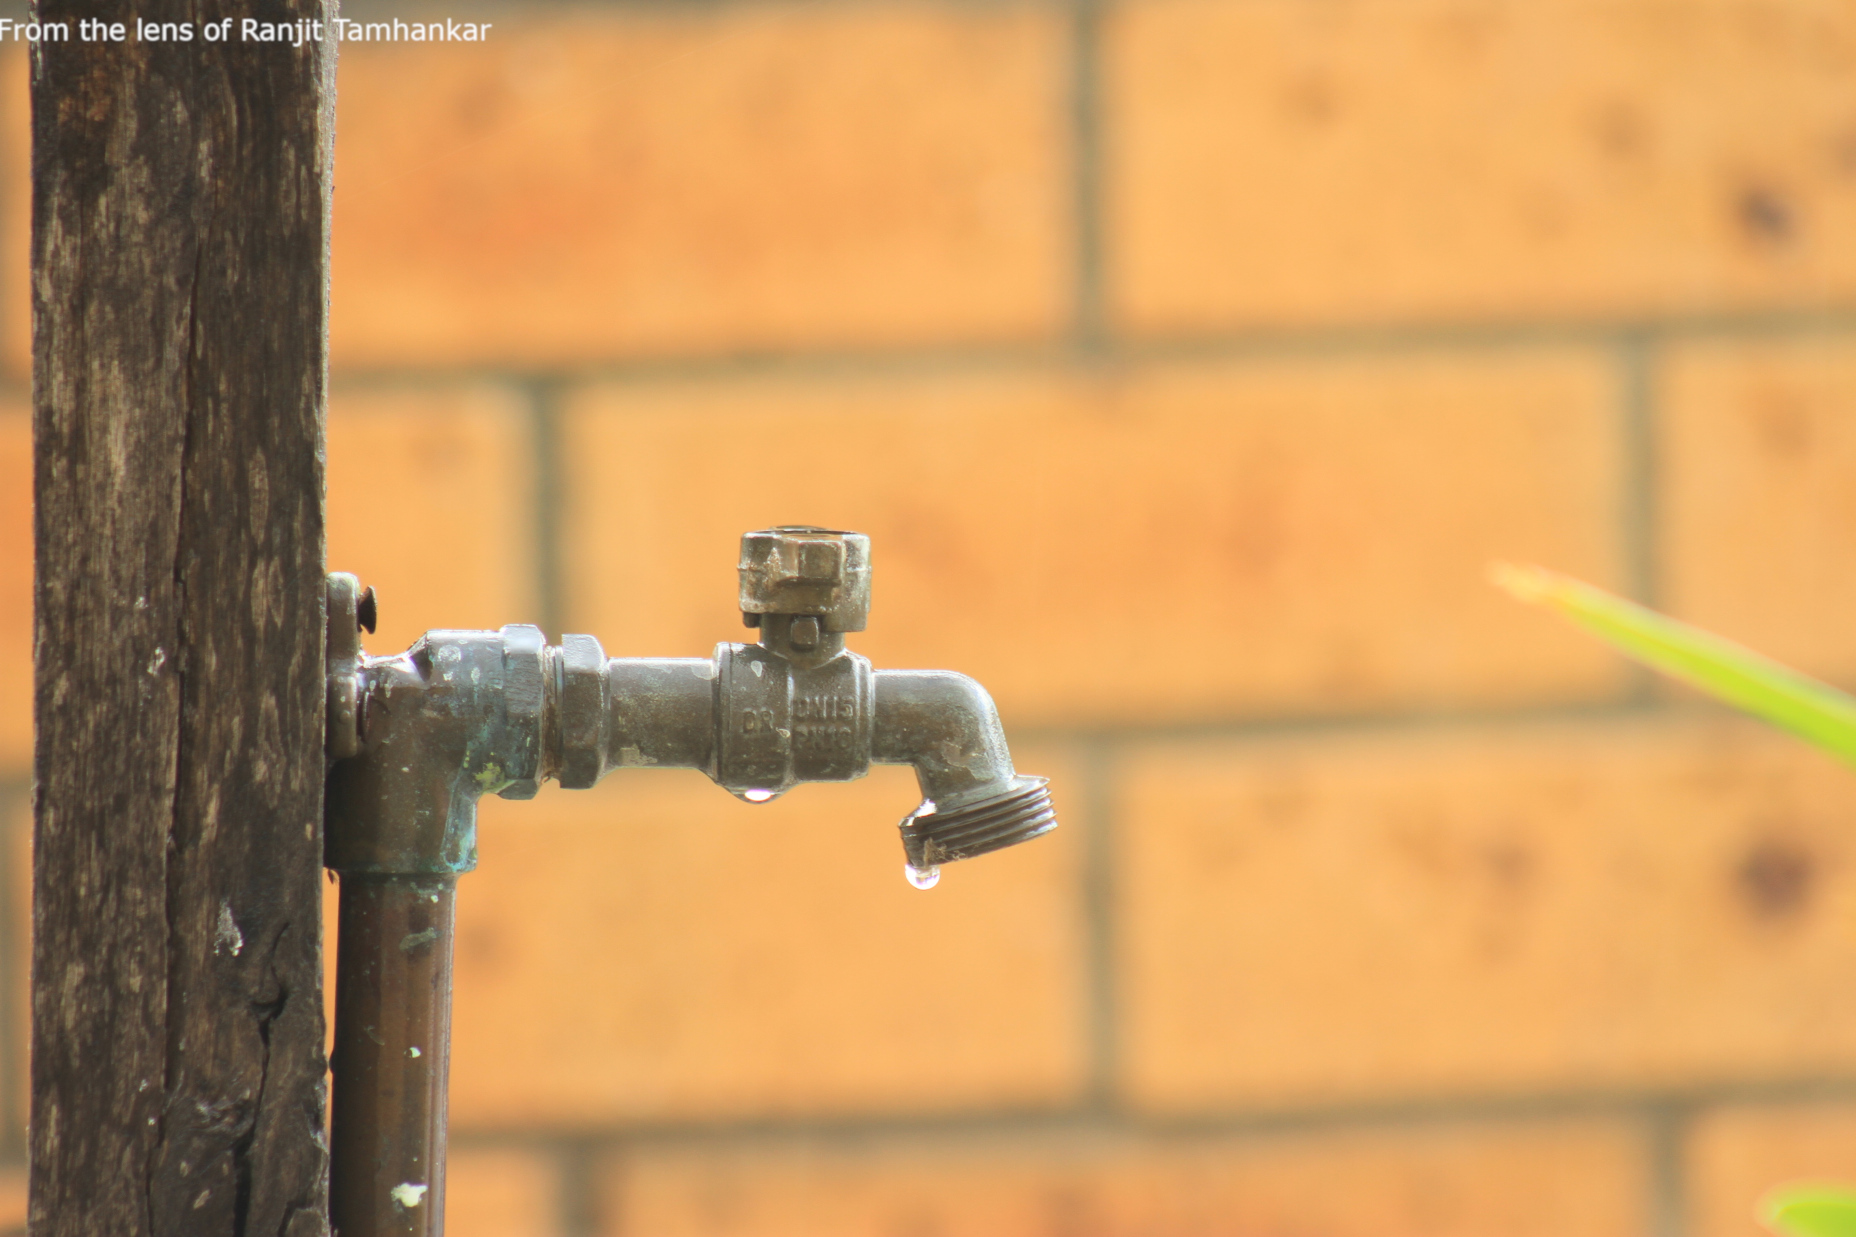
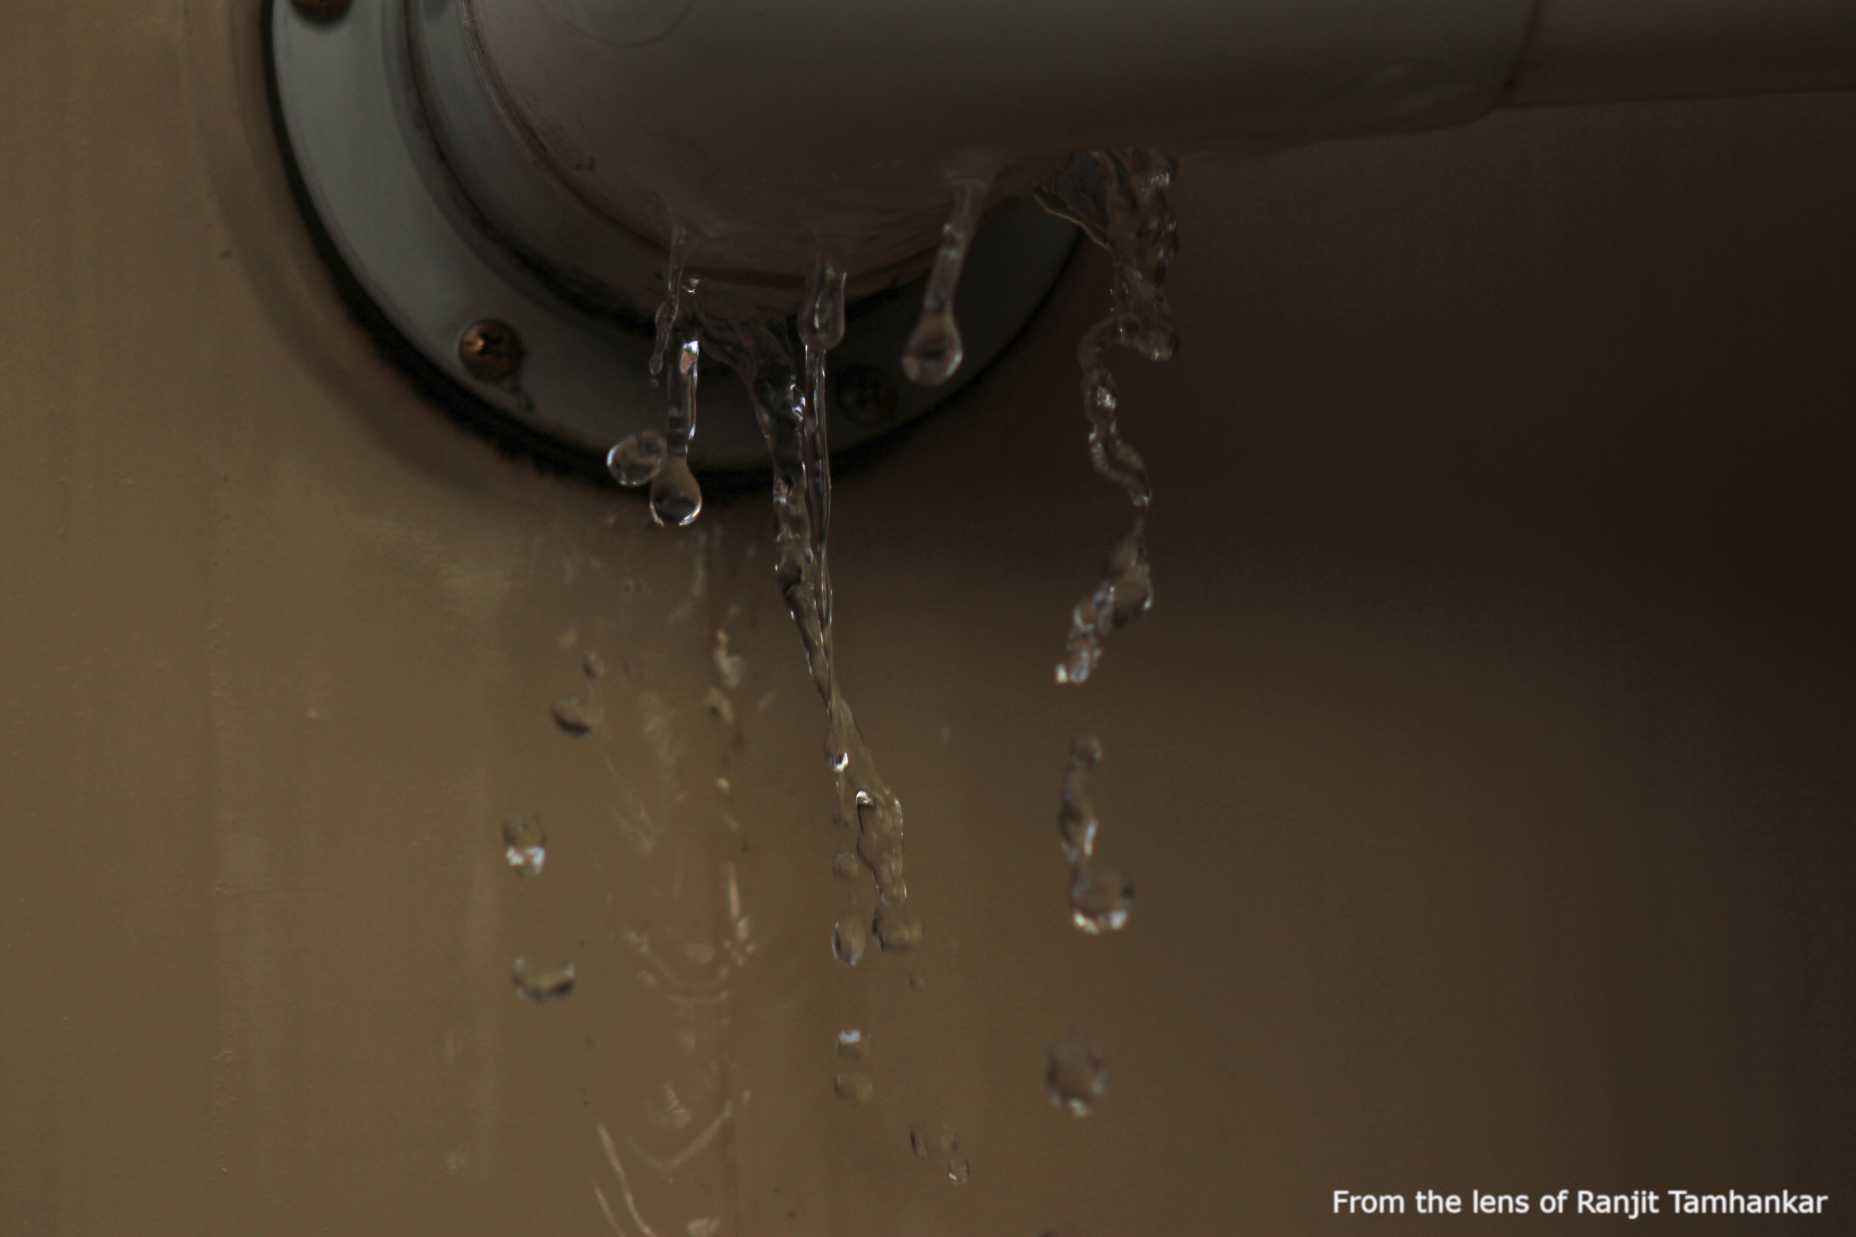
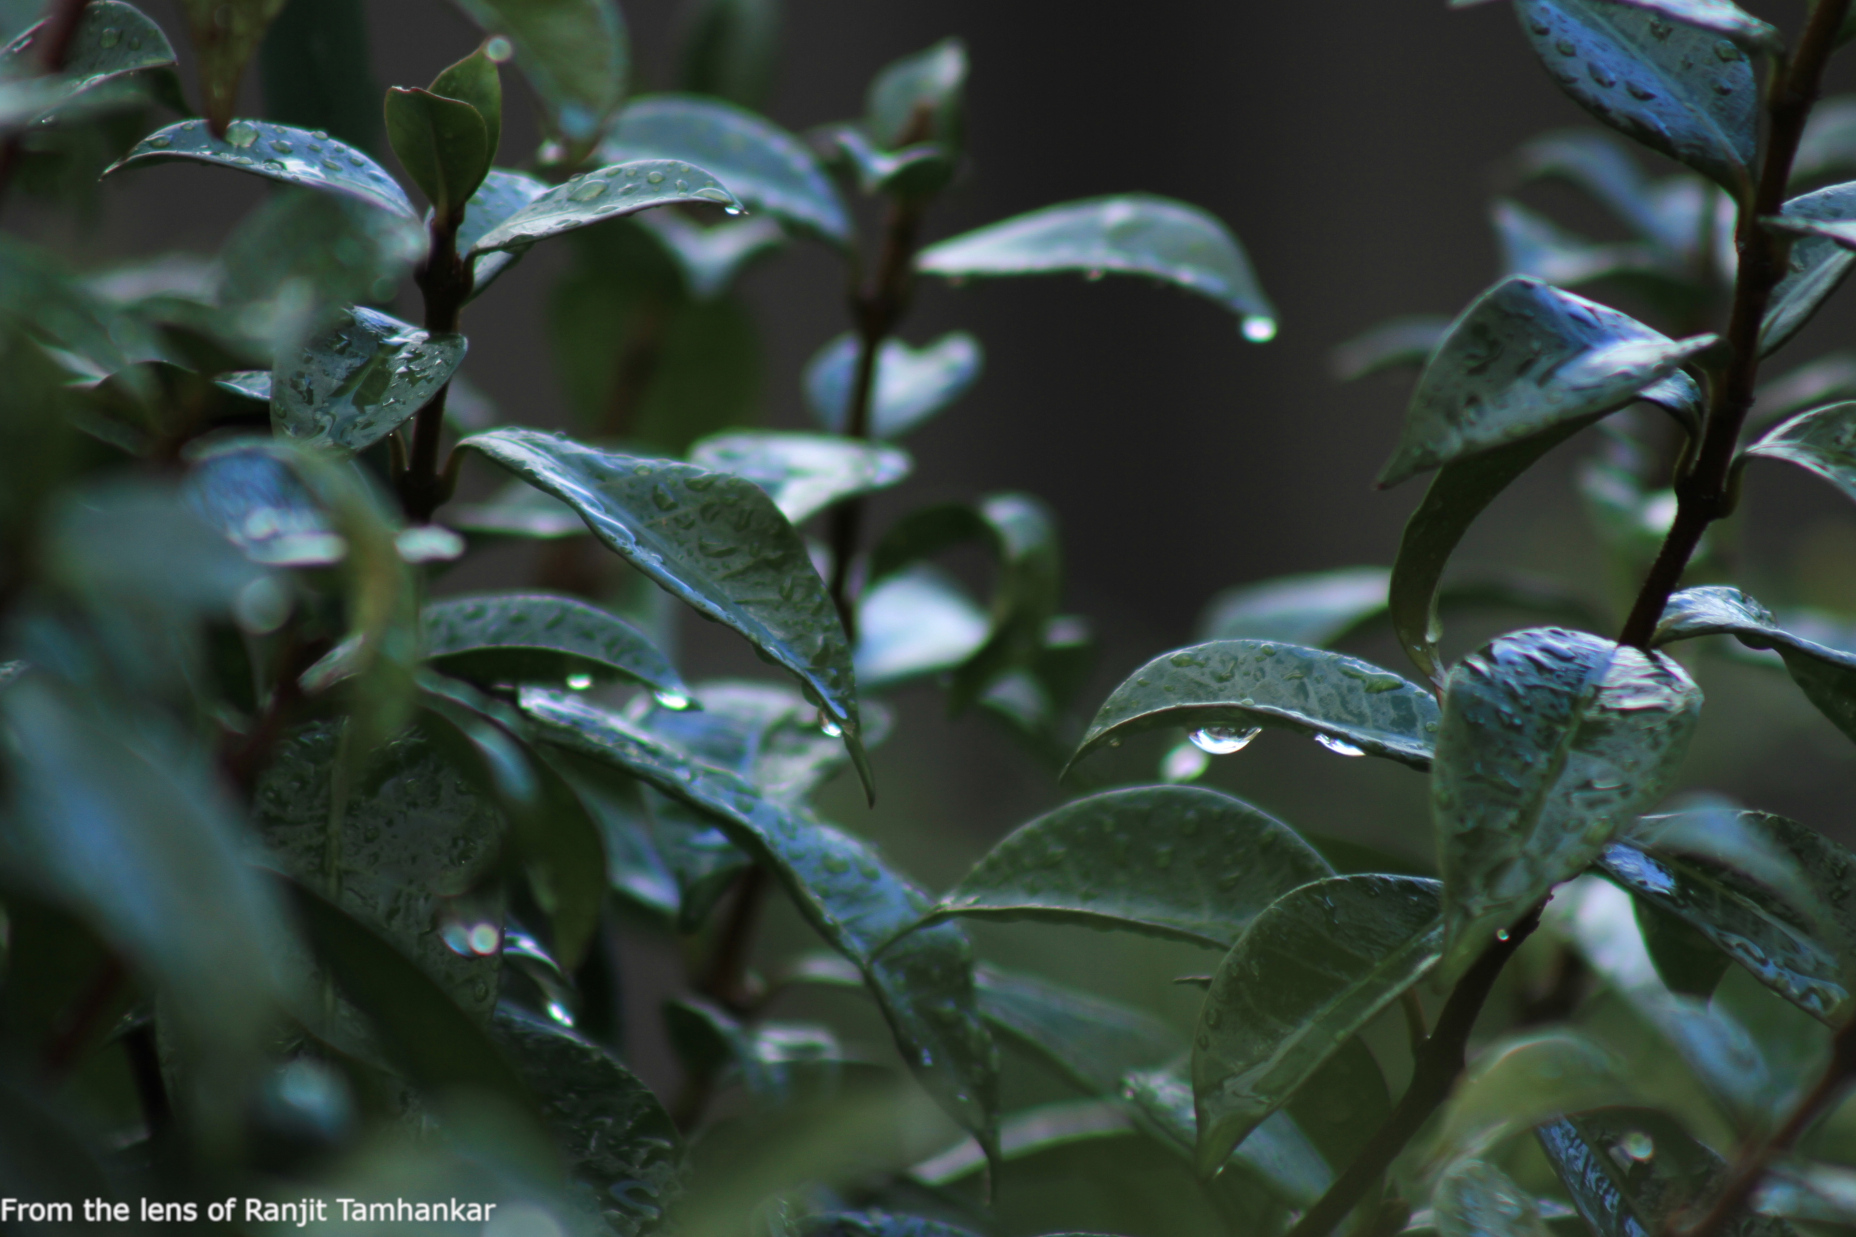
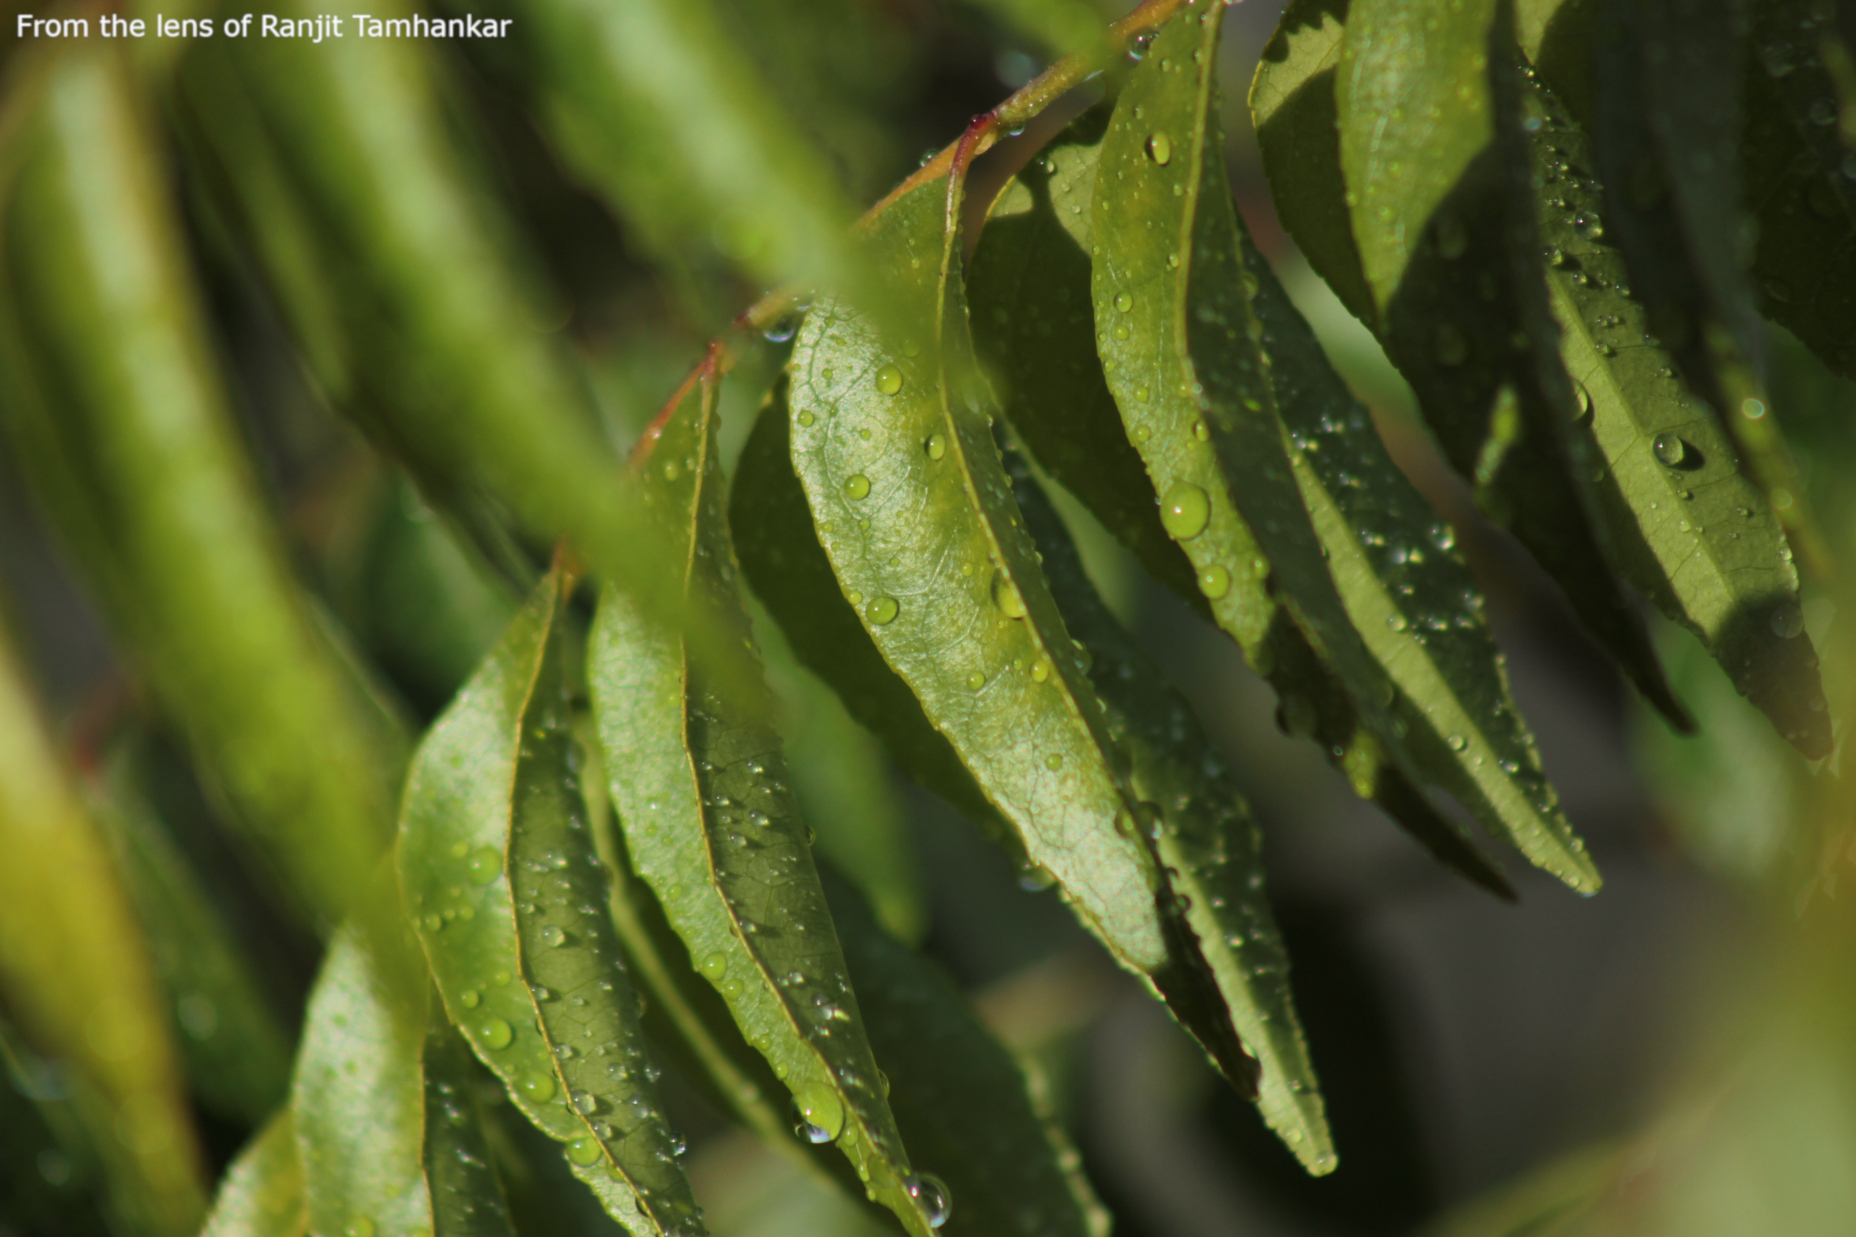
Yesterday it was raining heavily. I had opened up the living room blinds to get a good view and some light too. The atmosphere was dull but not so much for me to take a quick nap. So I decided to finish the book I was reading for some time. The book was of my favourite author James Rollins “Seventh Plague” and was very near for completion, some 40 odd pages to go. Seeing the pounding of the rain and the green bushes outside the window, I kept the book aside with HEAVY heart, grabbed my camera and sat down (literally) to take shots, all through the glass. Fortunately the window wasn’t that bad, almost clean, as you will notice there are no blemshes in the photos that you could identify.
I am satisfied with the way every photo has turned up, all through handhold – no tripod. I would say out of 100 odd snaps, 3 or 4 came out blurred due to the shake (the cold was making by body shiver a bit). By the way, all the snaps are taken in Aperture Priority
After I took these shots I realised that I didn’t have to go anywhere out. All the subjects were in my back and front yard, where all the action took place.
No more commentary now. Here are the snaps, 15 of the best.
If you need EXIF data on any of the pictures, please let me know. There are many snaps loaded this time and was a bit lazy to pull metadata on all of them and type them in..!!
Again as always, do let me know how you find them. Opinions welcome.
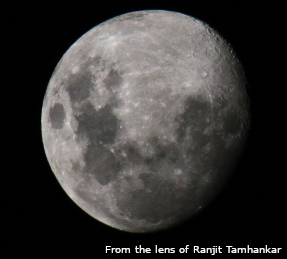
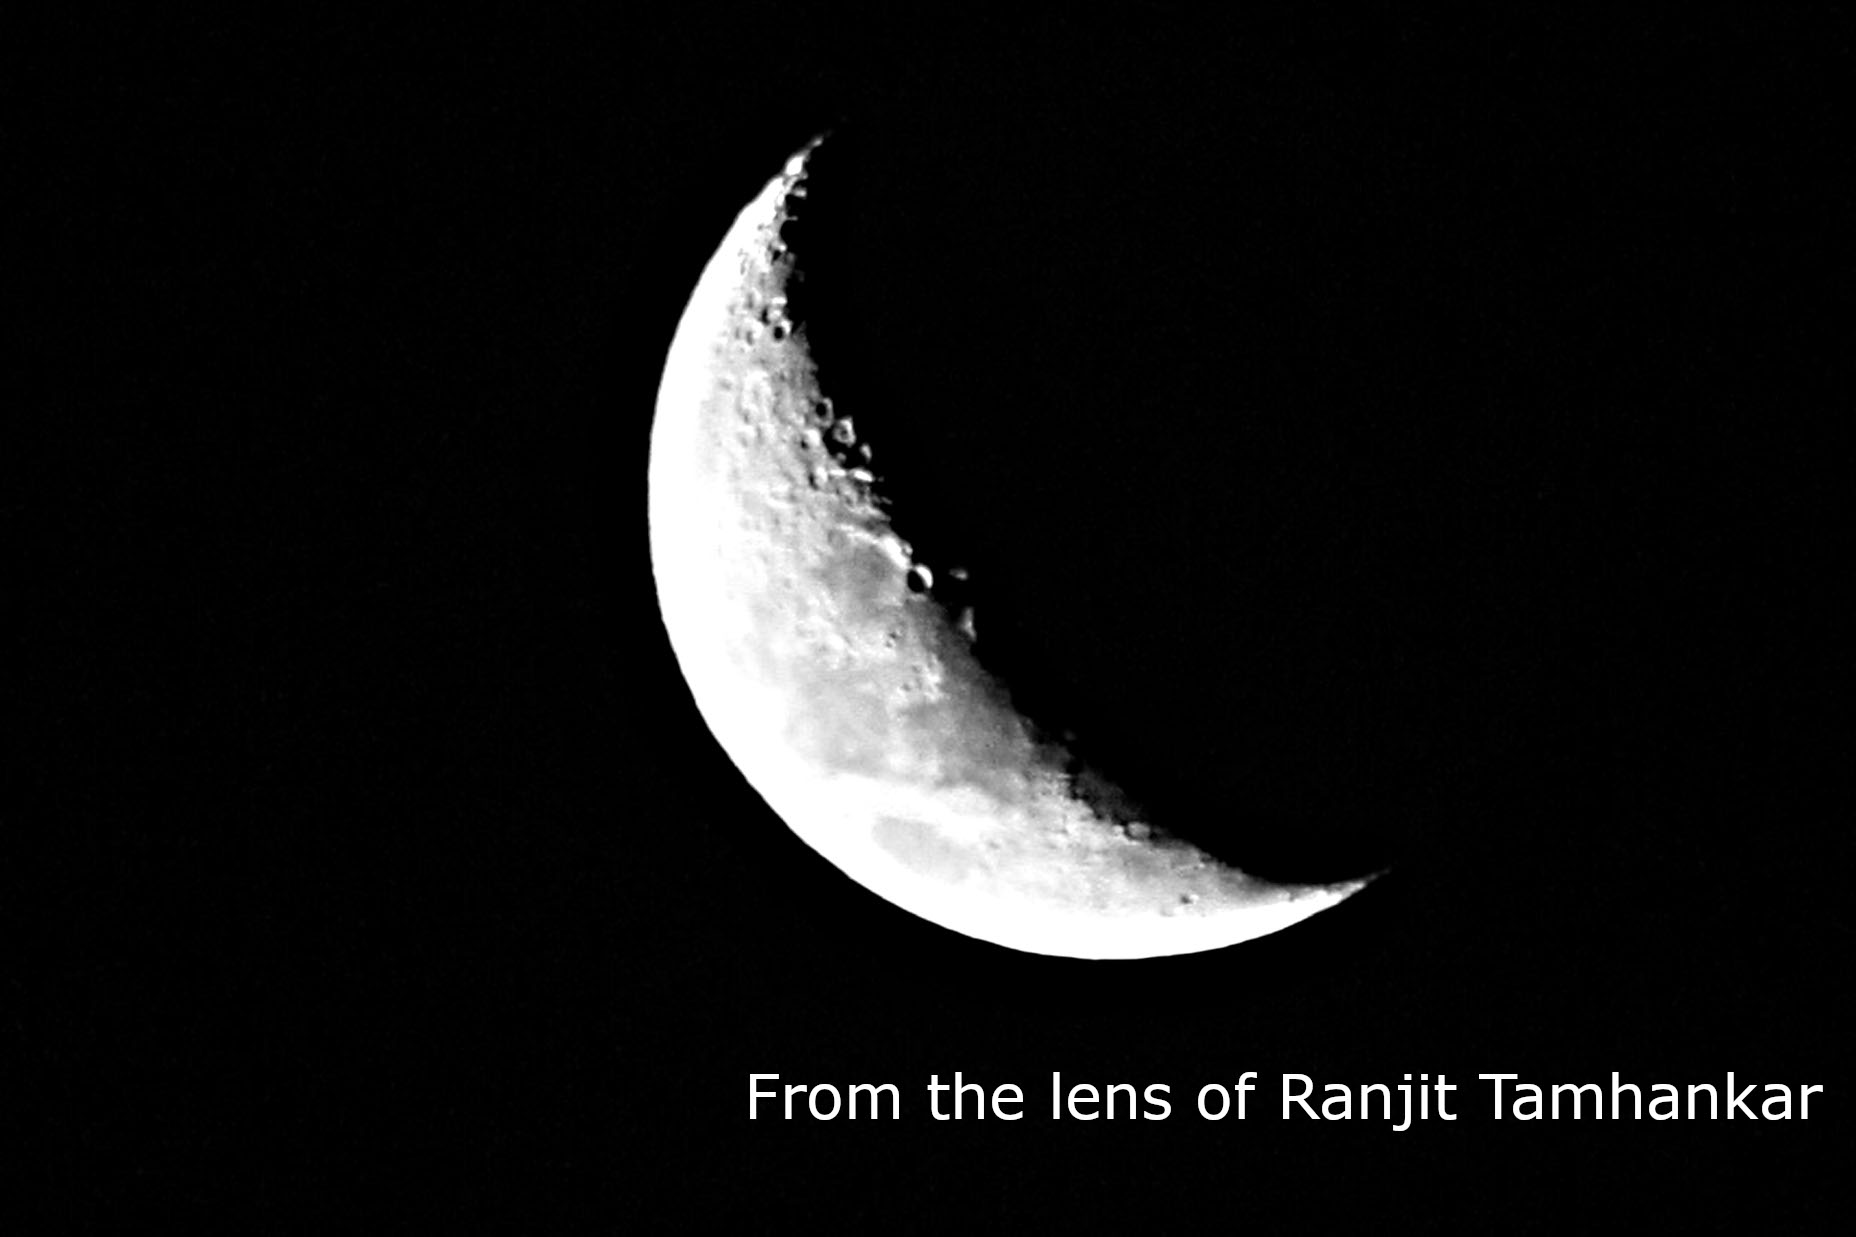
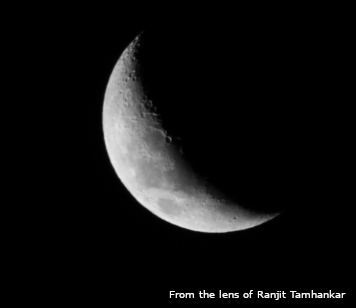
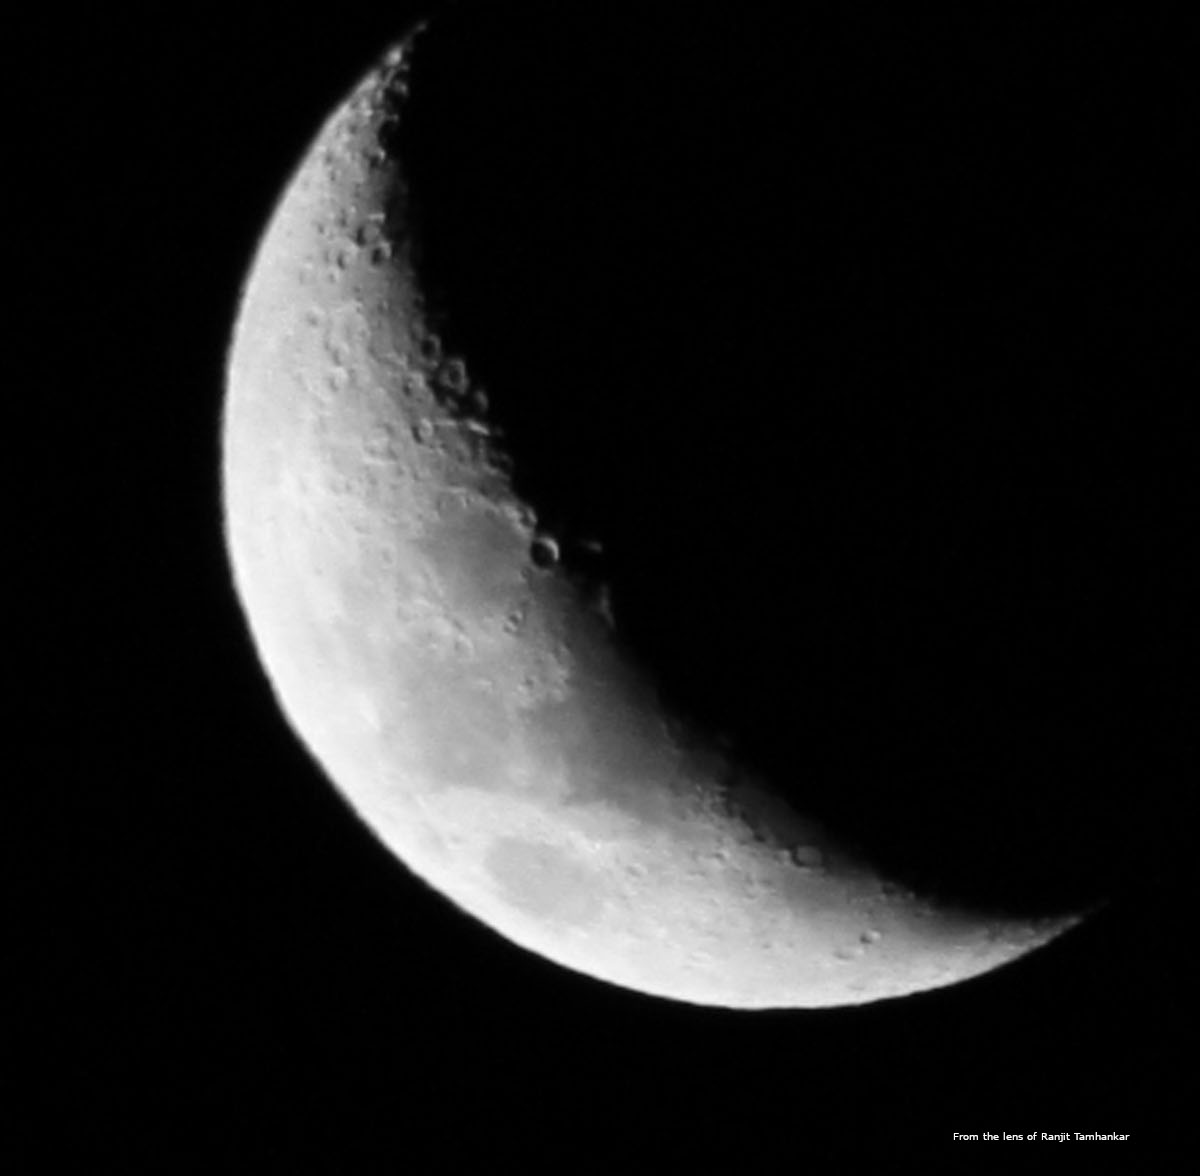
The following images are taken by Canon EOS 7D with a 75-300mm Ultrasonic lens. Shot in Aperture Priority (first two almost full moon images) and complete Manual mode (the crescent moon images) with a tripod. The Exif (Exchangeable Image File Format) data is given under each shot.
Taken on 16th May 2019; f/13; 1/400sec; 0 EV; ISO 500 Taken on 16th May 2019; f/8; 1/1000sec; 0 EV; ISO 500 Taken on 8th June 2019; f/5.6; 1/100sec; ISO 400 Note: As an experiment, I tried sharpening the edges which probably have added more white light to the edges but have sharpened the craters.Taken on 8th June 2019; f/10; 1/80sec; Kelvin Temperature; 0 EV; ISO 320 Taken on 8th June 2019; f/6.3; 1/160sec; Auto WB; 0 EV; ISO 400
These are not perfect images as one would expect, but a good start. I would like to improve upon these shots using correct exposures and get into a darker place while shooting it. To avoid the shake, while shooting the crescent moon I used the self timer of 10 secs. I have the remote but was a bit lazy to hook on..!!. Due to the delay, the moon shifted to the lower left corner when viewed on the camera screen. Next time I will be sure to use a remote or a 2 sec timer.
I will be glad if critics can suggest a better approach to take moon shots and opine on above. Truly appreciate readers feedback.
These images are straight from my backyard. You get only few seconds to capture the ever changing sky.
All images are unfiltered, which means they are not digitally manipulated other than for sizing. I used the GIMP application to add the watermark and resize (file size avg. 3MB to file size avg. 600KB) every picture.
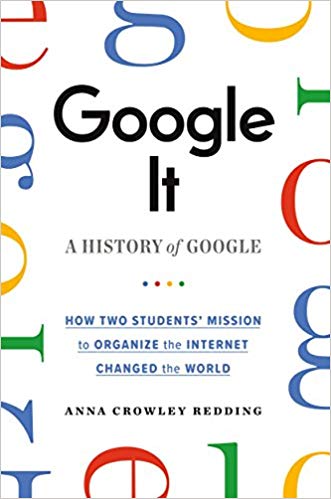
Recently I read a book on Google called “Google It”. It wasn’t a biography of a person but an insight into the organization itself and their founders, of course. I don’t like to read biographies of people, but this was something different. When I read the first page I got intrigued and finished the book in 3 days. It’s catchy and brilliantly written by Anna Crowley Redding. Some of you might have read the book or know enough on Google, but for those who haven’t been fortunate here’s an excerpt. Disclaimer – This article doesn’t intend to reproduce or copy-paste the book itself, instead is a gist of interesting facts, a story of perseverance in my own words.
Most of us know the founders of Google. It is a brainchild of Sergey Mikhaylovich Brin born in Moscow, Russia on August 21, 1973 and Lawrence (Larry) Page born in Lansing, Michigan on March 26, 1973. Both were studying in Stanford University. And as every student they had assignments and homework. Remember they were known to the world only after Google came into existence, so until then they were one among the crowd, nothing special other than their theories and thoughts.
In those years’ web was just in its infancy and internet was not so easily available to the masses. Now that they were student of Stanford, they had access to facilities and resources. If one had to so some research they must scoured through multiple books, articles and talk to people. If lucky, using internet would take at least 30 mins to search something on the web with no guarantee that the search will return expected results. Not much data and information were available in first place and spending time on a search wasn’t an efficient thing at all when you are working on a homework deadline.
Sergey and Larry thought of doing something for this problem and took it as their homework assignment. The year was 1996. Their first ginormous task was to download every page (used Web Crawlers to handle the task) that was on the web and then rank it to index. Oops..this is getting technical. I will not bore you on the intricacies of the process so will not delve into what they did and how they did. But can tell you that wasn’t any easy as they initially thought. Storage and speed were at premium those days. They had to beg, borrow, steal to get their job done. The outcome, an effective SEARCH tool, much faster than what was available. Word went out and students started using it. Everyday student would query, and the number of users started increasing. The duo called their homework/ experiment as BACKRUB, since it helped students as a rub would do for any aches.
Now that the tool was being popular and used by many, they had to continue to support the services they were offering. To do that they had to choose between schoolwork and running BACKRUB. Both being brought up and influenced by very intellectual and studious families, were expected to continue and get their PhDs. So, there was an emotional angle too before they could decide. They knew what they want so both dropped off from Stanford and donated 100% to the service. They must now move out of the college for two reasons, one was they were no longer a student and secondly, they now require a large space to carry out their operations which required housing of many computers, storage devices, cabling etc.
Later when the tool became popular the name BACKRUB sounded odd and not catchy. So, the duo met with their friends and colleagues to think on a new name. Many suggestions were dismissed. Someone yelled GOOGOLPLEX which immediately got accepted and short formed as GOOGOL (Googol is 1 followed by 100 zeroes or 10 to the power of 100).
On 15th September 1997 Larry and Sergey registered the domain name but misspelled it as GOOGLE. The mistake was catchy and better than the original, so they kept it. That’s how GOOGLE was born.
The issue now was how to generate money to support the ever-increasing cost of running the services as the service offered wasn’t gaining them any profit whatsoever. After many deliberations, they decided to sell their company and go back to Stanford to complete their PhDs. In 1997 they approached AltaVista (the then -year 1995- popular search service provider) and requested them to buy GOOGLE for USD $1M. Altavista rejected the offer. So, they continued with the help of few investors.
On 8th September 1998 GOOGLE Inc. officially became a company. Their first headquarter was in a garage (remember earlier I mentioned they had to move out of the Uni and find a new space) of Susan Wojcicki, the then colleague of Sergey and Larry. In 1998, Google had about 24 Million websites in their database. As the workload increased, they looked out for someone to join them and thus came the first employee (though technically Sergey and Larry were the first and second employee, but were also the owner) of Google, Craig Silverstein.
Wrapping up this article, I would like to take you to key milestones (not discussed already) in the journey of making Google to what it is today.
Google’s Motto – “Don’t be Evil”
August 1998 – Google DOODLE was born (honouring the Burning Man festival). Designed to commemorate holidays, notable events and achievements of prominent figures. This year it
Employee #20 Marissa Mayer – Former President and CEO of Yahoo
In 2000, Google launched MentalPlex (An April Fool act, it was a search technology that read the user’s mind to determine what the user wanted to search for, thus eliminating the need for typing)
October 2000 – Google launched new service called AdWords
September 2001 – Google NEWS was born (to keep people informed of all the news during the 2001 Twin Towers tragedy)
August 2001 – Eric Schmidt became CEO; Larry became President of Products and Sergey became President of Technology
In 2001 – Google launched IMAGES
December 2002 – Google launched FROOGLE (online Shopping)
1st April 2004 – GMAIL was launched
19th August 2004 – Google launched it’s IPO, trading by ‘GOOG’ on NASDAQ
In 2006, Google launched another service ‘TRANSLATE’ (to help multilingual communications)
Early 2005 – Google MAPS was launched (Google bought KEYHOLE – a digital mapping company – in 2004)
On Valentine day 2005 – YouTube was launched, which was bought by Google in October 2006 for USD $1.65 billion
In 2008, Google launched its own operating system called ANDROID
15th August 2015 – Google became part of a parent company named ALPHABET. Thus, Larry became CEO of Alphabet, Sergey became President of Alphabet and Sundar Pichai (a long timer) became CEO of Google
Key Terms used in this blog:
Internet: Giant network of Computers
Web: All contents, documents, files, folders and web pages
Web Crawlers (Spiders, Internet BOTS): A program that visits
webpages and reads them. Each crawler is on hunt for specific information. Once
found the Spider then creates a Database (DB) or Index of what it has
discovered, making the information easier to access.
Translate: It’s a free multilingual machine translation service
provided by Google. It supports over 100 languages.
IPO: Initial Public Offering
Doodle: A temporary alteration of the logo intended to celebrate notable events, holidays around the world, credit achievements of scientists and innovators.
To achieve good results or master a process one must follow certain rules. Photography isn’t an exception. There are few written rules which are said to make your photo look better because you now know HOW to take good photos. Few of the rules are listed below. I would like the readers to add more to it and suggest changes, if any. This blog combines the information of me reading (and later implementing) multiple books on photography picked up from my local library. So here’s rule number 1.
Rule #1: The “Half/ Double” rule In my previous blogs I haven’t discussed the term Exposure. You obtain exposure by combining the values of Shutter Speed, ISO and Aperture. To understand the Exposure concept better, please read the “Glass of Water” analogy. It is the easier way to understand the concept and the only analogy I found thus far. Now that we know what an Exposure means, this rule is about that.
Using any three values an Exposure is achieved, let’s say it’s our INITIAL exposure. Changing one value, will change the Exposure. In order to maintain the same exposure as our INITIAL, if you HALVE one element (either Aperture, Shutter Speed or ISO) you need to DOUBLE the other and vice-versa. For example, if you have a shot setup with a correct exposure of ISO 100, Aperture f/5.6 and Shutter Speed of 1/250, then based on the subject changes decided to cut the Aperture in halve to f/8.0 (remember Aperture is measure in ‘f’ stop and is inverse, so halving it will almost double the value), you would either have to DOUBLE the Shutter Speed to 1/125 (again the same maths as Aperture) or increase the ISO to 200.
Rule #2: The “Rule of Thirds” When we decide to shoot a prominent subject (a mountain peak, portrait, stationary animal etc.) we generally try to bring the subject in the center of the view finder thinking if we pan the subject in the center, it will be the only center of attraction. This is a false assumption or a myth. “Rule of Thirds” is one of the Composition techniques that allows an off-center composition which is pelasing to the eye and looks more natural. Again you can read more on it from the several available resources, books and internet.
The key elements of your photo should be arranged in thirds. Divide (imaginary or use the Grid Lines, if a feature in your camera) the scene into a matrix of 3×3. The focal point of your shot should be positioned with 2/3rds of the scene to one side, and 1/3rds to other rather than in the middle or close to the edge of the frame.
Source: photographycourse.net
As you see, the stone tower is positioned to left than in the center which gives this photo an appealing sense and a greater value. Make use if those 4 connection dots to position your subject.
All these rules are guidelines. If you don’t follow, no harm, as long as you are happy with your way of subject exposure and composition. Sometimes it is better to not follow the rules to achieve a different perspective, professionals calls it as Breaking the Rules..!!
Please send in your comments, opinions, and any other rules you may know of.
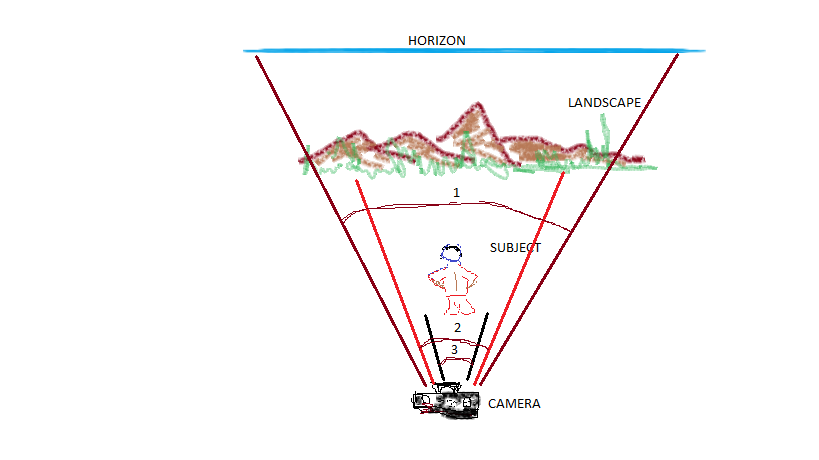
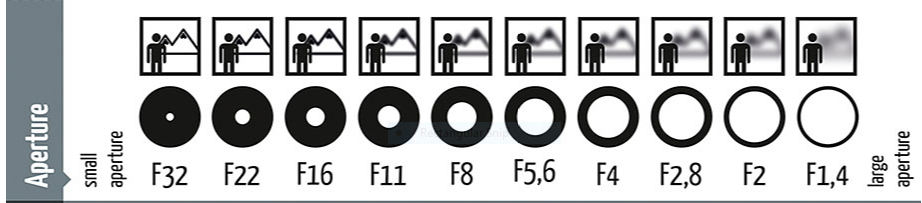
The following is a guide on the Aperture sizes based on the area of reference. A crude drawing (drawn in Paint), but works to pass on the message..!!
Aperture Focus – Visual
The above diagram displays three different areas in focus, Subject, Landscape and the Horizon. To denote the focal area for each I have given them a unique id 1-Horizon; 2-Landscape; 3-Subject. Refer the following table now.
Unique Id
Aperture Size
What’s in Focus
f/stop
1
Smaller
Entire shot in focus
f/32
2
Medium
Most shot in focus
f/11
3
Largest
Subject in focus; everything else behind is blurred
f/4.0 or f/1.8
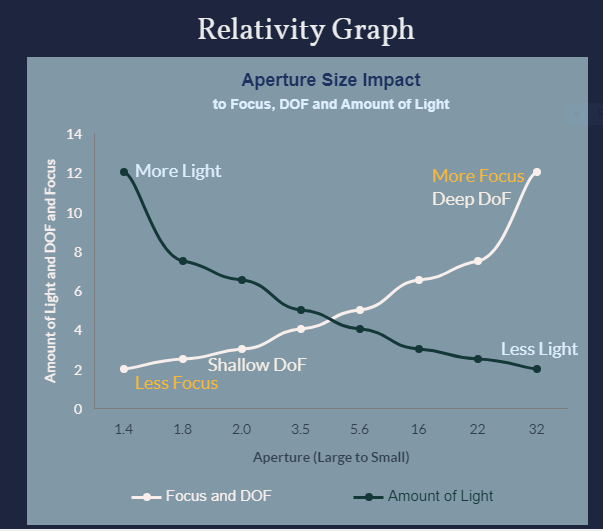
The following is a GRAPH (drawn in Visme, an infographic software), visually depicting how the Amount of Light changes when Aperture Size changes and how the Depth of Field (DoF) varies and how the Focus changes. Me being a visual guy, I understand such relativity better when shown in picture.
How to read the above graph:
The larger the aperture (f/1.4, f/1.8) – Less Focus and Shallow Depth of Field The larger the aperture (f/1.4, f/1.8) – More light can come in The smaller the aperture (f/22, f/32) – More focus and Deep Depth of Field The smaller the aperture (f/22, f/32) – Less light can come in
Note: The numbers representing “Amount of Light” are just indicative to show an ascending growth. They are not scientific data. Probably if I research I can replace them with actual scientific unit of measurement called Candela (for curiosity sake,Candela is the standard SI unit for measuring the intensity of a light source for photography), but I won’t. I want to keep this as simple as possible for everyone to understand.
Readers, please let me know what you think about the visuals. Do they help?
“Amount of light let in through the shutter is directly proportional to the amount of time the shutter is opened”
For example, an exposure of 1/500 of a second lets in TWICE as light as 1/1000 of a second. The following picture (Googled) might help understand the factor.
Effects on subject with changes in Shutter speed
Usage: On your camera select the Shutter Priority mode (TV or S). Use, when your subject, or any part of your shot is moving or when there are issues with getting enough light for a correct exposure.
2: Aperture
“Controls the amount of light that is allowed through it to hit the sensor”
A large aperture enables more lightto hit the sendor for the duration of time shutter is open. Aperture is usually expressed in f/stops (f/1.8, f/5.6). For example, a SMALLER f/stop (f/2.0, f/3.5) number indicates a LARGE aperture . Conversly a LARGE f/stop (f/16, f/22) number indicates a SMALLER aperture. The following picture (Googled) might help understand the factor.
Effects on subject with changes in Aperture
Usage: To acheive a good “Depth of Field-DOF” – The amount of an image that is in FOCUS. Shallow DOF means little of the image is in focus; Deep DOF means more of the image is in focus.
On your camera select Aperture Priority mode (AV). This mode gives you the freedom to select desired aperture value such as f/16 or f/22 to get a deep depth of field, while the camera take care of the shutter speed and ISO.
3: ISO
“Measurement of your camera sensor sensitivity to light”
Higher the ISO number, the camera is more sensitive to the light and produce more digital noise.
The higher the ISO the picture will have more noise (more grainy)
Usage: Usually most of the advanced cameras will have this set to AUTO. It starts from 100 and can go to 1000’s depending upon the size of the camera sensor. In broad day light when outside ISO100 works perfectly fine. If you are inside with less light to capture a photo, increase the ISO. In summary, LOWER the ISO when shooting in brighter light, INCREASE the ISO when shooting in dim or less light.
This blog is meant to be a refresher for some and information for others who are just entering into the world of DSLR. By no means I am planning to create or recreate a book on Photography. This is the first blog on the science. More will follow soon.
I have been on many camping trips in my 10 plus years of stay in the USA. First 4/5 years we did strict tent campings, then moved to cabins/yurts, and later started on remote campings (no electricity, no gas, no water, just a wooden or stone made house). I enjoyed every bit of it, being an avid nature lover. My very first camping trip was Uluru since we migrated to Australia. The Outback adventure tour was something out of this world, though. This was a trip that even the trip organizing company (name withheld) didn’t quite know about. This blog is not about the Uluru rock (a.k.a Ayers rock) but the time spent there. One can read about all the facts of Uluru on the internet if interested.
The day came. The plan was to fly from Melbourne to Alice Spring. Stay that evening and start bright and early morning (5am) on a 6hrs trip into the outback. There were 3-4 pick-up locations and our hotel was on the second pick-up point. We three (me, my wife and our son) and other two – elderly but young couple from Melbourne- boarded with us. It was a mini-bus, a bit set back, as I was hoping for some sort of a rugged 4×4. However, since the group had 15 members, they had to arrange for a mini-bus. The driver, a happy go lucky guy, helped us put our luggage in the caravan attached at the back of the bus which also housed all kitchen stuff – utensils, food etc. Sleepy, we settled in, as the bus made few more pick-up stops and when all were in, we started the arduous journey into the most awaited arid landscape, which I have only heard and read about. It was something we three have never experienced, not even the Arizona, Nevada landscape come closer to this. We were aghast by the flat land, red sand, sun beaming strong – even in early morning and no human being visible anywhere. It was September of 2015. We choose this month as it is still winter and a better month to be in Uluru.
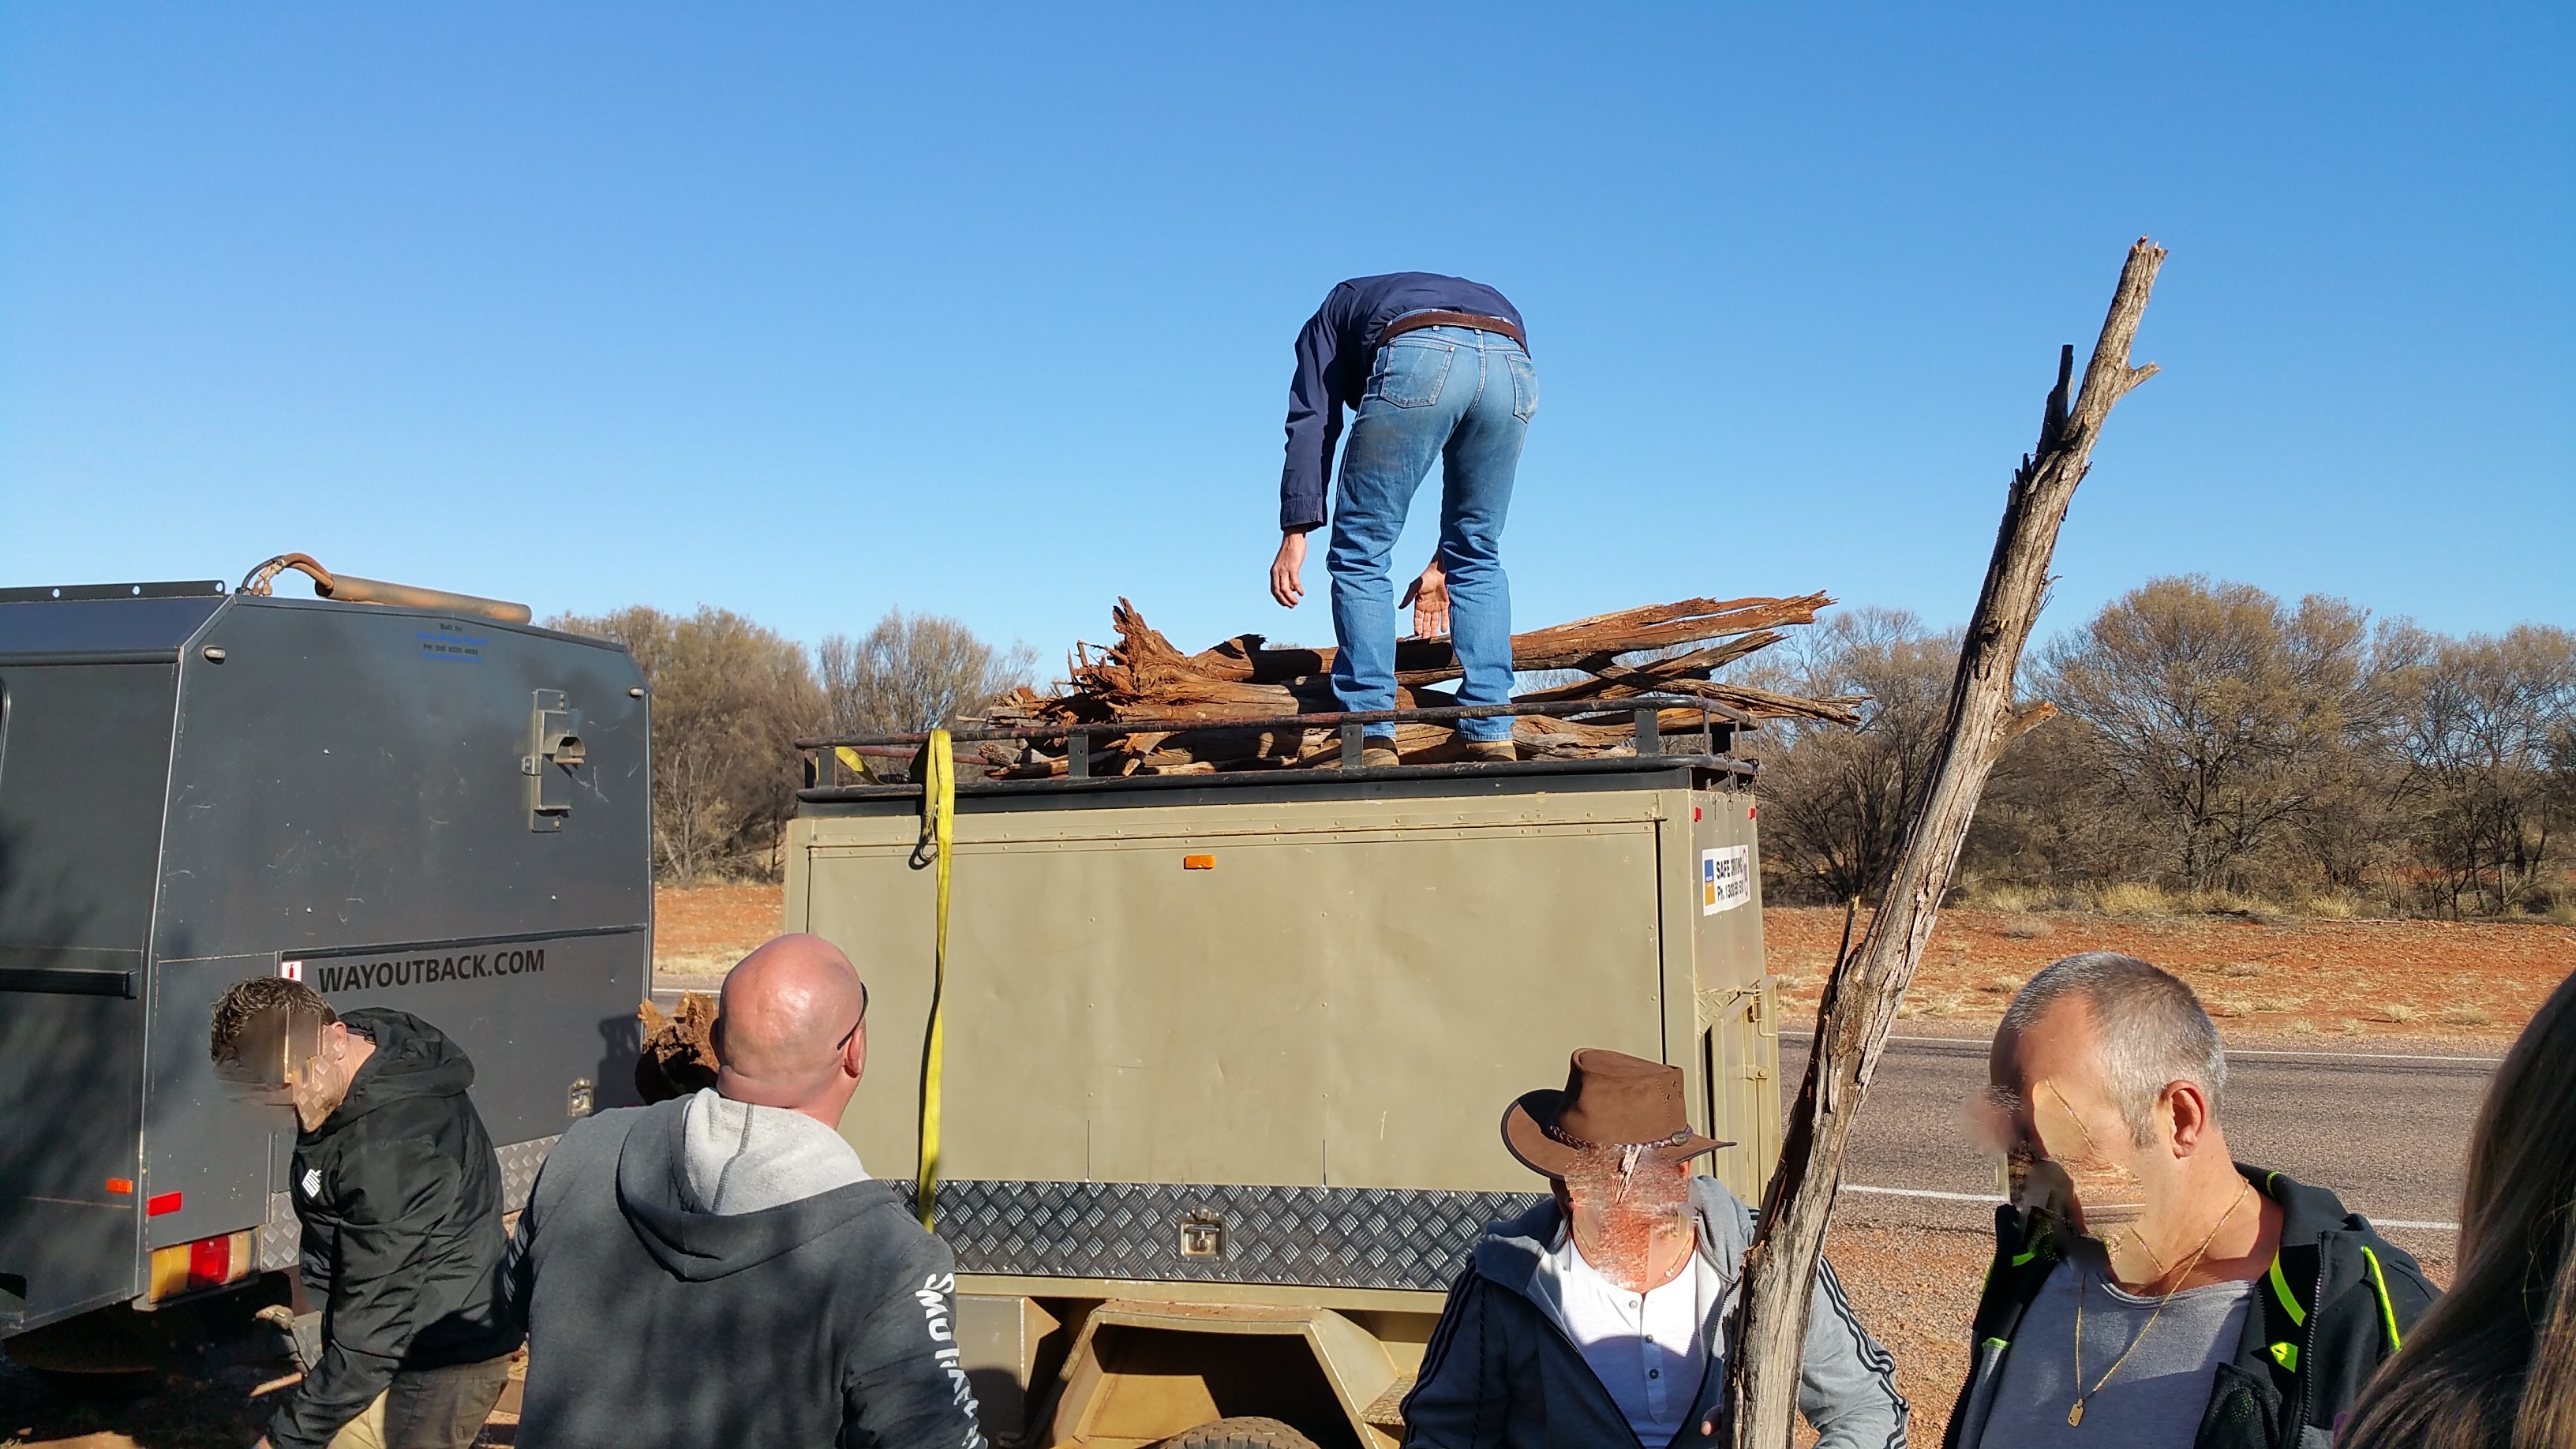
On the way, we stopped to collect woods for our evening itinerary. This trip being completely in the outback, there were makeup tents and cooking areas and common toilets/bathrooms in some areas. New day, new site, a new camp was the theme of this trip. NO permanent establishments on any sites. We later found out that the cooking was to be strictly on coals as we were bare with amenities on this trip, leaving an absolute nomads life. Hence the wood collection. All of the group members soon embarked upon wood hunting and soon there was a huge pile of woods, good enough for that night and early morning. This was then a routine every single day.
Firewood collection and loading
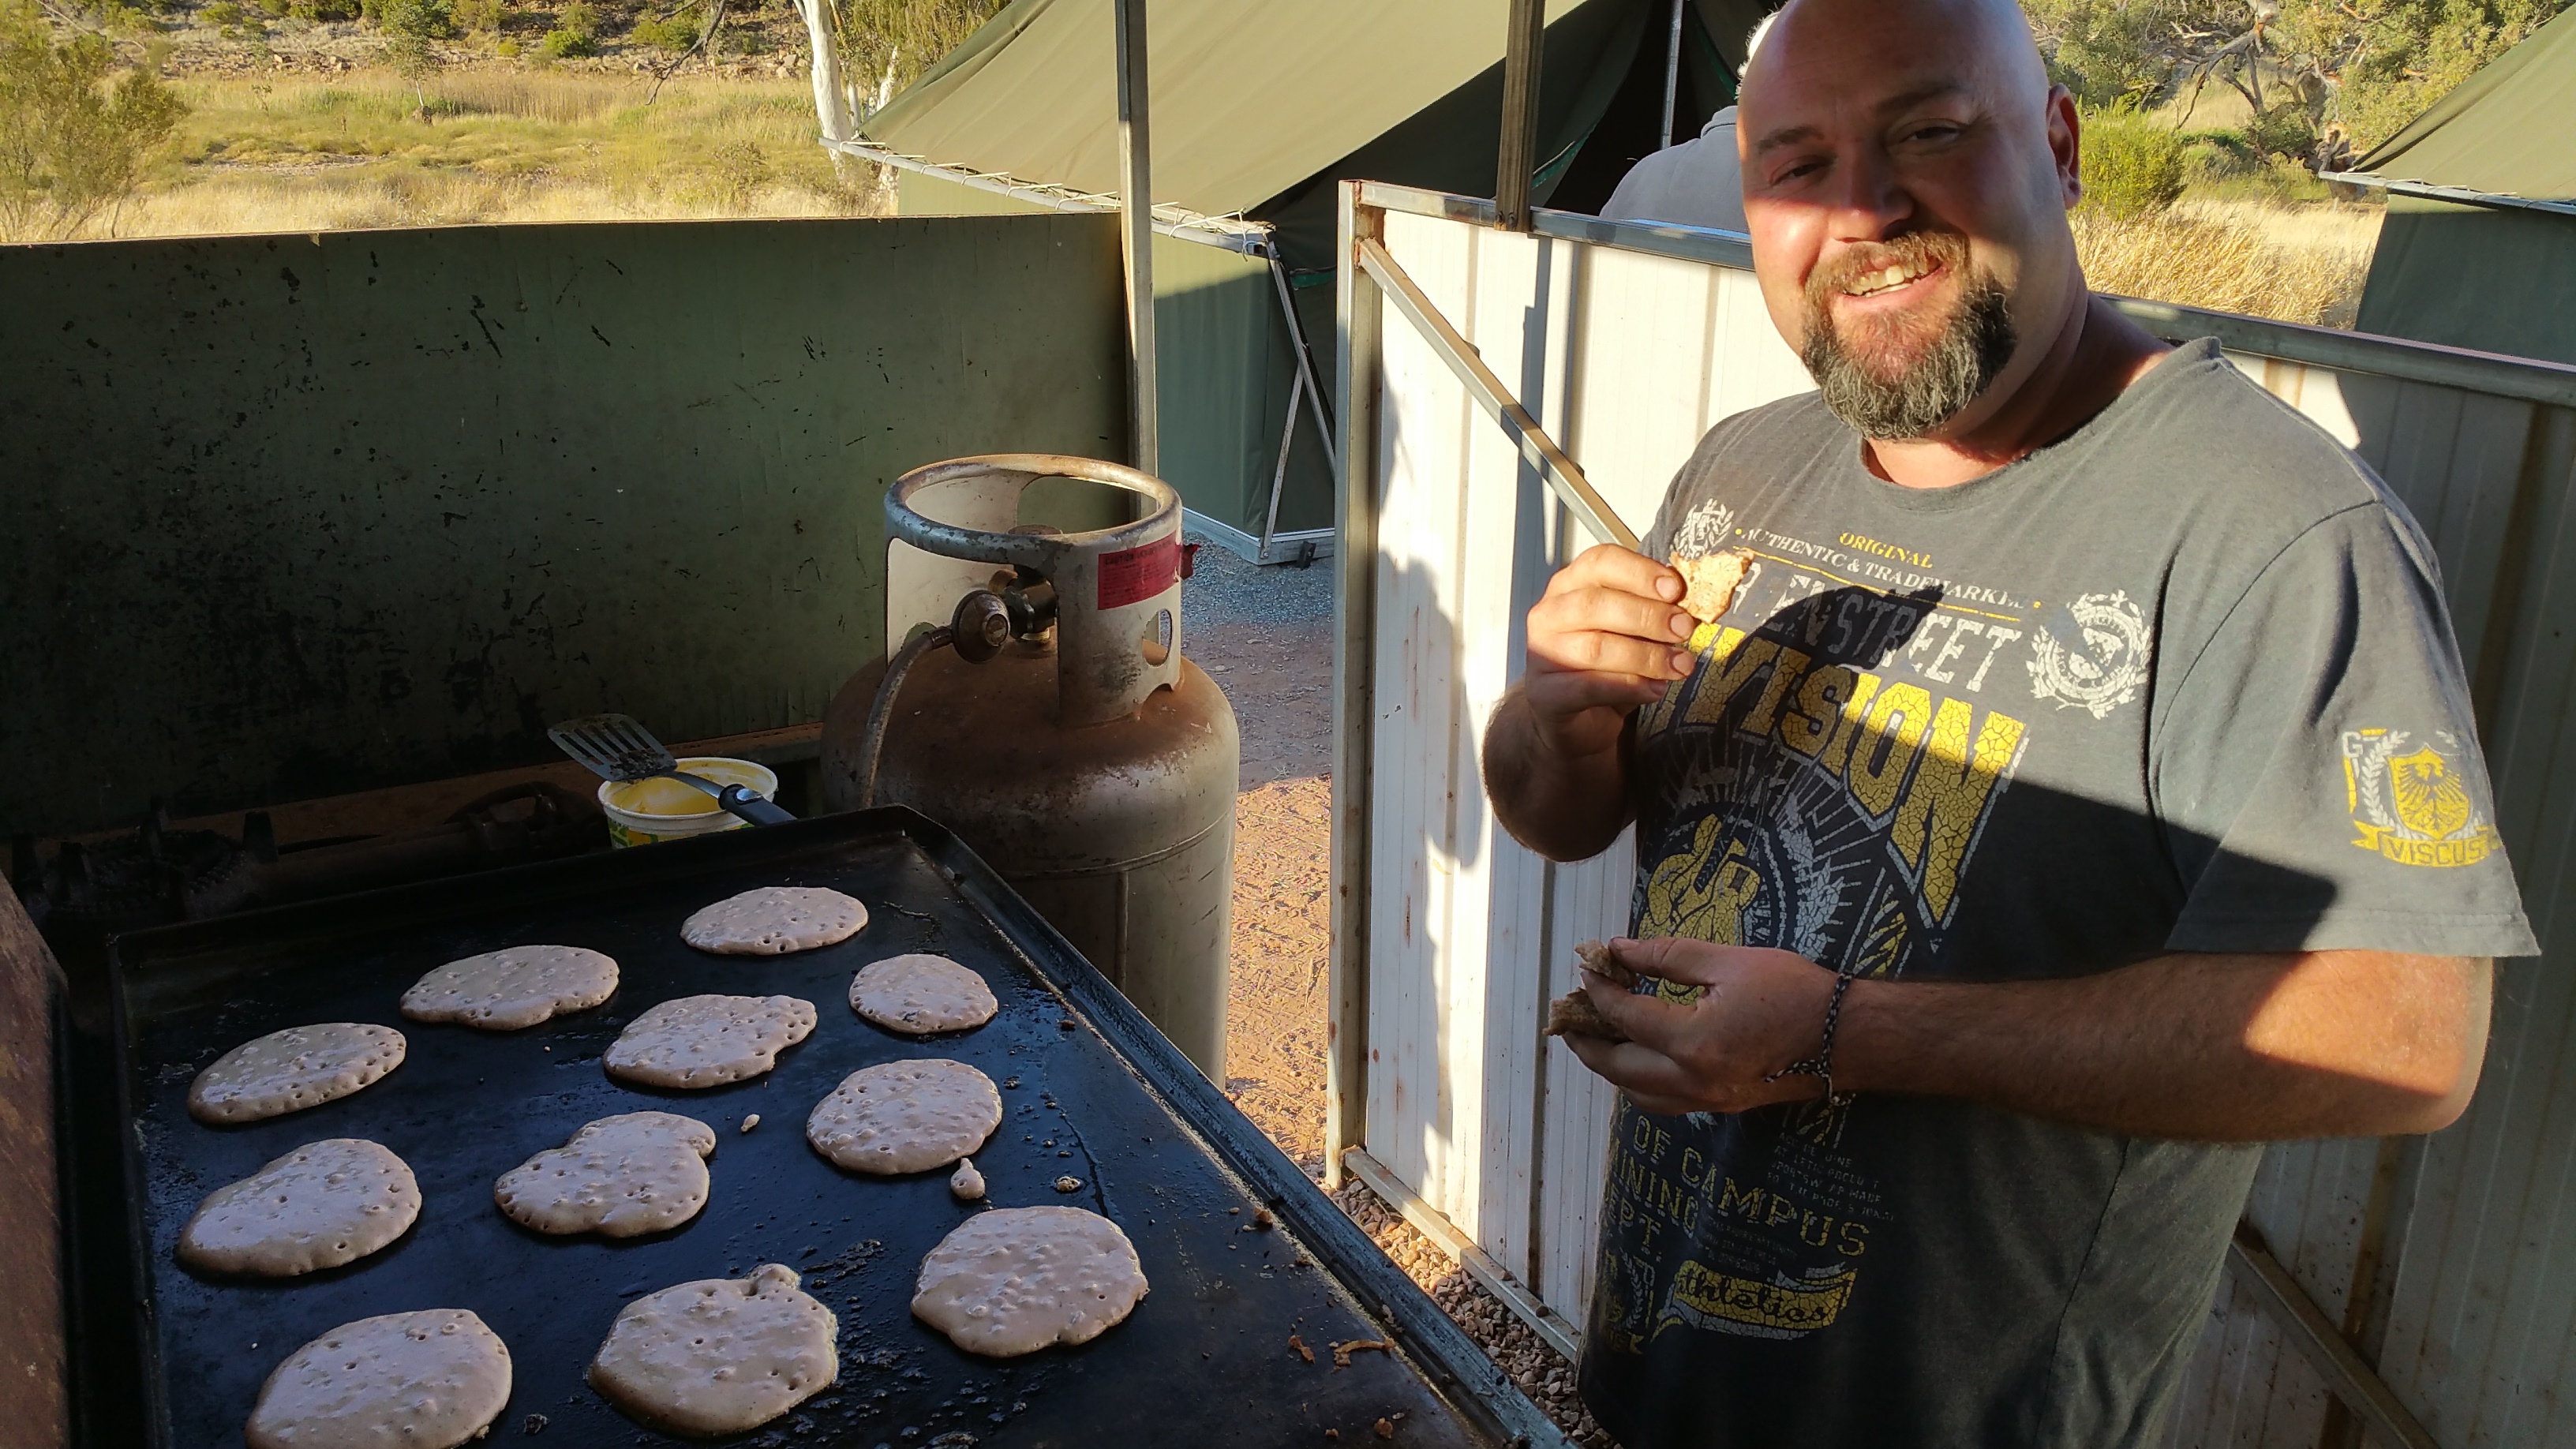
We were driving through the rugged terrain of Kata Tjuta National Park with the sun blazing up in the sky and air-condition in full swing inside. The temperature was soaring as the day progressed. We were taking it all in what the landscape has to offer. We did stop for some refreshment at one of the locals. Our driver and all of us helped cook breakfast at the facility. A different experience altogether.
Pancakes – from scratch – in the making. There was an area with a shelter provided with a portable gas and a grill. Any bacterias that would be lurking in this facility would have been dead already due to the heat :-). We lived with this assumption for the entire 5-day trip..survival of the fittest?
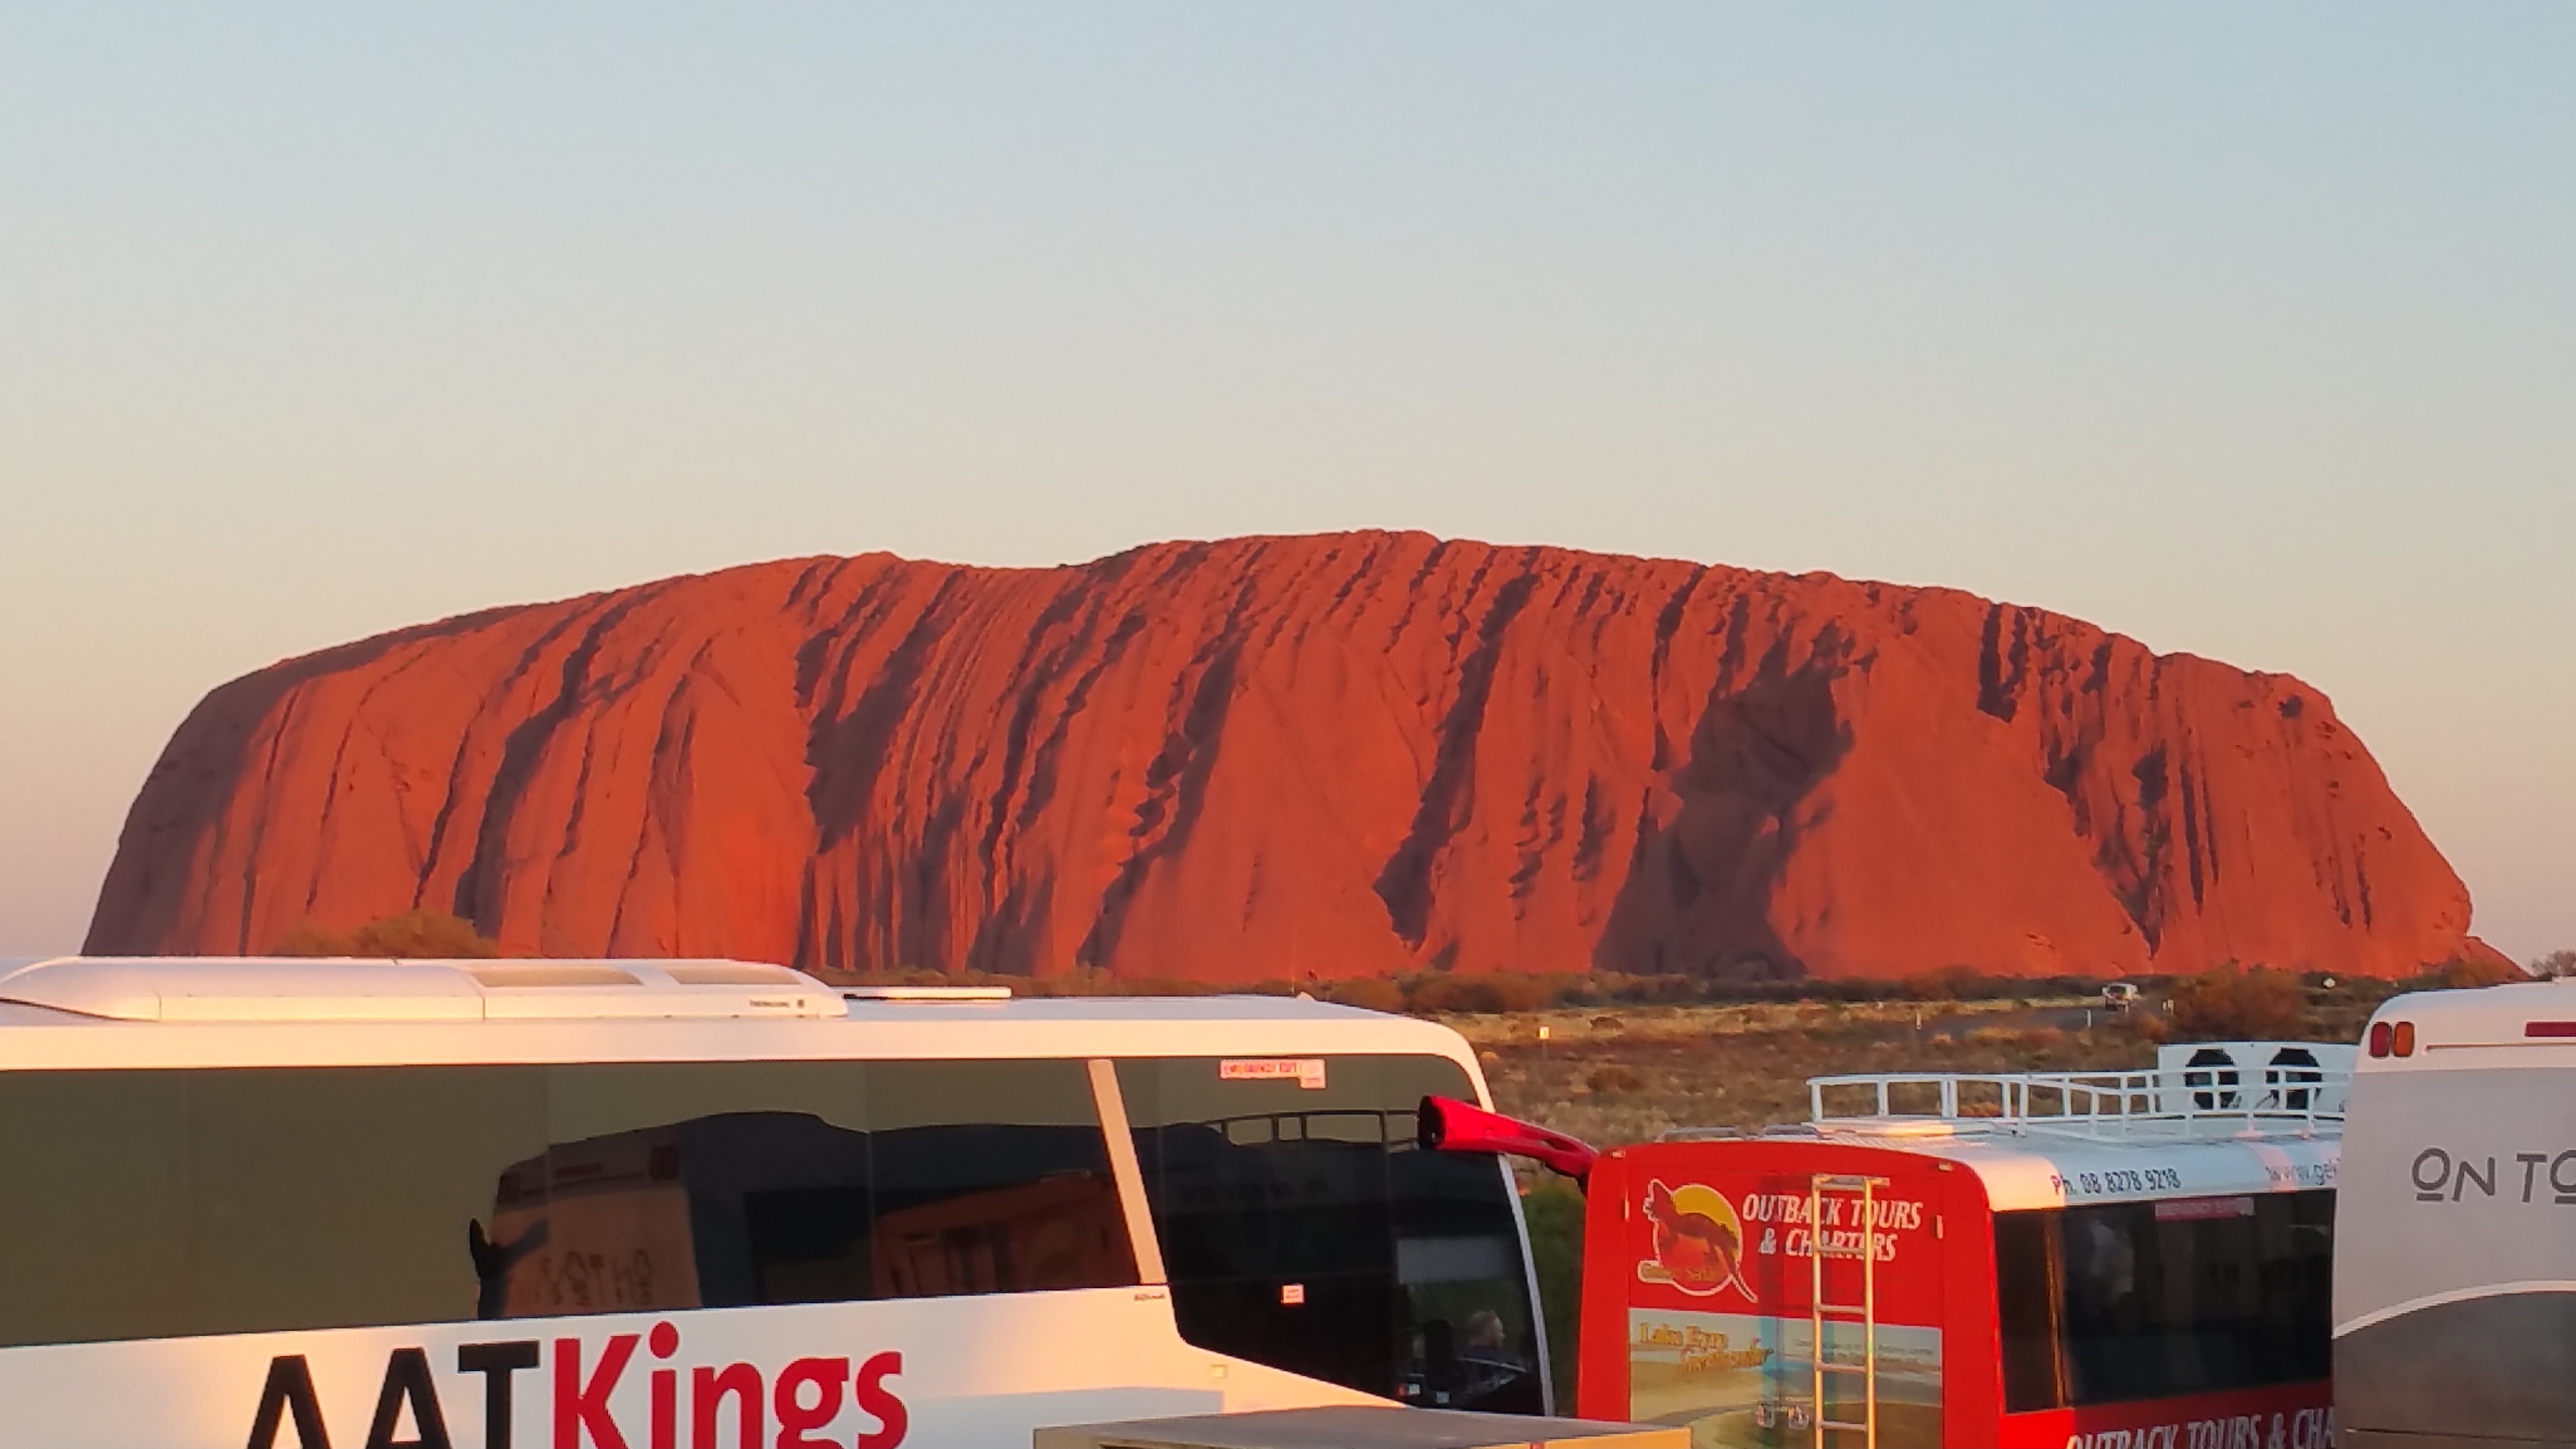
The afternoon was devoted to enjoying the sites of Uluru, including a visit to the cultural centre to learn about the Tjukurpa (Aboriginal law/religion), a full base walk (10 km loop, 3.5 hours). There was an option to climb the rock but we decided to not do it in order to pay respect to the culture, so we base walk instead. Uluru is a sacred site and Anangu, the indigenous custodians, respectfully ask visitors not to climb it. We all were wondering how the rock could be climbed as we didn’t see a way to do so. The rock is completely smooth with no crevices or outgrowth to hold on to. However, on one side we saw a few metal bars with a rope running along to hold while climbing. But we didn’t see anyone doing so. Glad that people respect the belief of the custodians.
It was then time to view the magnificent sunset on Uluru, with a champagne by the side.
Uluru – during Sunset
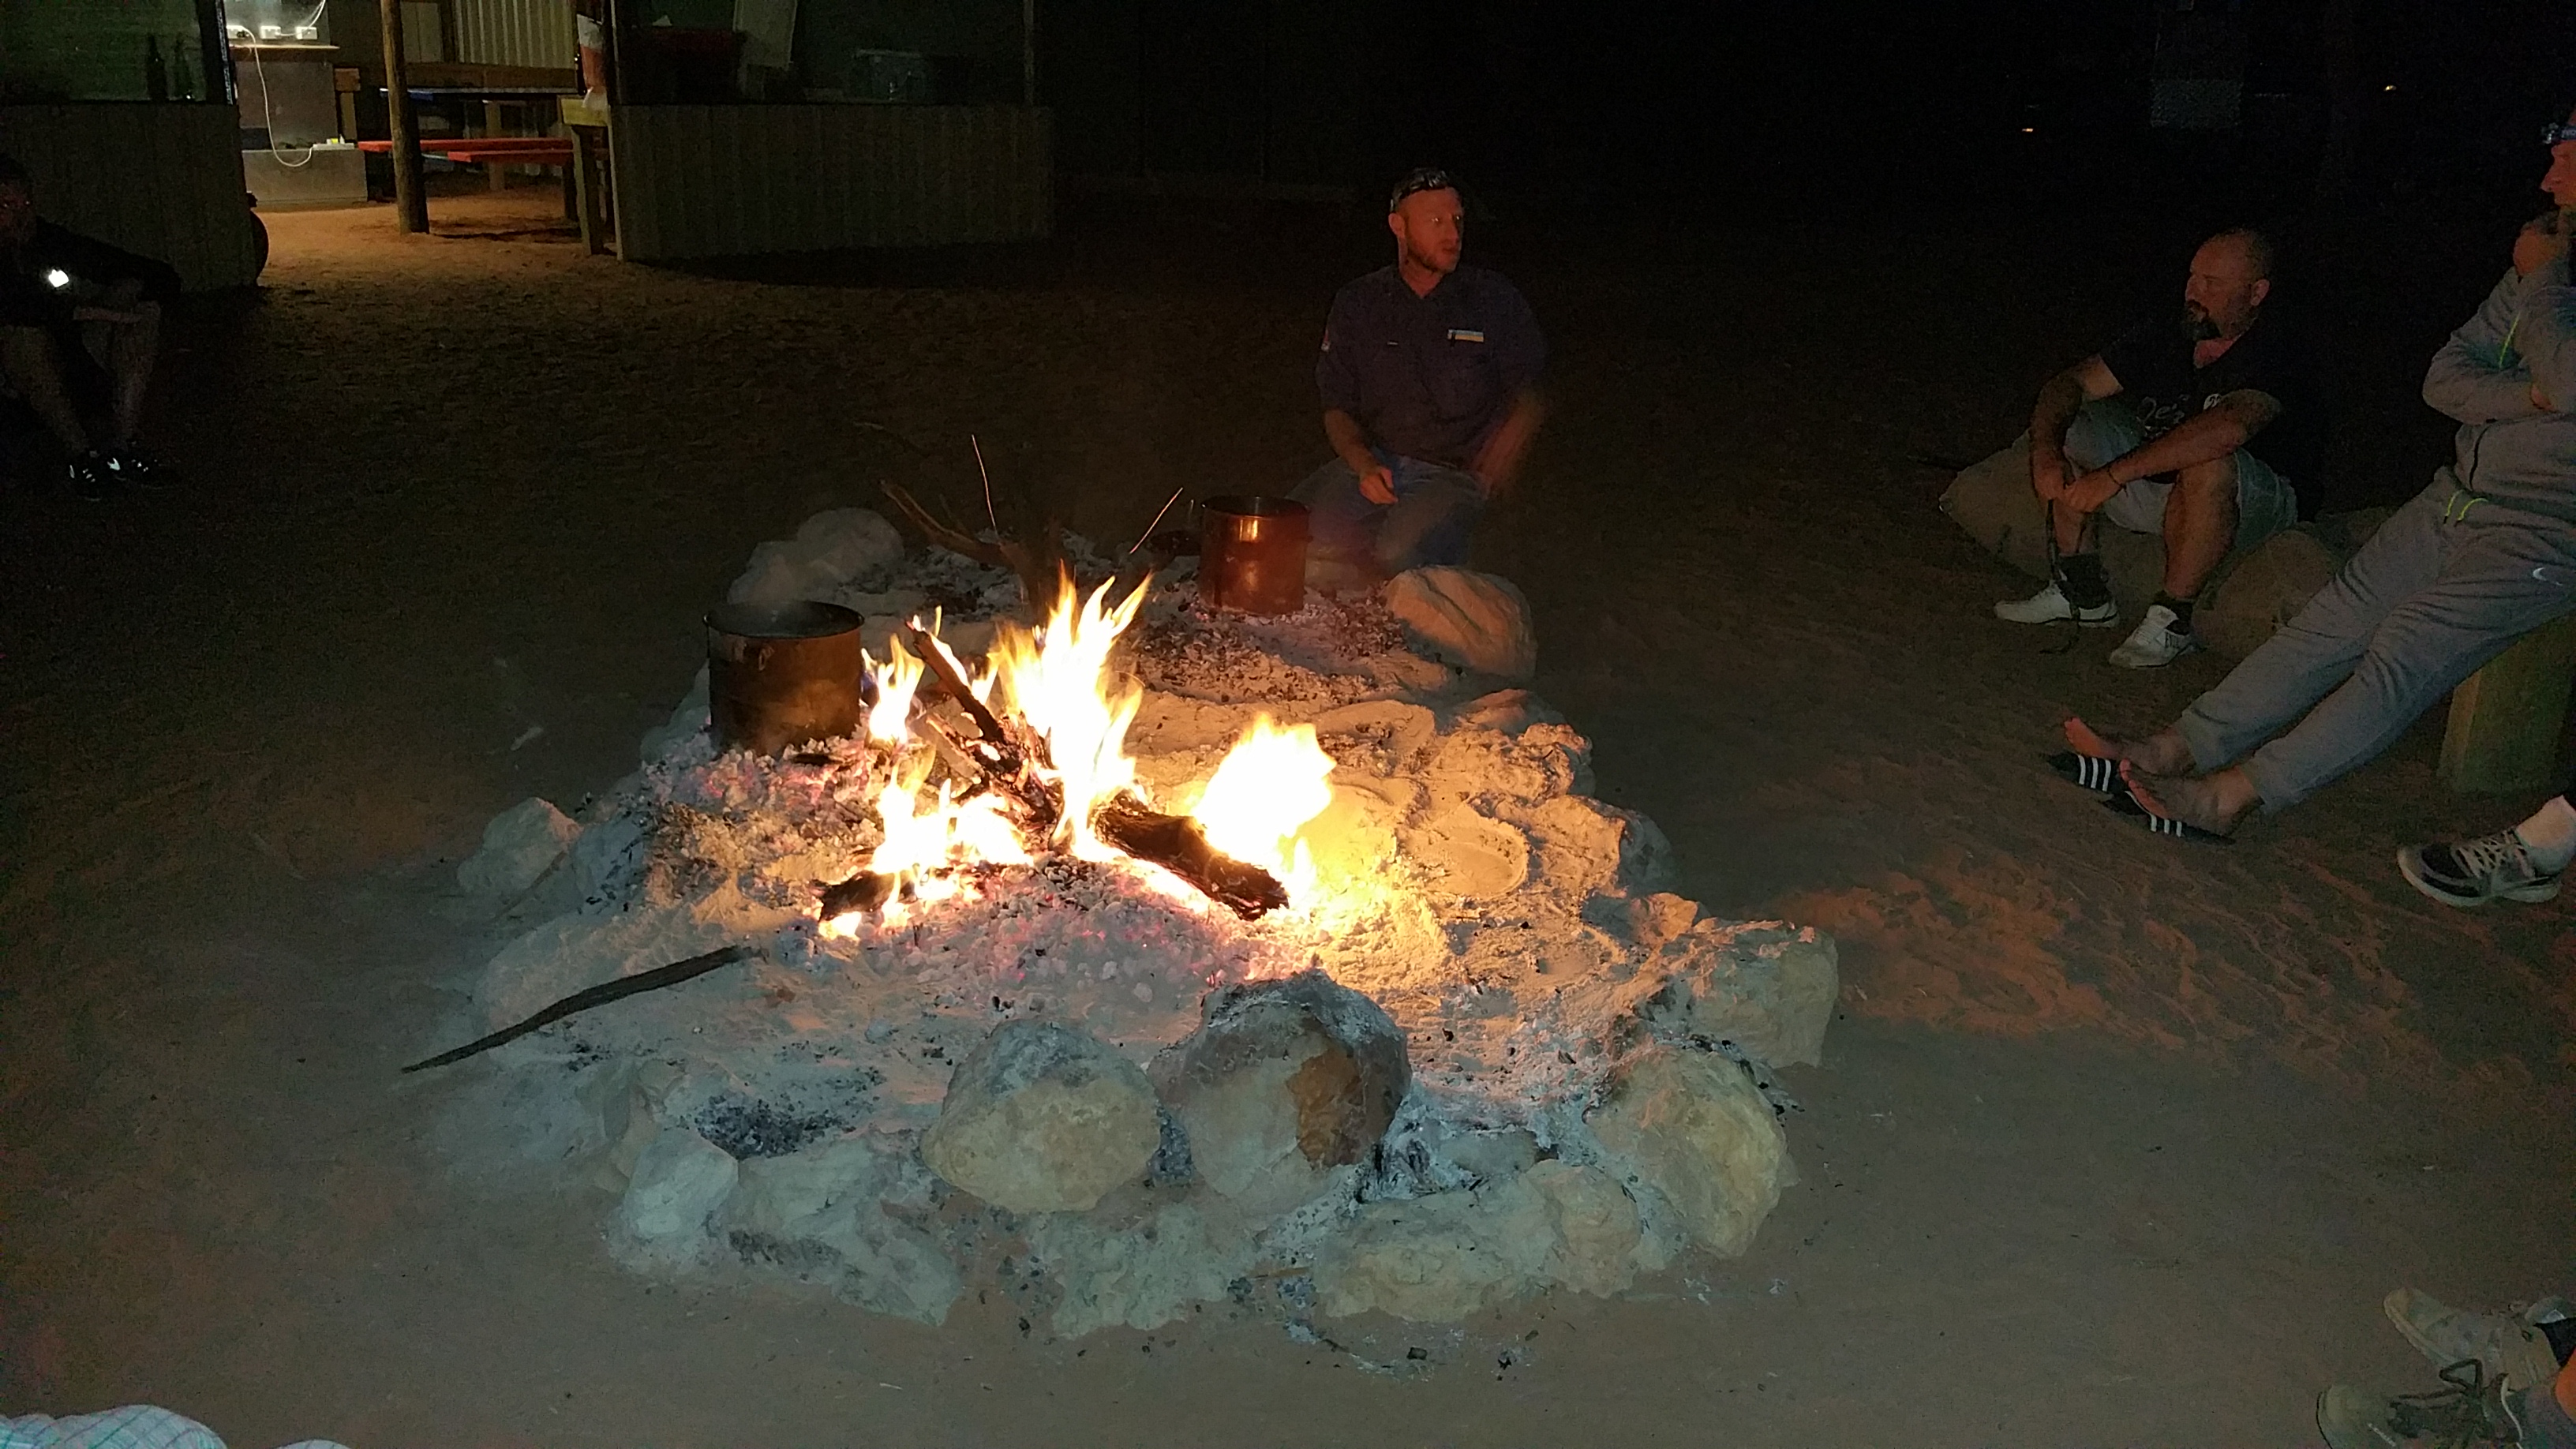
There were hundreds of tourist buses and thousands of tourist flocking to see the sunset. The shades on the rock vary as the sun sets which is a visual treat. It was time to leave the site as we had another long day the next before we cook our dinner and settle in our remote campsite for the first night. As soon as we were back at the campsite, we all begin doing chores. Some of us started helping in the kitchen, cutting veggies, making the dough, preparing stuff we haven’t seen, few of us brought down the twigs and wood from the top of the van, made a big pile and lit it. The primary objective was not to generate some heat but to make coals. Our dinner was going to be cooked on it soon.
If my memory serves right, we had a chicken dish, a beef stuff, a vegetarian dish for few and a nice local damper (Damper is a traditional Australian soda bread, historically prepared by swagmen, drovers, stockmen and other travelers. It consists of a wheat flour-based bread, traditionally baked in the coals of a campfire or in a camp oven: Source Wikipedia). This was an instant HIT. Never had tested such a thing until that evening.
After having a nice warm dinner and a clean-up, we all were given an option to either sleep in the tents (temporary canvas tents already installed on the grounds, enough for all of us) provided or sleep outside in the swags.
Swagged
The idea of sleeping outside under the open sky was appealing and at the same time was scary as we didn’t know if any night crawlers would want to snug with us. But the enthusiasm overpowered over scariness and ALL of us decided to sleep on the ground. Our bags were sleeping in the tents…!!. It was a unique experience. Sometime in the midnight around 2am, the temperature dropped and we all begin shivering. Good that the fire was burning to keep the area warm enough. We all have positioned our swags around the fire. We were all tired and soon were snoring. We had an early start the next day to view the sunrise over Uluru. Good Night folks…..Sleep tight, don’t let the crawlers bite…!!
Thank you for reading my earlier post (https://thetamhankar.com/?p=4090) where in ‘Chapter 1’ I had described my experiences about few attractions; some may not be known to most. In this next chapter we will explore similar attractions. Let’s go on a trip once again.
Chapter 2
Day trip #4 Taljai Tekadi Pune (a.k.a. Taljai Hills)
Not so far from central Pune, Taljai Tekadi is a hillock developed as a park and wildlife reserve. Though it is a mountain drive (a proper tar road) any and all types of vehicles go up there. One can take a cab and call for one too. Be sure to plan for some sort of a vehicle arrangement as getting a rikshaw to come down from the hill is not so easy. We had to call a uber which took some wait time.
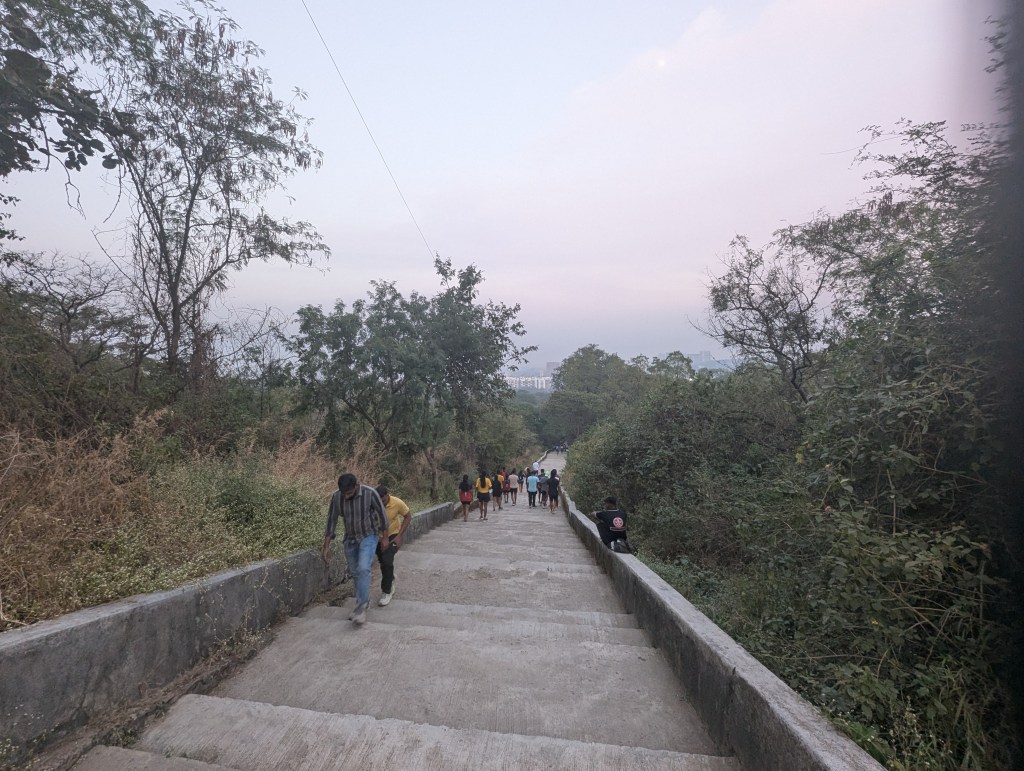
This place seems to be famous for walking (have numerous trails – we did one of the most travelled one), jogging, running and trekking. There is a large presence of NDA candidates, and defense personnels who train on the hills for physical endurance (the below photo shows the number of stairs they train on. I don’t know how many and neither know where these steps lead to and ends). At the entrance there is a nice little temple of Goddess Taljai after whom the hill is named. This location also offers a nice view (depending on the level of smog..!) of Pune. It has a large area with trees where you can relax and take your bearings before you move ahead.
I was hoping to see some wild animals on the trail, but there were none. Maybe they come at nighttime or are elsewhere where there is no foot traffic. Inside the forest area at the start of the trail, they have an office and toilets.
Beware of the mosquitoes. They seem to be in abundance especially during the evening time.
There are several hawkers just outside the forest entry. You could easily get something to eat and drink that would suit your palate. If you are an outsider, non-Indian, I would caution on what you eat and drink at this location. Especially avoid drinking watery substances made in front of you (as you won’t know the source of water) unless it is bottled.
Readers can read more about this location at https://punetourism.co.in/taljai-hills-pune
Infinite stairs at the tekadi
Day trip #5 Pu La Garden
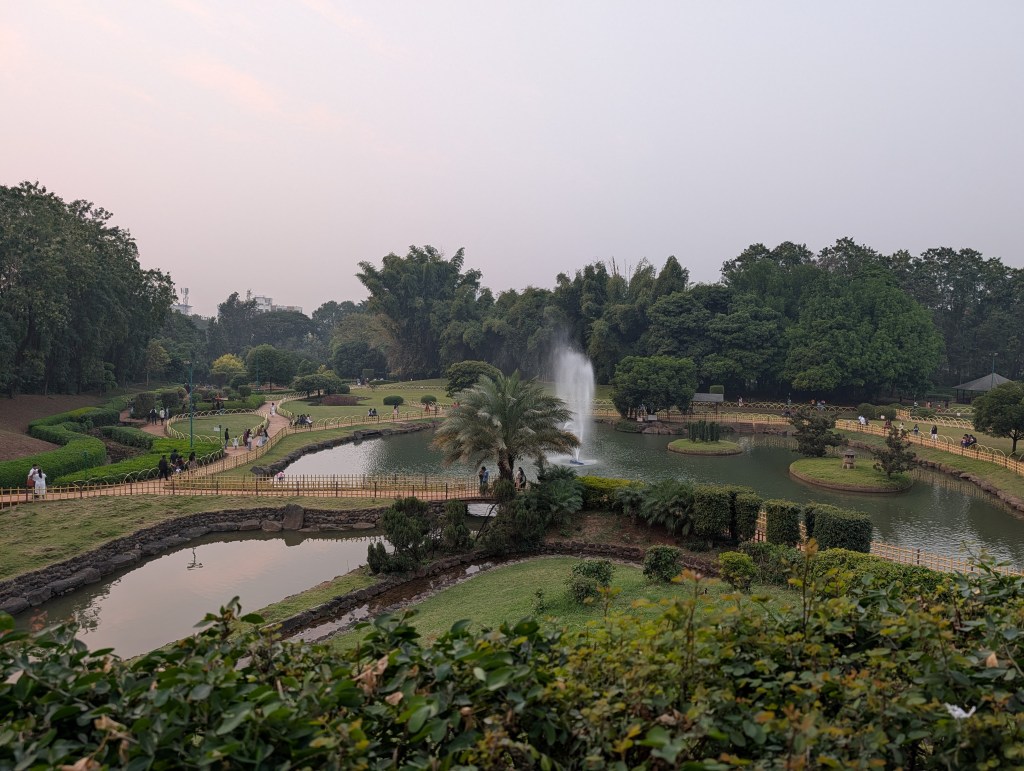
Pune-Okayama Friendship Garden (a.k.a. Pu La Deshpande Udyan) inspired by the 300-year-old Koraku-en Garden in Okayama, is one of the largest gardens in Pune located on Sinhagad road. Shinto, Buddhism, and Taoism were used in the creation of different garden styles in order to bring a spiritual sense to the gardens and make them places where people could spend their time in a peaceful way and meditate.
The entry fee is merely Rs.5.00 per visitor that helps upkeep and maintenance of the garden and its facilities.
To avoid damages and manage nuisance makers, there are few volunteers/garden employees who are (maybe) scattered around the huge 10 acres premises to watch over. We indeed saw an employee asking a visitor who was deliberately walking on the lawn not to do so. Hence proved. There are enough placards placed all around that says do’s and don’ts. However, who cares…!
The garden is open all days from 0600hrs to 1030hrs and 1600hrs to 2000hrs.
Top view of the garden from one of the only high points in the garden.
The garden entry is adjacent to a busy road with a 4-way intersection. As you might have read on my other blog(s), there too is no walk sign nor a walk signal at this junction. Zebra crossings are just for the sake and doesn’t deter the traffic nor helps pedestrians. I would suggest if you were elderly or have walking difficulties, only cross the road few seconds after the signal becomes red as there are many red light jumpers and you don’t want to get caught in them (the good thing is as there is a countdown timer – which displays how long the signal will stay red – you know exactly how much time you have to cross over)
This garden is excellent for a morning jog, an evening stroll/ walk, or just do nothing but sit on a bench and watch your surroundings. Won’t recommend for a run as it has no straight path anywhere.
It probably is worth assuming that being a 10 acre well managed garden there would be an abundance of variety of birds. However, if my memory serves me correctly, I didn’t see any. Unless I was there on a wrong day or wrong time. Readers who have experienced this garden can correct me and also write what different species they have seen. I would be very interested to know.
Though the garden premise is well secured and maintained, you cannot stop who would be visiting the garden with a different objective in mind. While leaving the garden I saw that there was a group of four boys travelling casually behind another group of girls. One of the boys slowly and cautiously tried approaching one of the girls, probably checking and asking her out. From the girl’s behaviour it was clear that she didn’t knew him neither was interested. Still, he was pursuing and did so till the exit where the group of girls stopped at a hawker completely disinterested in the boys. Good thing was the boy gave up and they went their ways.
To maintain the sanctity of this serene place, no food or drinks (water is fine) are allowed inside the premise. Neither there are any hawkers or food stalls inside the premise. There are certainly few outside the garden gate next to the busy road.
Day trip #6 Nashik – Tapovan
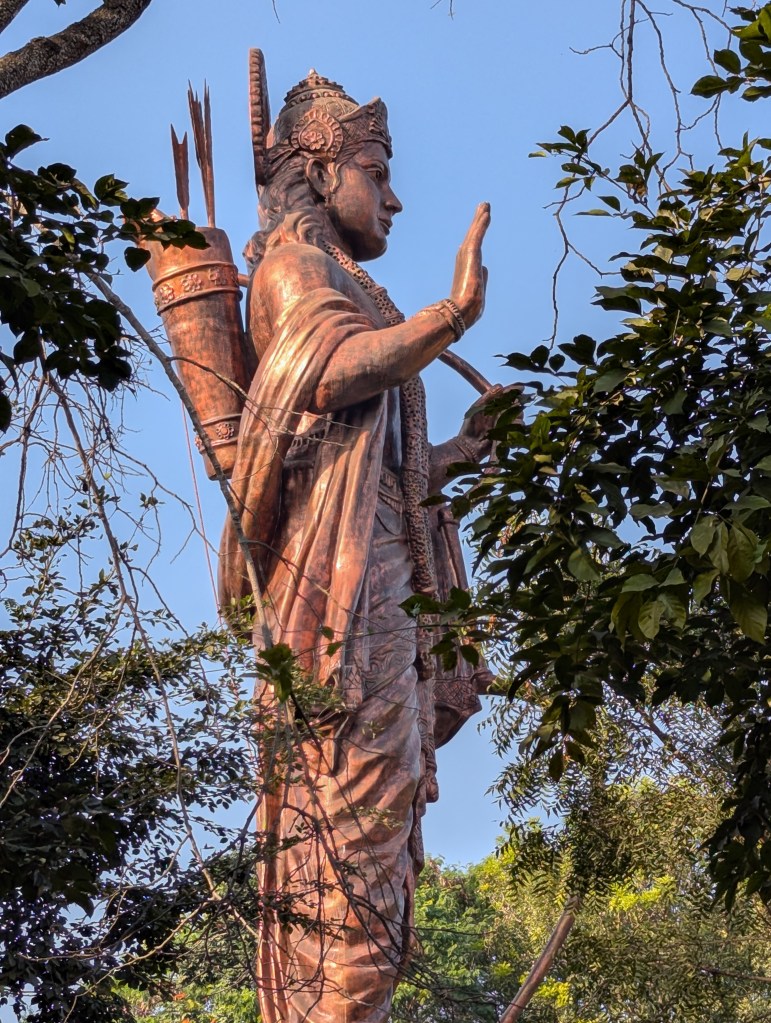
While on our way to Nashik, we happen to stumble upon Maharashtra’s tallest statue of Shree Ram. Inaugurated in October 2024, standing at an impressive height of 21.33 meters (70 foot), this statue is located in Ramshrushti Udyan within the Tapovan area of Panchavati, Nashik. The statue is made of fibre-reinforced polymer. As mentioned in the epic Ramayan, Shree Ram spent significant portion of his 14-year exile in the serene forest of Tapovan, thus bringing spiritual significance to this place.
There are many other smaller attractions in and around Tapovan. These were all walkable. I happen to visit them all in the matter of an hour. Panchavati, RaamKunda, Kaala Ram mandir (built with black stone), Gora Ram mandir, Pandavleni caves, Godavari-Kapila sangam, Sita Gufa (cave)* etc.
* I would like to make a note here in regard to the mythological site Sita Gufa. It is said that Sita stayed in this cave while in exile. Hence my curiosity piqued. When I walked towards this site to see the Sita Gufa, there was a huge line. Decided not to stand in that big queue and that too when it was sweltering. So, I asked around as to what this site is all about. One of the vendors gave me genuine (I hope so) feedback about this place. He mentioned that this Sita gufa is a man-made attraction and is not the original gufa. The original one is some place somewhere where you can’t go. Not sure how true this is but thought I should share with the readers.
Once you reach Tapovan, auto rickshaws can take you around to see 10 plus attractions (with a rate card) including the above. Once they see you as a tourist, they will be behind you to consider their ride to visit these attractions. I would say it is not a bad idea to accept such ride if you are unable to walk longer or have less time on hand. However, I have seen that they rush such groups at sites as the sole objective is to finish with one group quickly and grab another. Can’t blame as that’s their source of income for most. Tourism is booming in such sacred places.
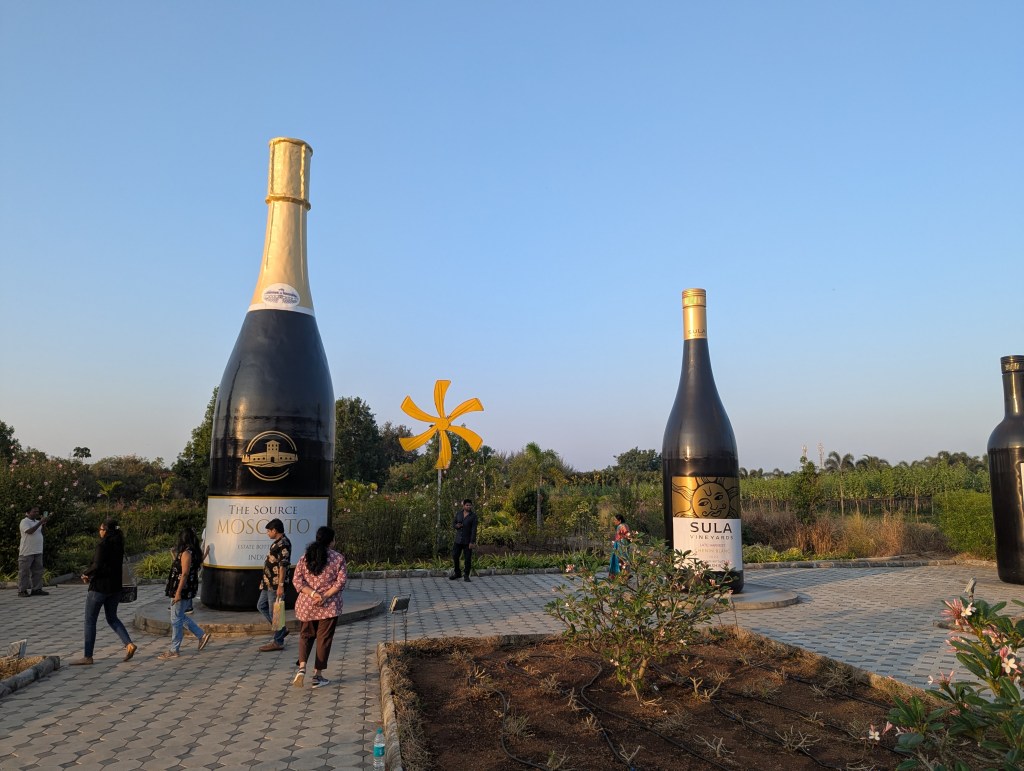
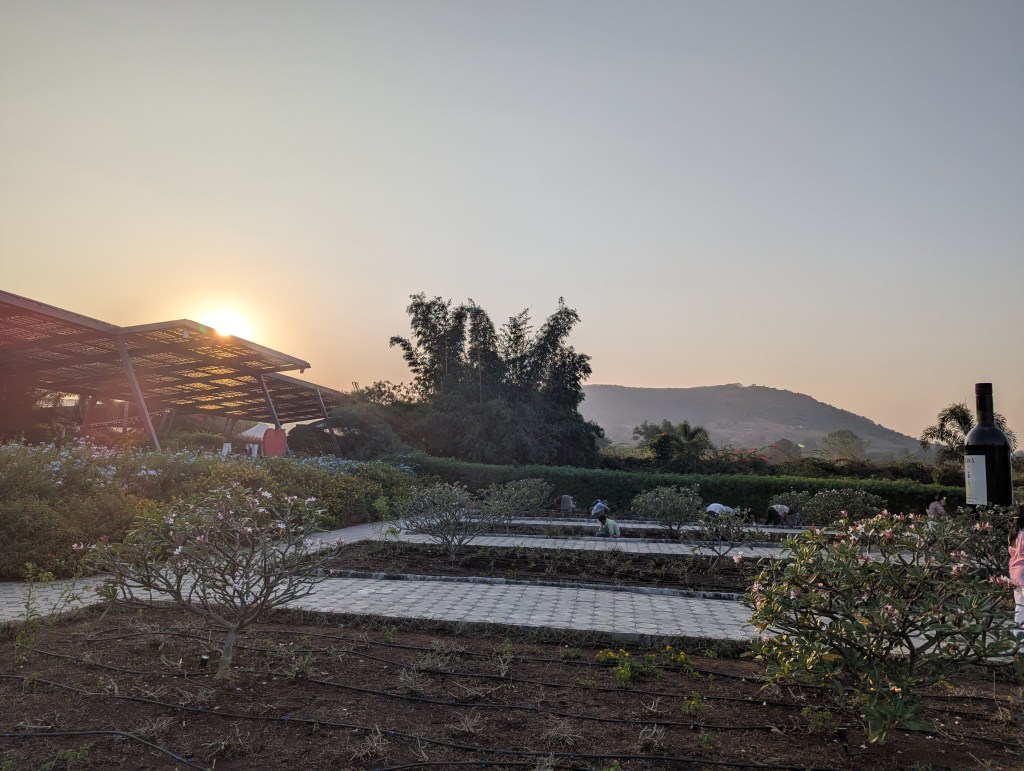
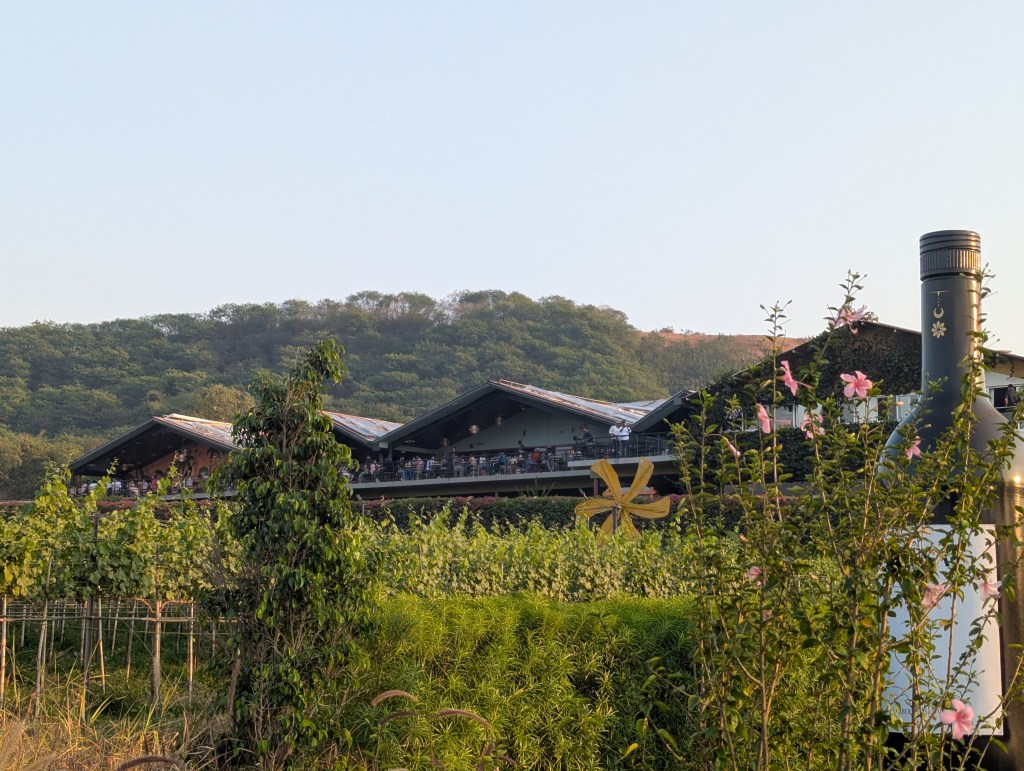
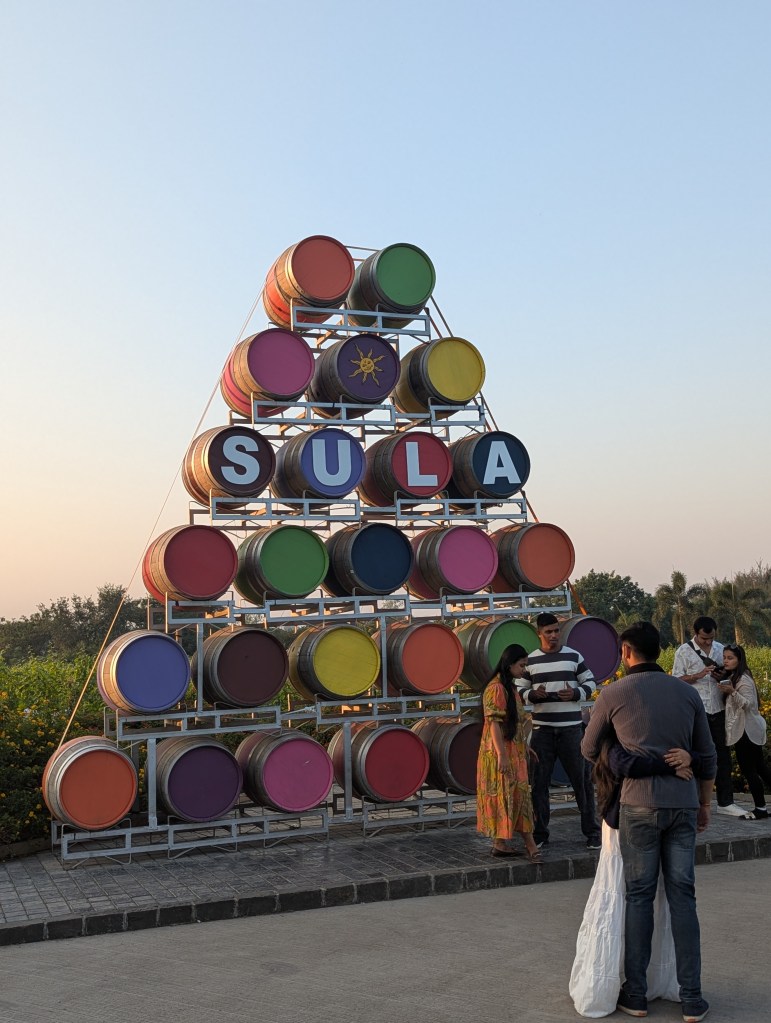
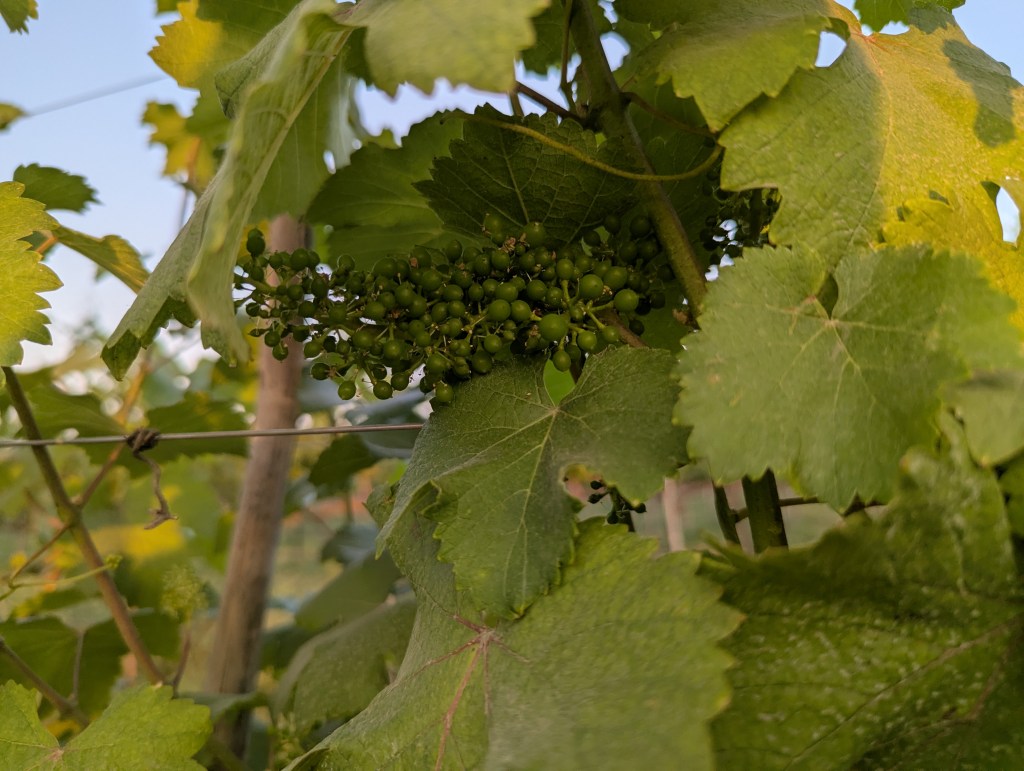
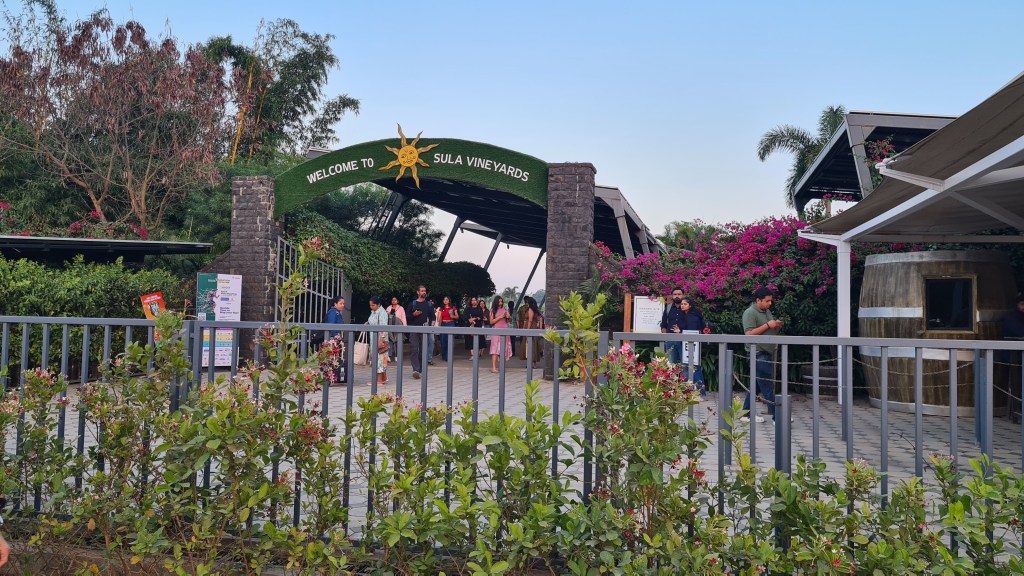
The unique climate of Nashik helps in growing different grape varietals, each with its distinct personality. As per the website, Rajeev Samant (CEO) recognised the potential of Nashik for cultivating grapes and so he embarked on the wine making journey – founded Sula Vineyards – with the help of an eminent California winemaker, Kerry Damskey.
It’s a nice place to enjoy and spend your whole day here provided you are a genuine wine enthusiast, as wine tasting, drinking at the restaurant, and buying wines is what it is all about.
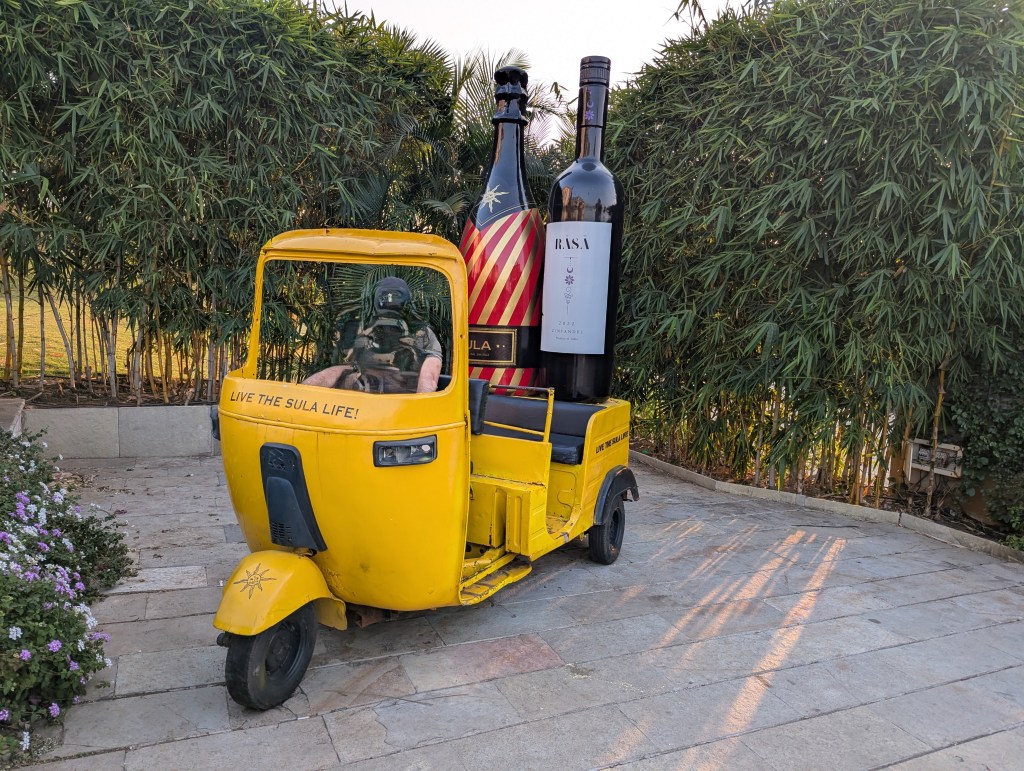
A virtual taste for the readers…!
Sula Vineyards, Nashik Gat 36/2, Govardhan Village, Gangapur-Savargaon Rd Nashik, Maharashtra 422222
Visitors can also do a staycation at Sula Vineyards. When I last checked a 3 person Tower Suite was listed at INR 16K, which is dear price for some. But if you want a full immersive experience of the region, I guess this, is it.
For those who are new to this place, meaning first time visitors, the entry fee is INR 1000.00. It’s not all lost here if one thinks it’s too much to just see the vineyard. Visitors can use this (all of it) money (keep the receipt with you) to buy from the shop. The average price of a wine bottle hovers somewhere around INR 1200 upwards. You can buy glasses, wraps, accessories etc. It also has a big restaurant (I guess you can use this money there too, although I didn’t try so can’t say for sure) for which you need prior booking. When I visited this place, it was booming with people all around, the restaurant was full. Wine tasting experience is a different cost element and also need a prior booking, so you won’t miss.
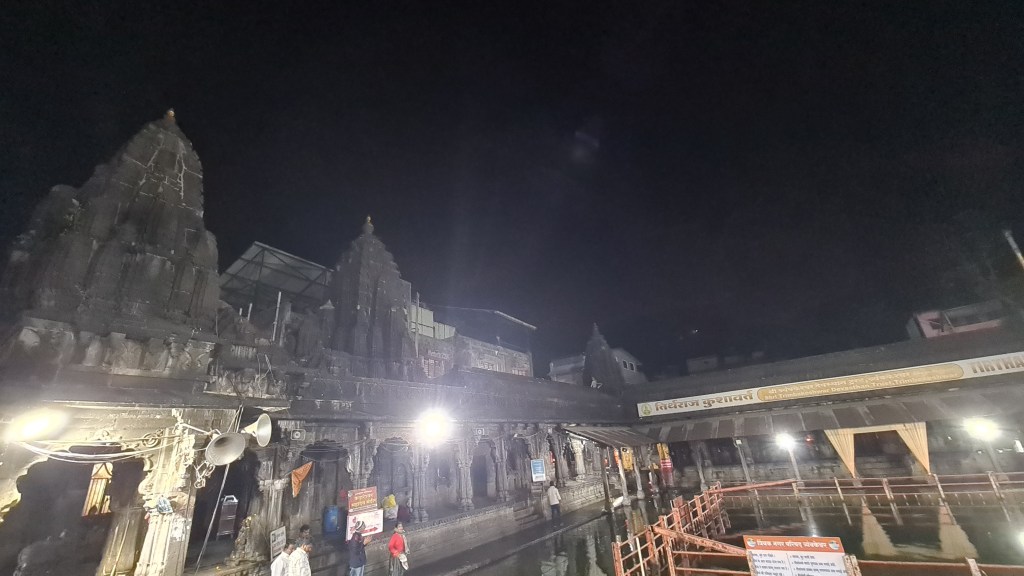
Day trip #8 Nashik – Trimbakeshwar
Trimbakeshwar, located about 28 kilometres from Nashik, Maharashtra, in the town of Trimbak, is one of the most sacred pilgrimage sites in India. It is home to one of the twelve Jyotirlingas dedicated to Lord Shiva and marks the origin of the Godavari River, the second-longest river in India.
The current temple was built by Peshwa Balaji Baji Rao after it was destroyed by Mughal ruler Aurangzeb.
Unlike other Jyotirlingas, the one here has three faces representing Lord Brahma, Lord Vishnu, and Lord Mahesh (Shiva). And that’s why this ‘Shri Trimbakeshwar Devasthan’ has utmost importance among others.
We reached almost around nighttime hoping to get the darshan. However, upon reaching there and walking towards the entry for more than a kilometer, we found out that the general entry would take about 3 to 4 hours to get into. So, we tried our luck with obtaining a VIP pass. Even the VIP pass counter was closed as they had given away all their passes for that day, the next available was at 0530hrs next day. Not wanting to spend those many hours in the general line and not knowing how much actual it will take to get in, we settled on placing ourselves in front of a large digital board that was displaying the gabhara live. They had the live recording of the inner sanctum which we happily accepted, took the darshan and left.
I managed to take the temple view – see below – from outside (which was allowed).
The Kusavarta kunda (sacred pond) in the temple premises, built by Shrimant Sardar Raosaheb Parnerkar, who was the Fadnavis of Indore State, is the source of the Godavari River, the second longest river in India.
It’s a heavily crowded place. So be aware of your surroundings.
Depending upon which entry you take to get into the premises (there are few and are guarded by the police/ temple administration) you may have to walk a lot. We ended up walking more than a kilometer just to get near the outskirts of the temple as the road goes through hundreds of shops lined up on both sides. The actual temple seems to be lost in that chaos. And take a note, there is hardly any sign that tells you how far you are. Just keep walking. Ask vendors for directions if felt lost. We did the same.
Finding the counter for VIP pass could be a nightmare. There are no such boards – in line with your eyesight – that would direct you to the counter. However, while looking for one, I found a directional board perched atop a light pole, saying the way. You will find many such boards (looking up obviously) directing you. You would doubt if that’s any true as you won’t see the sign of a VIP pass counter for some time. And suddenly to your bewilderment the signs vanishes. You will see a very strange arrow pointing downwards on a wall saying VIP pass window, but there is none. However, if you circle a bit round the wall, you will find a small little building/room/shop which says VIP counter. Of course, it was closed when I arrived so couldn’t see much neither can guide you from here.
I would suggest, as previously mentioned, that if you want a darshan try weekdays only and avoid any auspicious day. Even then you will have to be ready to wait in the line for few hours.
For the interested readers, the twelve jyotirlingas are:
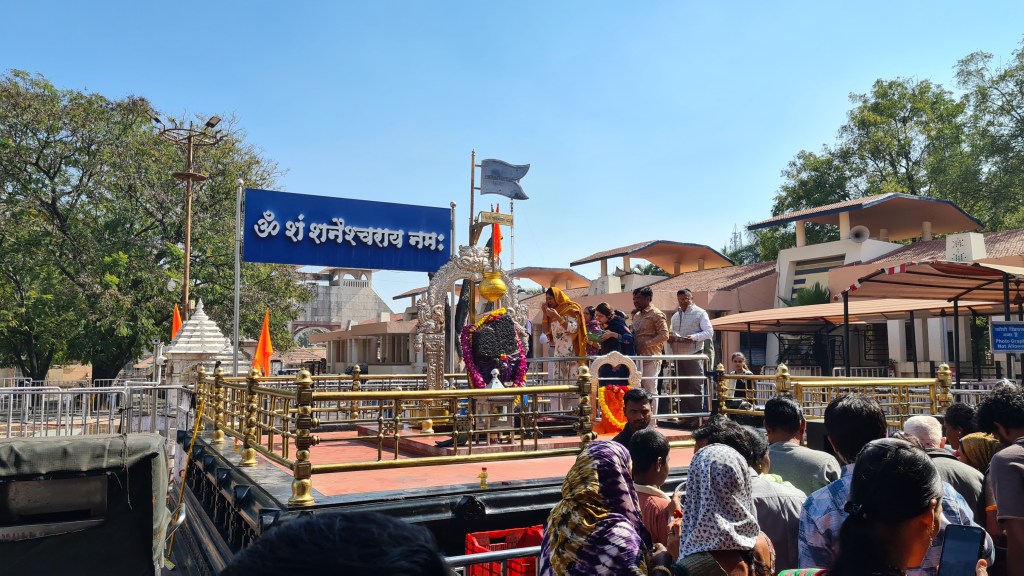
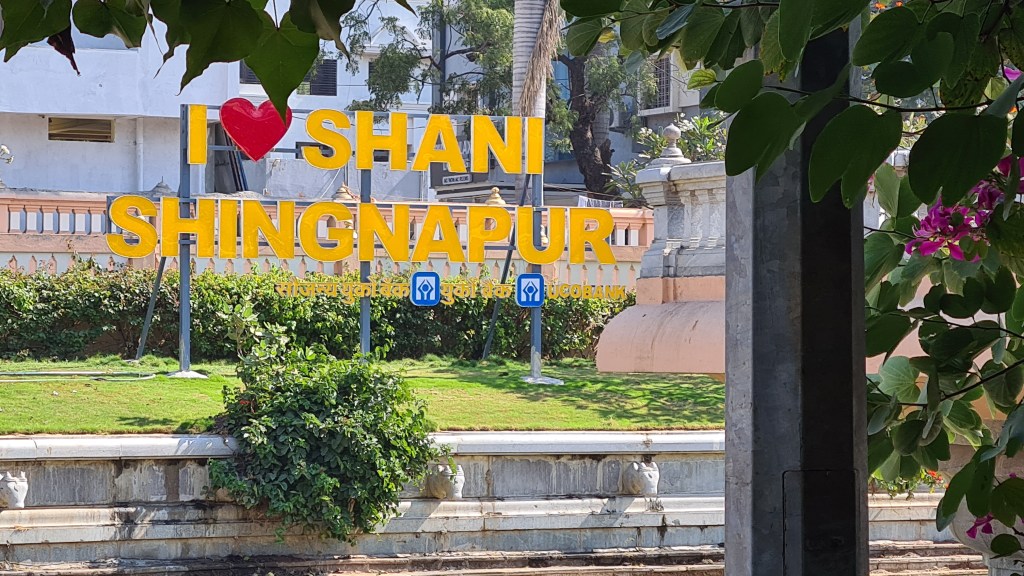
This place is famous for Shree Shanidev Temple. This temple is located in Ahmednagar district of Maharashtra and is a world-famous pilgrimage site dedicated to Lord Shani (planet Saturn). It is believed that the deity resides in the temple and actively protect the village. And hence it is said that (which is true in certain degree) there are no doors to any of the homes in this village. At present the homes now have doors but no locks (there is a documentary about this on YouTube). Since it is believed that no one dares to rob anyone in the village, and if anyone tries, they have either returned back the goods or met their fate.
The village of Shani Shingnapur is famous for its doorless houses and shops. Local residents believe that Lord Shani punishes anyone who attempts to steal, leading to a tradition where homes have only door frames but no actual doors or locks. This faith extends even to local institutions, including a “lock-less” bank.
The deity itself is no humanlike figure nor represent one. Instead, it is a 5.5-foot-tall black stone, installed on an open-air platform, symbolising the deity’s omnipresence.
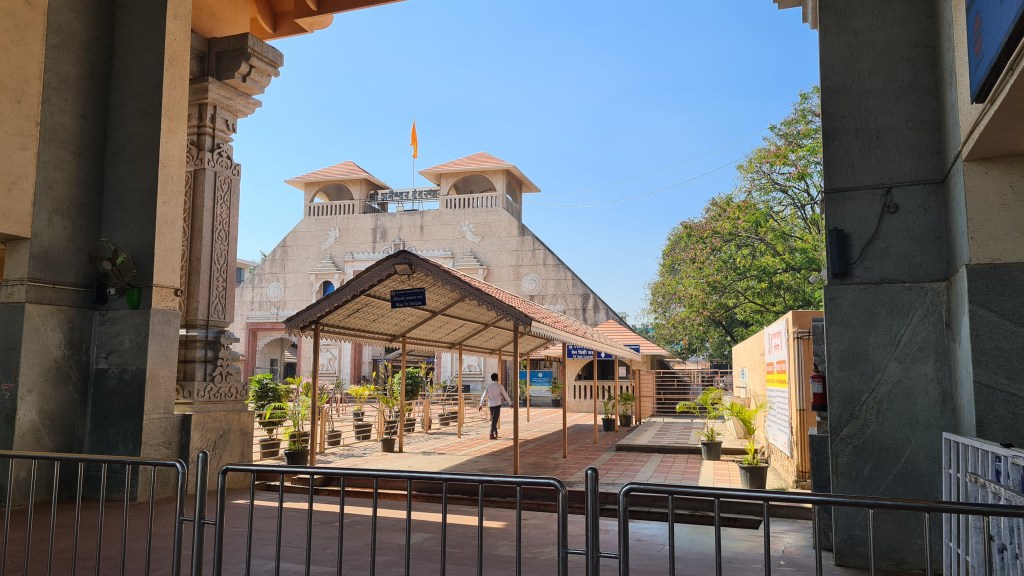
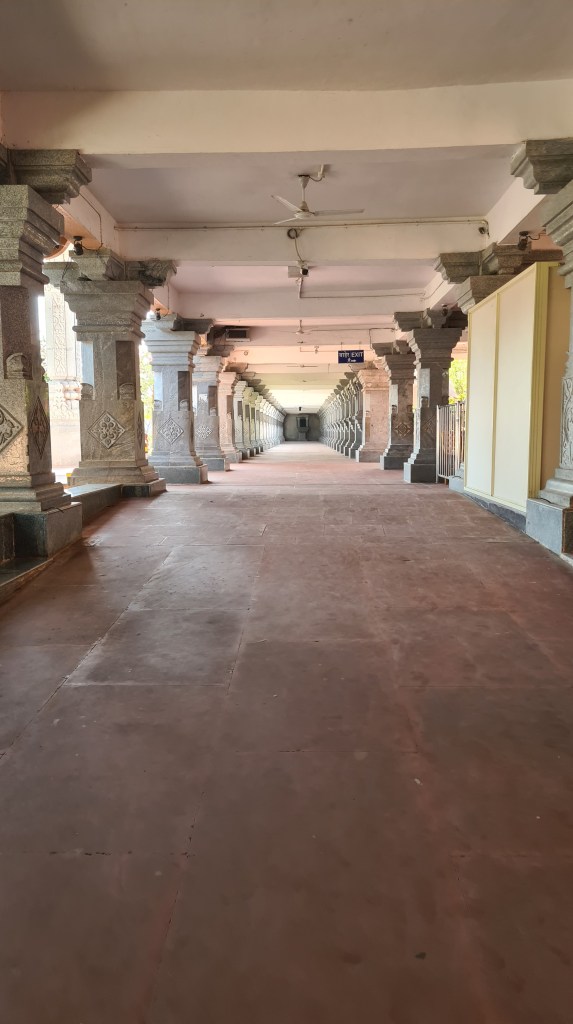
The temple premise is architecturally very beautiful (as you may see from the below images), newly renovated (as we were told by our driver a.k.a. tour owner – let’s call him from now Mr. Joshi – that this facility was not there few years ago, one could directly go to the place of the deity), super clean and serene. As it was a weekday there was not much rush.
Another attraction would be to drink fresh sugarcane juice extracted by the bulls instead of machines. You will see hundreds (might be a little exaggerated, but you know what I mean) of pandals (tents) lined up on roads leading to and away from this village especially adjacent to the highway.
Shree Shanidev installed on an open-air platformThese are NavaGraha temples surrounded around a Stambha. A body of water flows besides it.Entry to the templeThe long and beautiful corridor, one for the entry and similar one for the exit (this is newly built)
This temple has a huge parking of its own. Large tour buses are often parked here. This parking is laced with numerous stores selling offerings and souvenirs.
*** ALERT ***
We have experienced this, so I am alerting others. Avoid if possible. When you enter the road – entrance gateway – that leads to the temple you will be lured by vendors who will stand in the middle of the road and stop your vehicle and direct you to their shop saying you can park there for free. Ours met us at one of the entry roads, told us that they have a free parking and we should follow him. It was a single small road, so we initially ignored him and kept on going further. However, he was leading us on his bike and when his shop came close, he stopped in the middle of the road and asked us to enter the particular shop. Not knowing anything about this place (however our tourist guide/driver should have been knowledgeable about these tricks) we blindly followed, just happy that we got to park under the shade away from the sun.
Then the trick start to unfold. We were initially told that once you park there is a way from backside which will lead us straight to the temple. However, we met a pujari (let’s call him that as I don’t know what to tag him as) who suddenly appeared from his shop desk and greeted us. Then he started asking questions about who we are and started giving us all the necessary information about the mandir and the offering process. We were glad that someone is giving is free information that we never knew about. Then came the twist. The pujari handed each of us (me, my wife and the driver) a basket full of several things which we were expected to offer the deity. No price was discussed at this point. We appeared hypnotised and unknowingly went with the flow. Collected the basket, moved to leave, then there was another small stall selling oil and metal stuff – more offerings non-negotiable. We paid INR 600-900 odd each for this alone.
Then we asked for the backdoor entry through which we were told we can visit the temple. But there was no such thing. The guy led us back on the road, we travelled few meters and then we saw what we should have seen in first place if we were not robbed off our path. There was the entry to the mandir premise starting with the huge parking area. We all cursed and cursed but controlled as we were now in sacred area. We crossed the parking area, left our shoes at the collection centre, then entered the actual temple premise.
When we came back to collect our car, we were then asked to pay for the baskets, INR 550 each. We treated all of this as a donation for a good cause and forgot we were duped. Left it to Lord Shani to deal with it.
These vendors (or their representatives who are employed to lure customers and then get a commission) probably can’t be avoided as they block your road, doesn’t matter which small or large vehicle you are in, ensuring you won’t see the real entry to the free parking made available by the temple, thus don’t get to choose whether to buy the offerings or not. By luring they force you to buy from them. I guess all this is true for new visitors. The one who visits most would know these tricks and hence avoid too.
**** Next adventure is the 9 days Konkan Trip…..stay tuned
2025 I had the chance of spending more time on my vacation and hence I and my wife decided to take a trip to India. Not because we wanted to meet our family and friends, but more because we wanted to explore India on this trip. The answer to ‘Being an Indian how much of the country we have seen’ is not that glamorous and hence we decided to not go anywhere else but India. We planned a two-week Konkan road trip along with few day trips. However, the highlight of India trip was the visit to the Konkan region and Goa.
As this blog is going to be a big write up, I will divide this into chapters for the sake of simplicity and readability.
Chapter 1
Day trip #1 Bhuleshwar Temple
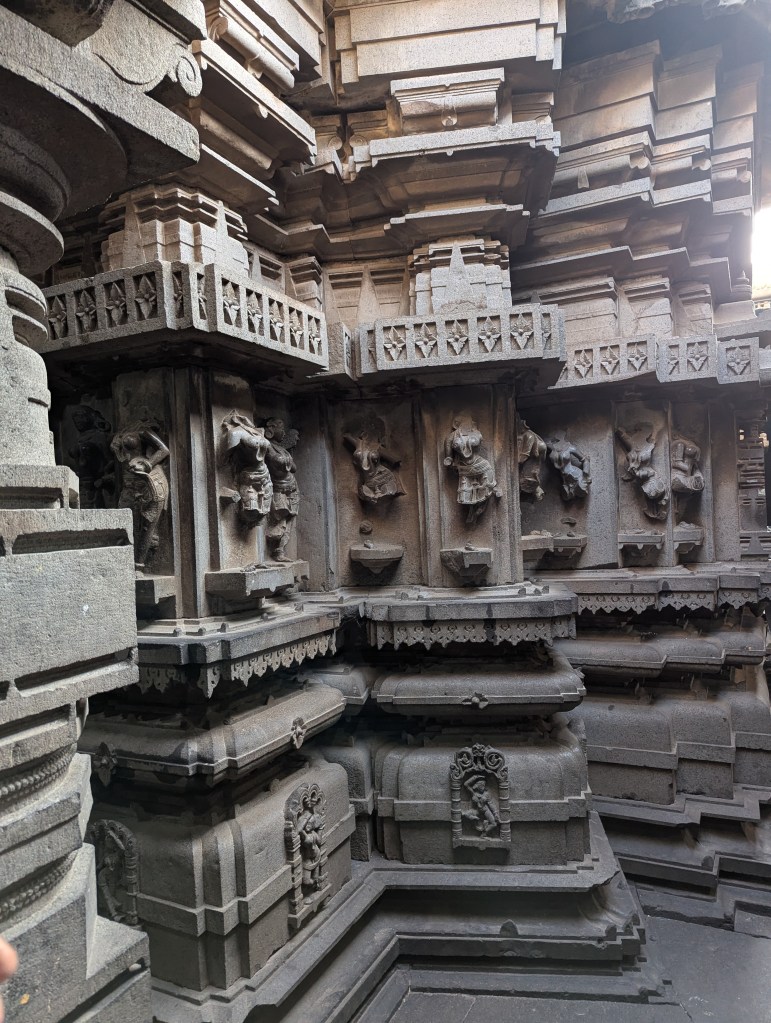
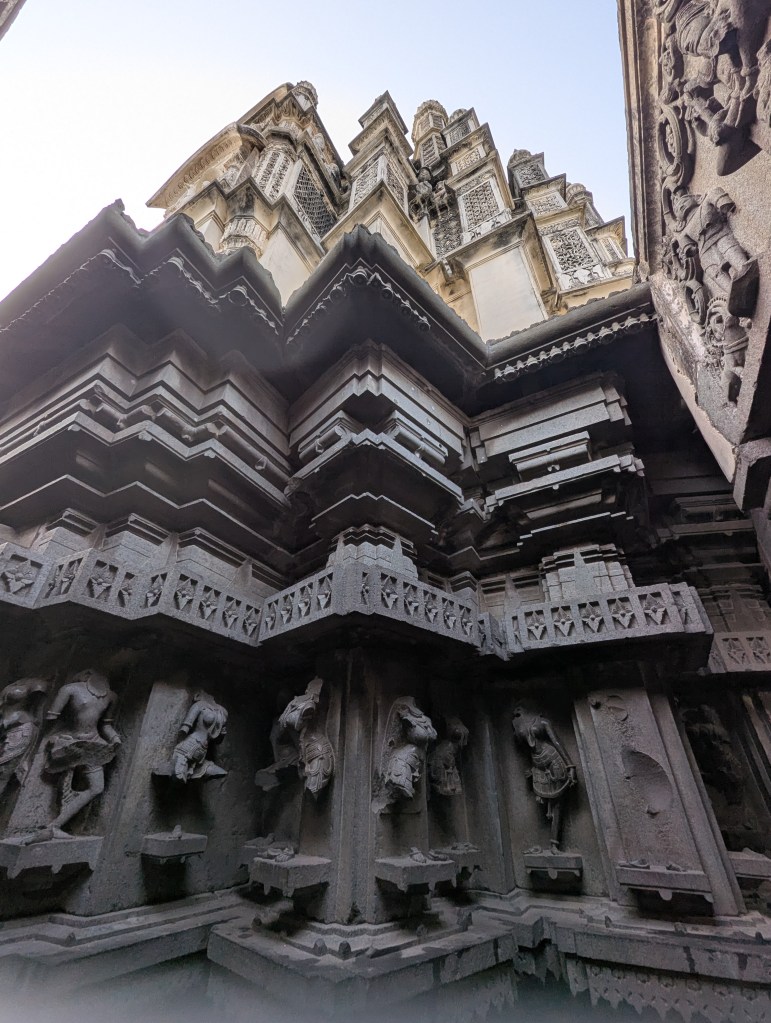
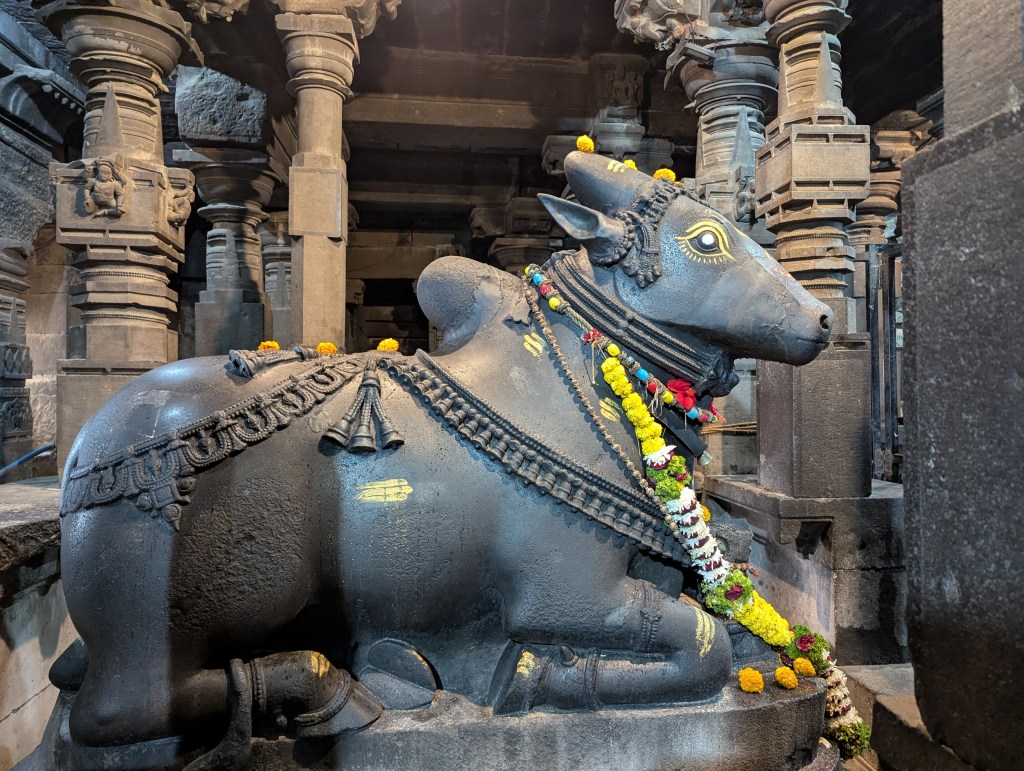
Bhuleshwar, a pretty old stone temple located on a driving distance from Kothrud, Pune. It’s an architectural phenomena one must see. Completely carved out of black stones. The Bhuleshwar Temple is a Hindu temple of Shiva, situated around 45 kilometres from Pune and 10 km from Pune-Solapur highway from Yawat in Maharashtra, India. The temple is situated on a hill and was built in the 8th century. There are classical carvings on the walls. It has been declared as a protected monument. This temple is said to have been built in the 1200 century by King Krishnadevaraya.The temple figurines were attacked and disfigured by the Mughals (Source Wikipedia). In front of the Shiva idol, gabhara, there sits the largest Nandi I have ever seen. Recent pictures below.
Visitors must be aware that any kind of Photography and Videography inside the temple is not allowed. Whereas you can take photographs just outside of the main temple and surroundings. Also this place is a bit remote on a hill side. Recommend going in day light. Although there is a small police chauki (outpost), a policeman was also there on the day we visited, it is still better to be vigilant. The surrounding is all natural. There are couple of hawkers just at the entry of the temple, selling stuff that one may be interested in, Shiva idols, bands, flowers, sweets, etc. are sold there.
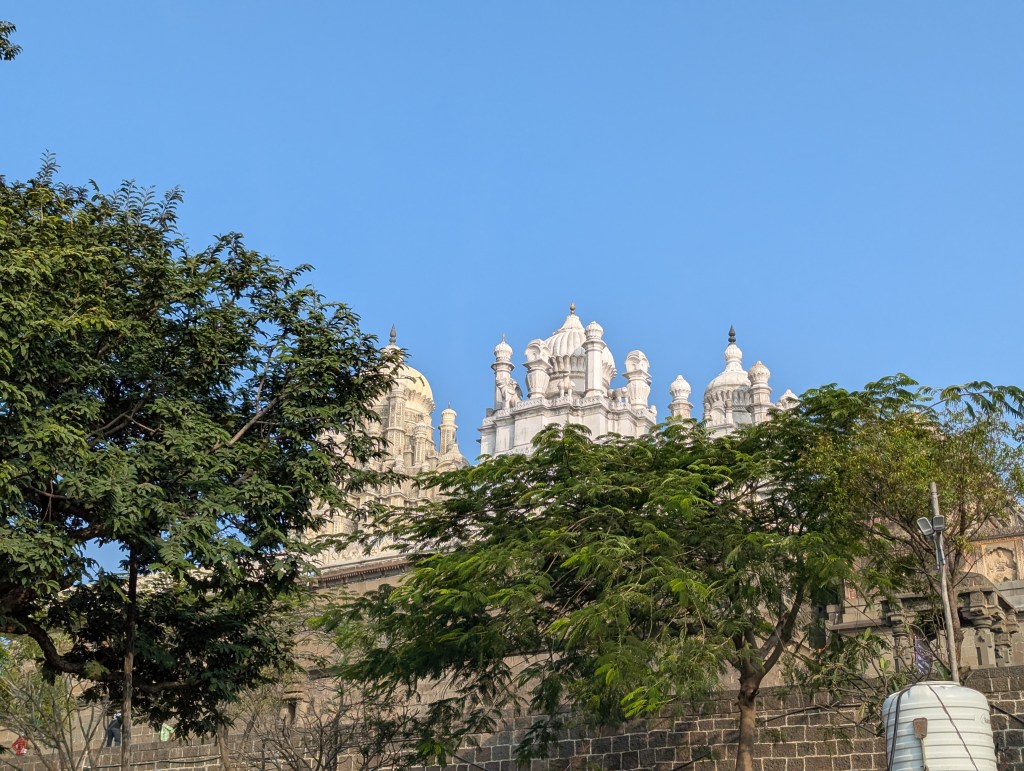
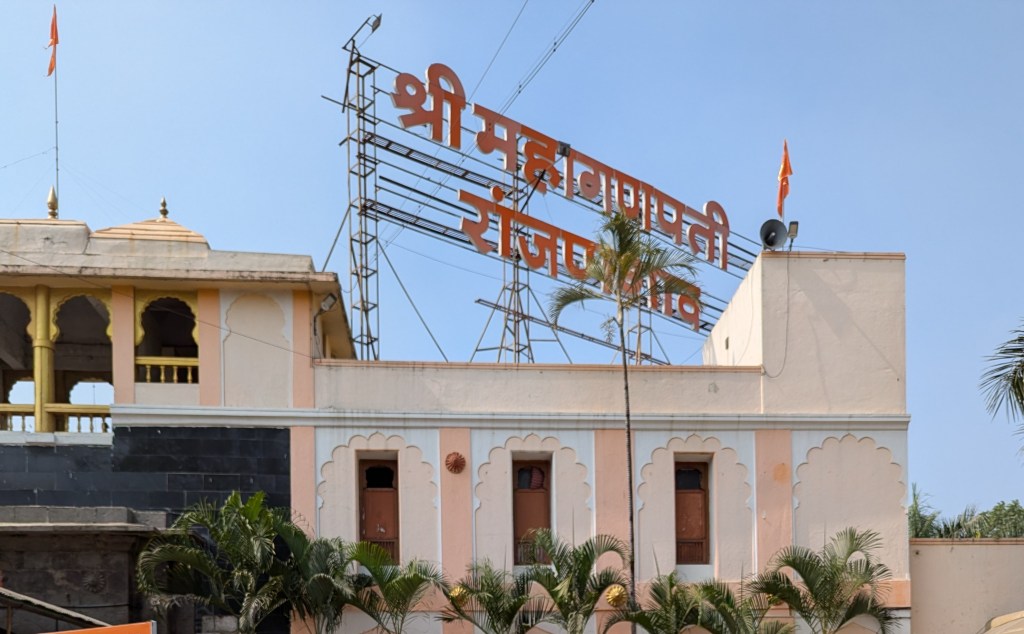
The next stop was visiting the most reverred Ganapati temple. Ranjangaon Ganpati also known as Shri Mahaganpati Temple is a Hindu temple dedicated to Lord Ganesha, one of the most revered deities in Hinduism. Situated in the village of Ranjangaon within the Shirur taluka of Pune district, Maharashtra, India. It is one of the eight Ashtavinayak temples venerating Lord Ganesha, bearing immense religious importance in Hinduism, built in 9th and 10th century during the Madhavarao Peshwa 1 era.
This temple has a large area and includes restrooms. Since this temple is located in the heart of the village there are plenty options to eat. It also has a free chappal/ shoes stand. Caution, I won’t recommend buying modak (fried) ones from here as they are pretty tough and have dry fillings.
While going from the Pune – Nagar highway the route is Pune – Koregaon – then via Shikrapur; Rajangaon is 21 km before Shirur. From Pune it is 50 km. However we had taken a different route perhaps as we went directly from Bhuleshwar.
Next stop was Theur, another Ganapati temple on the route. The Chintamani Temple of Theur what its called, is a Hindu temple dedicated to Supreme God Ganesha located 25 km (16 mi) from Pune (Haveli Taluka) the temple is “one of the larger and more famous” of the Ashtavinayaka, the eight revered shrines of Ganesha in the Indian state of Maharashtra. The Chintamani Temple was also a spiritual magnet for the Peshwa rulers, especially Madhavrao I (1745–1772).
Theur is prescribed to be the fifth temple to be visited in the Ashtavinayak circuit, pilgrims often visit Theur second in the circuit after Morgaon, as it is a more convenient route.
This temple also boasts large premises including shops, eating options, free chappal/ shoes stand etc. You can buy freshly steamed Ukadiche Modak from one of the shops just outside the main temple.
To avoid long queue and delays I would recommend going on a weekday if that suits. If you are on a religious trip then go on an auspicious day but accept delays in darshan. This is applicable for any famous temples throughout India.
Most temples in India expects its devotees to wear decent clothes while visiting. No sleeveless, no shorts, nothing that would be overly inappropriate can be wore, If for some reason you do, you will be not allowed to enter the premises. I too was wearing shorts in both visits. The mitigation would be to cover yourself with something larger piece of cloth if you are carrying one. Females can cover their shoulders by dupatta, whereas males can cover their legs by wearing a dhoti or lungi, which many a times are readily available for a purchase from nearby stores or stores located inside the temple premise.
Avoid getting roped in by the hawkers who would want to sell something that is unnecessary. They may lure you in buying stuff saying that’s what people do, or pushing you to park your vehicle in some specific spot where they may have their own shop thereby expecting you to buy things from them.
When in doubt always ask. As mentioned Photography of any kind is strictly prohibited, inside the temple where the idol is installed, in such famous temples to keep the sanctity of the place. If mentioned (there are boards saying so) please avoid and not get embarrassed. Although it is written boldly so anyone can see and read, you will see many people tend to be oblivious of the warning and taking photos only to be later reprimanded by someone who is keeping an eye on such devotees. It’s more of a faith than policing hence in many places there may not be anyone watching you. If you still have a desire to photograph the deity, please ask the pujari (pundit) and if he allows only then take one and get out of the way. They may allow if there is less queue or no one behind you to get the darshan.
Day trip #3 Morachi Chincholi (the village of tamarind trees and peacocks)
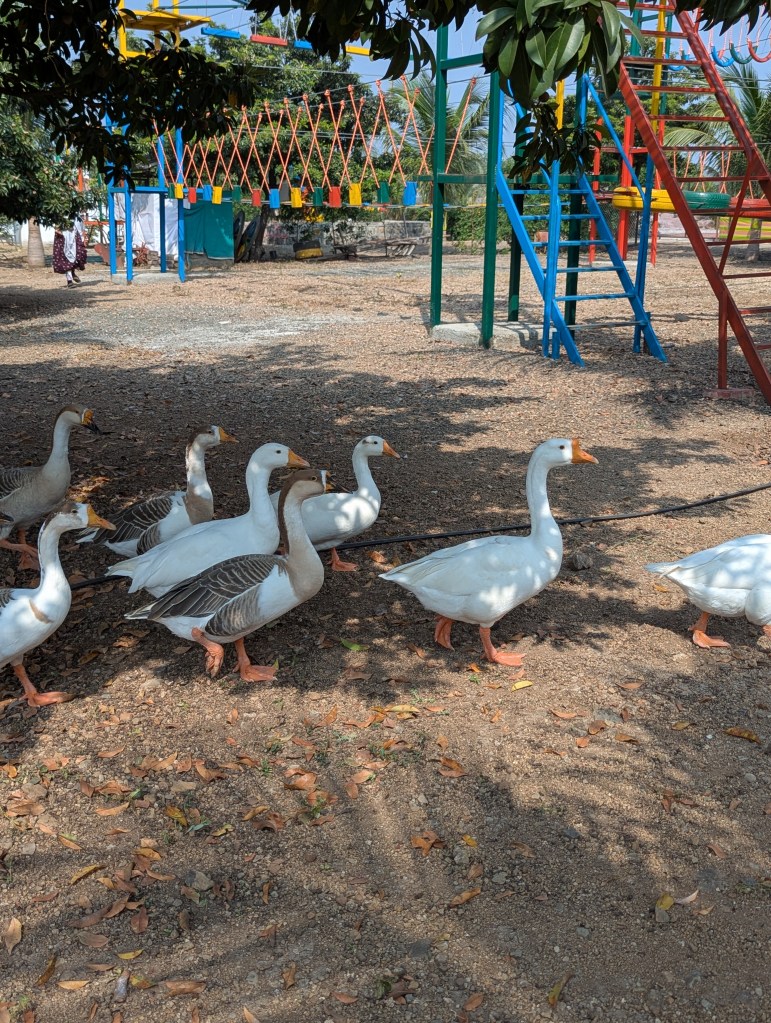
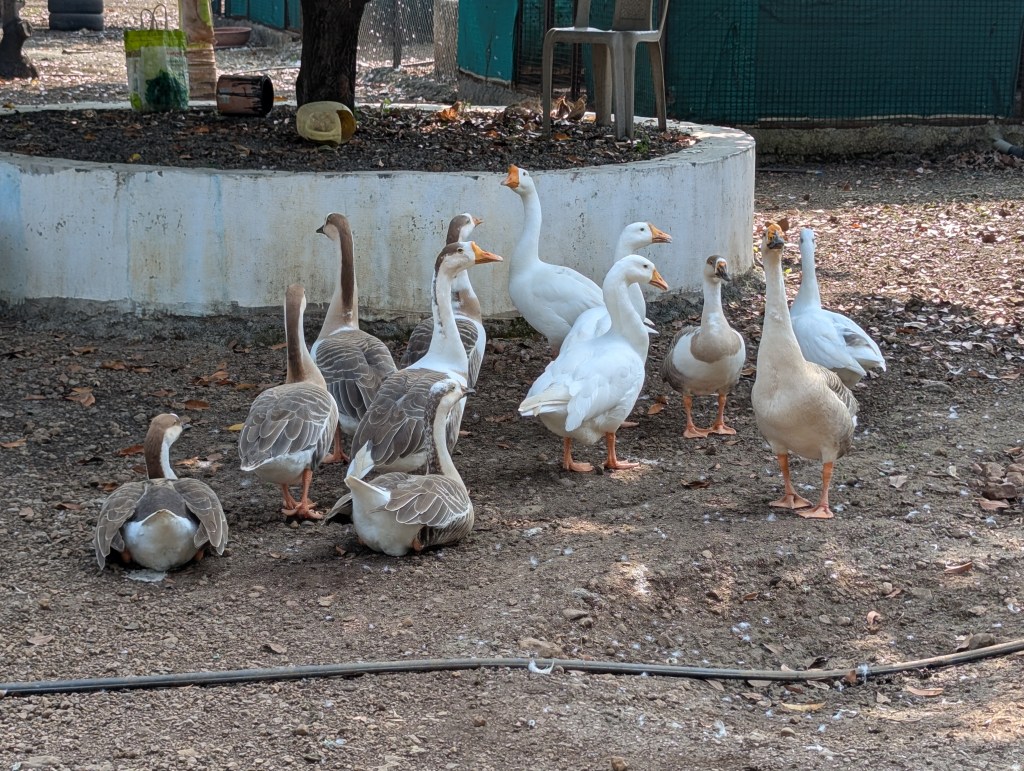
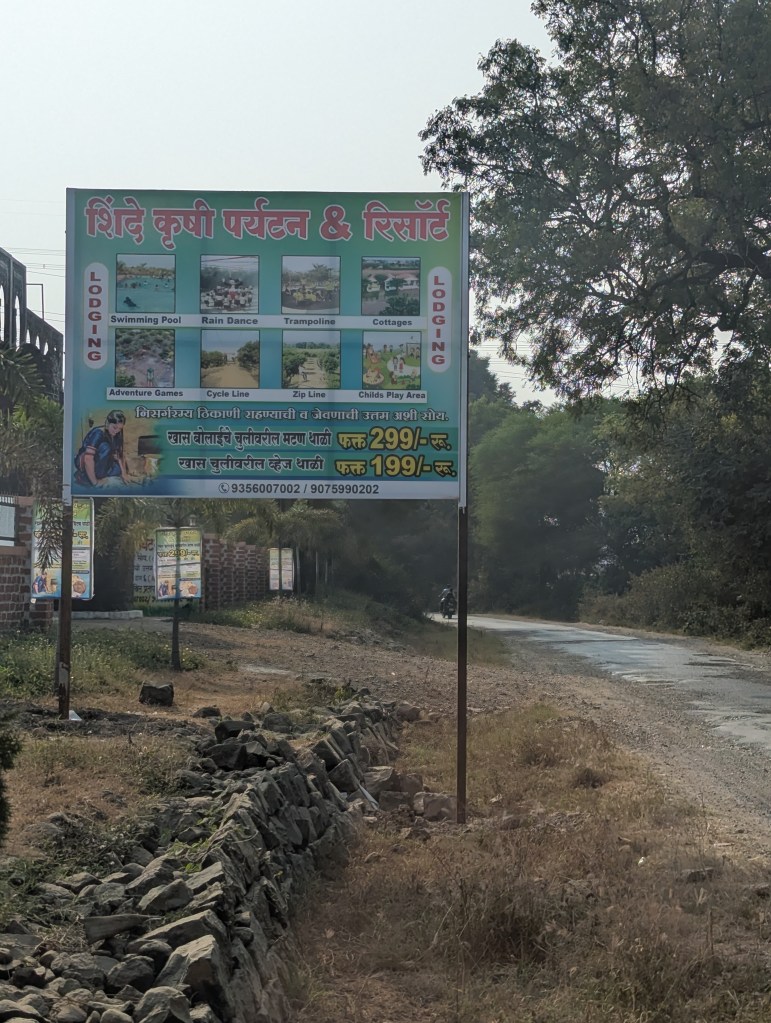
Not aware or made aware what it is, we all thought it’s some place where one would get to see many peacocks. This was the final leg on our trip. So we head off. It was way past our lunch time and we were also looking for a place to eat. When reached in the village after asking few villagers we came to an understanding that there is no such one place to see peacocks. Whereas, Chincholi Morachi is a village near Pune-Ahmednagar Highway about 55 km from Pune. It is known for its peafowl. They seem to be in abundance all around and can be seen early in the daytime or later in the evenings. And we were bang in the between, afternoon 2pm or so, so didn’t see any. As we were so deep in the village there was nothing around as an option to eat. However there are few farmsteads who serve lunches when preordered which we only came to know about. We searched around, asked few places, some said it will take an hour to prepare, some couldn’t take our order as about to being closed. Fortunately, we hit a place (Shinde Krushi Paryatan and Resort – image below) where the owner was happy to take us in with a wait of 30mins which was certainly acceptable and appreciable to us.
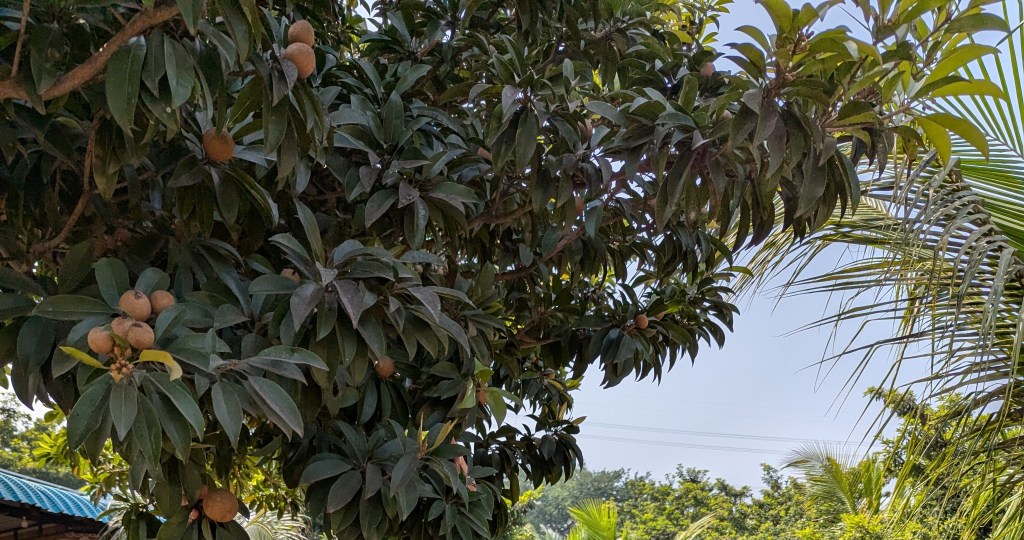
It was a huge farm, mostly with trees bearing chikoos (Sapodilla or Sapota). There were few hammocks tied to the trees. Ducks, handsome ones, were roaming around. There were see-saws, slides, a closed pool, and a short high rope course too. So, all of us (6 of us including our driver) did something to spend our time until being called for lunch. And after a heavy and delicious village style lunch, we gave up (not literally as it was our last stop and it was almost 4pm) and headed back home…!
Chincholi morachi have many waterparks, private farms, where you can spend a whole day, a day outing, with your family. The booking has to be done prior to arrival to avoid rejection. The park booking also includes a lunch. Inside such parks you may get to see peacocks. Famous for its wild peacocks and agri-tourism hospitality, this village is an ideal weekend escape for families, students, and nature lovers.
All the pictures that you see in this blog have been taken by me (this time by the Google Pixel 10 Pro phone, as I couldn’t take my DSLR on the trip this time). If anyone need to use these images, please feel free to use them with proper credit.


 Pancakes – from scratch – in the making. There was an area with a shelter provided with a portable gas and a grill. Any bacterias that would be lurking in this facility would have been dead already due to the heat :-). We lived with this assumption for the entire 5-day trip..survival of the fittest?